Phase I /1902 C&S Coals
12345678
... 10


12345678
... 10
Re: Phase "Zero" / St Charles Coal Cars
|
Ahhh . . . Derwent Watercolor Pencils! I use those, too, though it never occurred to me to use them freehand to create "ghost lettering". That's a neat technique, Keith.
As to number 73 and train, I think this may be the one you're referring to:  Kindig, et al, The Pictorial supplement . . . This is another Denver Water Board Special photo, identified as at Case Spur, at the western foot of Kenosha. The photo credit says it's in the DPL collection, though I've never found this particular photo online. An enlargement shows the second boxcar with faded block lettering: 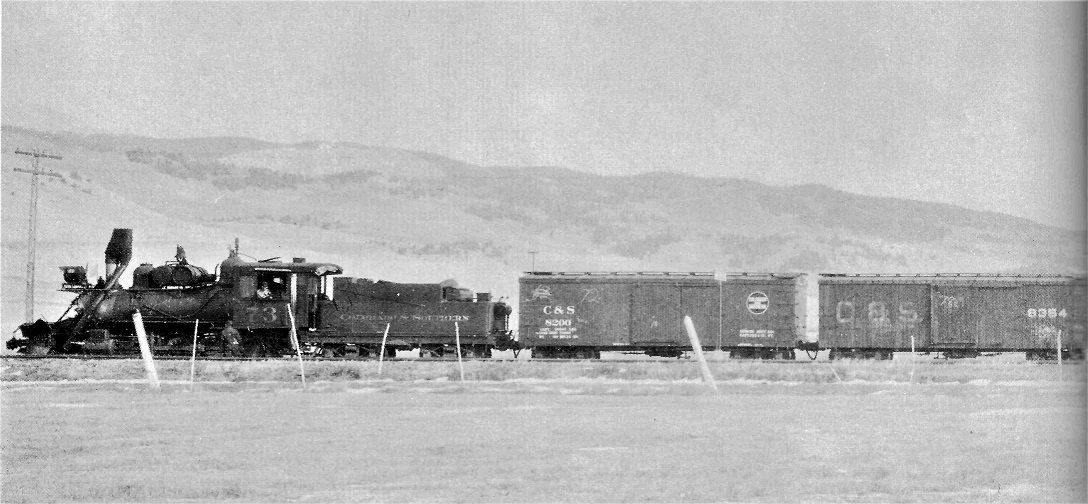 Lots of chalk markings in evidence on both boxcars. I believe number 73 is "doubling the hill", about to take a second cut of eastbound cars up to Kenosha. A longer train, with 73 on the point, is shown following the DWB Special down the hill from Kenosha on the same day, at both Webster and at Grant.
Jim Courtney
Poulsbo, WA |
Re: Phase "Zero" / St Charles Coal Cars
|
Yes, that is the image, Jim. I think you are correct--this is east (north) of Jefferson at the foot of the Kenosha grade. I believe the book caption labeled it Michigan.
Graffiti and chalk marks are on my to-do list. The strokes are too fine to duplicate with pencil. I think the best option would be to create a bunch full size and shrink them down for decal film. Studying many of the photos posted on this website, the C&S crews made liberal use of chalk to indicate the consignment of cars: the bar codes of the era! One nice thing about the Derwent pencils is that if you overdo, or don't like the result, with a little water you can wash it away and start fresh. On one of the eclipse heralds, I added a couple lines of white where 'Colorado' and 'Southern' would have been and streaked the pigment down for a nice washed effect. The pencils and Pan Pastels are nice additions to our weathering kits!
Keith Hayes
Leadville in Sn3 |
Re: Phase "Zero" / St Charles Coal Cars
|
Happy coincidence: I too have some Derwent watercolour and graphitint pencils. I use them to sketch solar prominences and sunspots through a solar telescope.
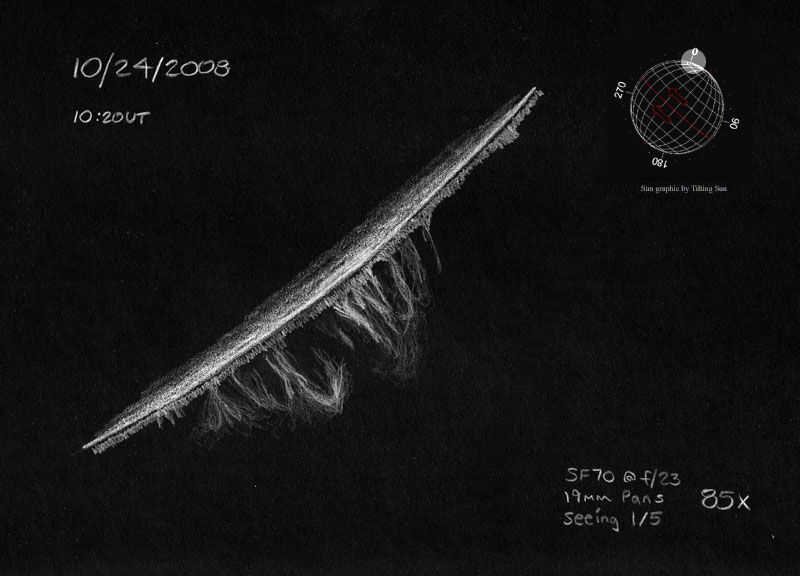 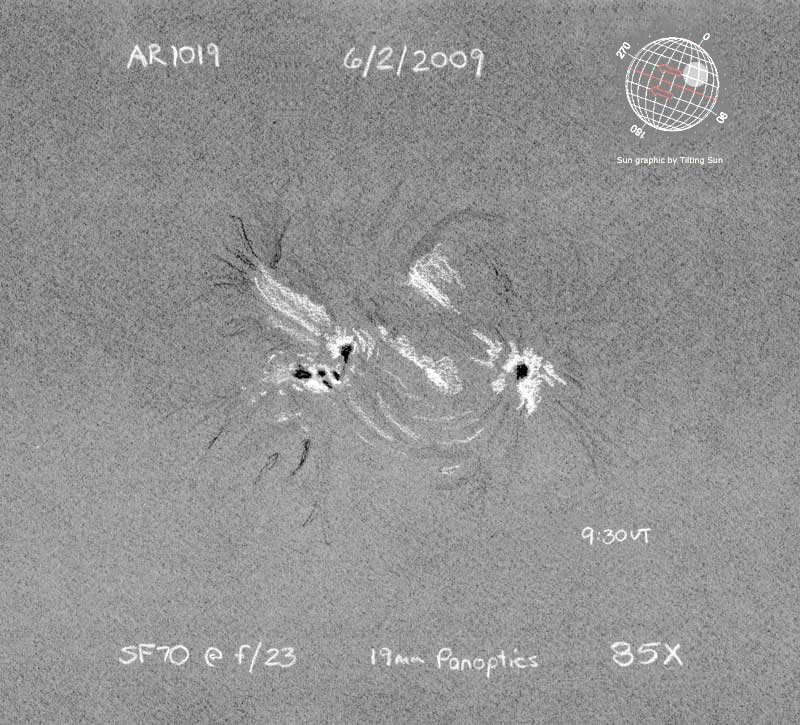 Cheers, Jeff. |
Re: Phase "Zero" / St Charles Coal Cars
|
That photo is one of the sexiest ever of a C&S locomotive !!!!

"Duty above all else except Honor"
|
Re: Phase "Zero" / St Charles Coal Cars
|
In reply to this post by Keith Hayes
I'm about ready to put grabirons on my coal car, and I'm trying to decide what to do on the inside of the car- do I drill right through the side boards and mount the grabs so that the ends stick through to the inside, or try to hide the ends in the board, or what? And, likewise, how about the nbw's? I'm working in HO scale, the boards are not very thick and it would be tricky to drill only partway through. What do you guys do?
thanks for any advice, John John Greenly Lansing, NY
John Greenly
Lansing, NY |
Re: Phase "Zero" / St Charles Coal Cars
|
This post was updated on .
For what it's worth:
I drill grab holes completely through styene or wood side boards for the grabs, secure the grab with a tiny amount of ACC. I then clip the end of the wire grabs off so they just barely protrude on the inside, so they kinda represent the bolt head of the NBW. After the interior is finished, I highlight these "bolt heads" with some rust paint on a flat tooth pick with most of the paint removed with a paper towel (a "dry-toothpick", as opposed to a "dry-brush", application if you will). For Grandt NBWs, I cut them flush from the sprue behind the washer, position them just above the grab iron (or below on a few grab irons) with tweezers. Then I use a tiny amount of MEK on a 5-0 brush to weld them to the styrene side boards. For wood, I do the same thing, but flood the wood around the NBW with MEK; this causes the plastic NBW to melt into the wood grain, and they seldom fall off. With this method, expect every 4th or 5th NBW to fly off into space and be lost forever. 
Jim Courtney
Poulsbo, WA |
Re: Phase "Zero" / St Charles Coal Cars
I found one later (once). Cheers, Jeff. |
Re: Phase "Zero" / St Charles Coal Cars
|
In reply to this post by Jim Courtney
Ahh, modelling content I can respond to.
 When I build my ½"n3 Ph1 car I had the luxury of thick boards to secure the grabirons to, so it was only a little extra effort to clip the bolt shank protrusion from the n-b-w, cut off short for insertion into the hole on the inside or the car and clip the grab iron leg to match. Filing the clipped ends of both items flat and square allowed for better securement inside the planks. Yes, I even did such underside of the end-cap boards as well.
UpSideDownC
in New Zealand |
Re: Phase "Zero" / St Charles Coal Cars
|
In reply to this post by Jim Courtney
Jim, thanks! I was thinking pretty much along those lines.
Jeff, I too have actually found an escaped nbw or two in the past, but probably they weren't the actual ones I had just lost, rather were previous inhabitants of the ever-growing reservoir of lost bits that develops on the floor over time.... Chris, that coal car of yours is really wonderful. It makes me wish I were building in some more sensible scale. John John Greenly Lansing, NY
John Greenly
Lansing, NY |
|
In reply to this post by John Greenly
Jim suggested I could put up pictures of the 1902 coal car (HOn3) I'm working on, so here they are. It's not complete. I'm totally undisciplined in doing things methodically. This car is already painted, at least a first approximation, and I haven't put in any of the nbw's yet, and other details are missing too. There is some slight method to this madness, though. I painted this with a 40 year old bottle of Floquil boxcar red with a little tuscan mixed in. I like to put it on with a brush, and then for a weathered car I brush a lot of it off again, using rather a lot of solvent. (I do this outdoors!!!). It's a sort of subtractive rather than additive weathering, re-exposing the wood to some extent. If I put nbw's or other small details on first, the paint tends to pool around them and doesn't get removed so it leaves darker spots around the details (also plastic ones can get eroded by the solvent). I don't know what I'll do when I run out of this bottle of paint, I'll have to quit- though there should be more than enough for what I'm likely to build. The color is not really right in the photos. It's too pink here.
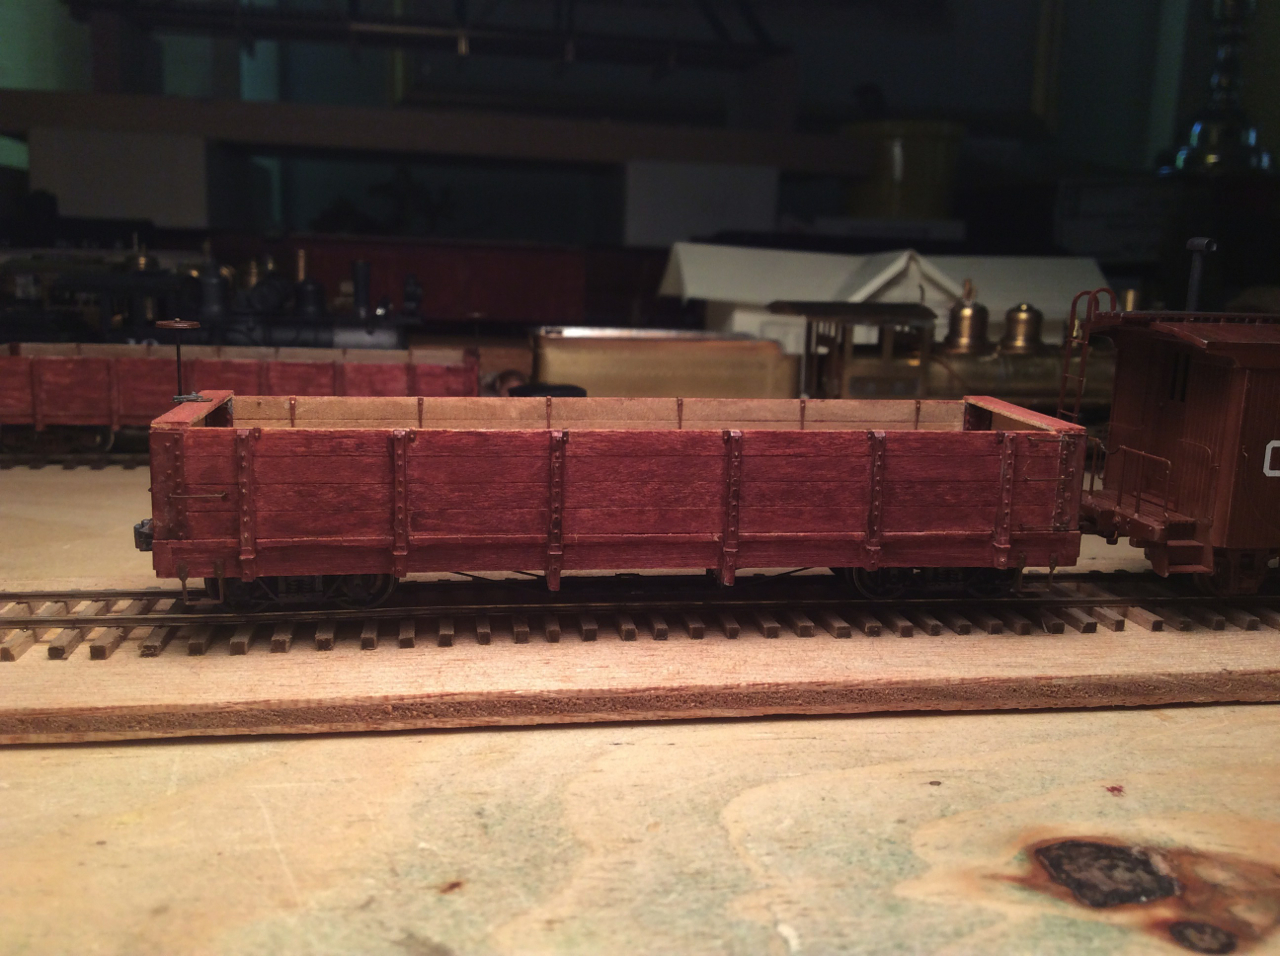 This is the car that I started off to make using an old Tomalco D&RG 1903 gon kit, as discussed elsewhere on this thread. I found that none of the wood parts were correct dimensions except the side boards, so what I used of that kit were just those and the Grandt corner irons and stakes. I tapered the stakes as I described before; just a couple of swipes on a mill file to taper their backs above the floor level, and then I bent them inward slightly at that point to make the back straight and the front tapered, and conform properly to the side sill. Very quick to do. 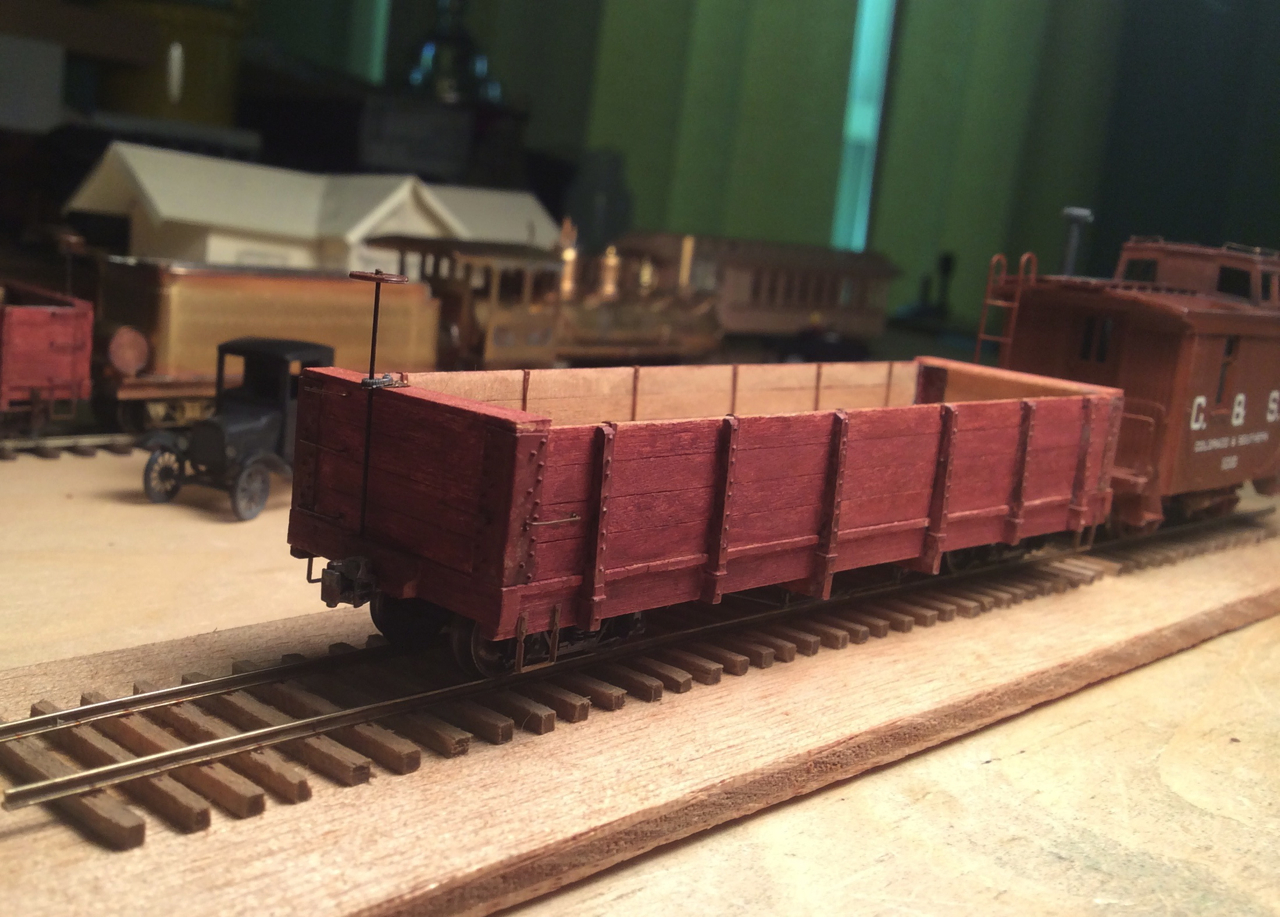 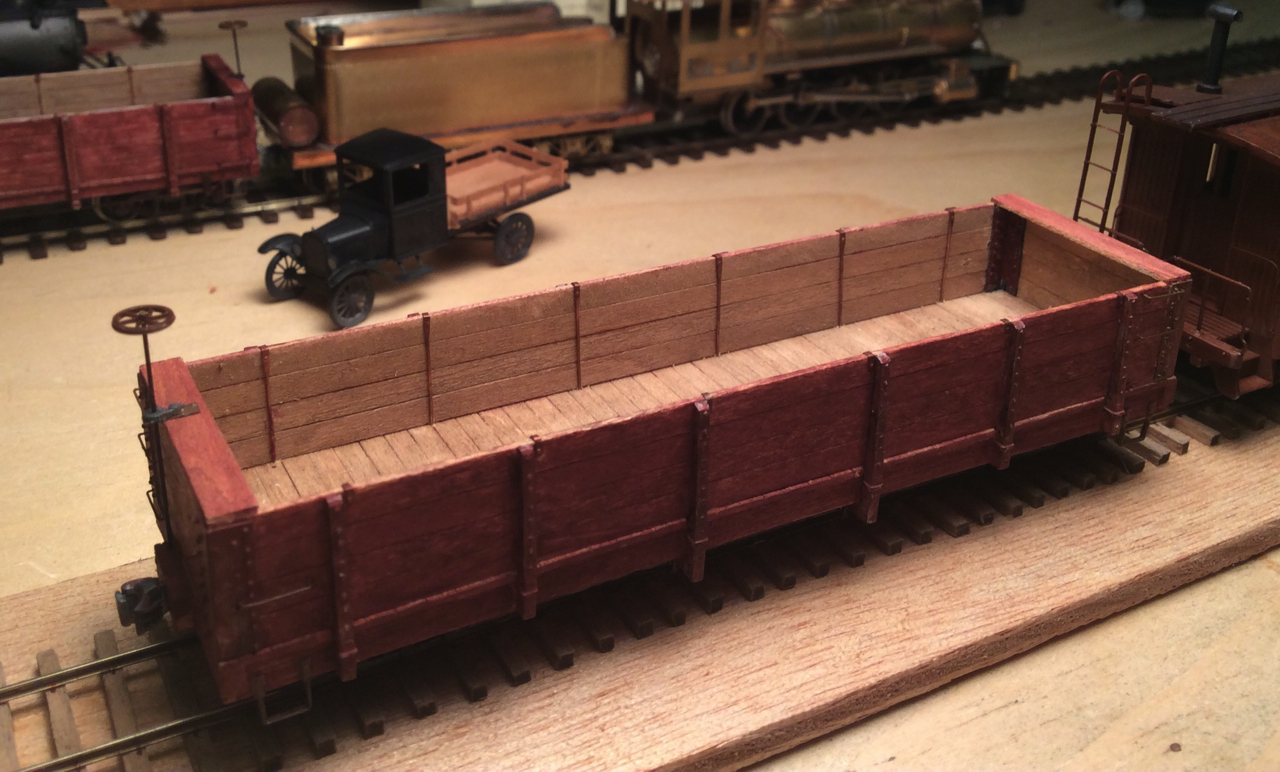 One of the details I like best about the C&S cars is the inside tiedown bars on the car sides. I made these with a little HO scale blacksmithing. Started with .012" bronze wire, annealed it dead soft by passing it for about 1 second through the flame of a butane micro-torch, then flattened the end with a hammer on an anvil, embossed two rivet heads with my rivet machine, and then bent it over to fit over the top board. The bronze turned reddish from the annealing, so I didn't paint it much. 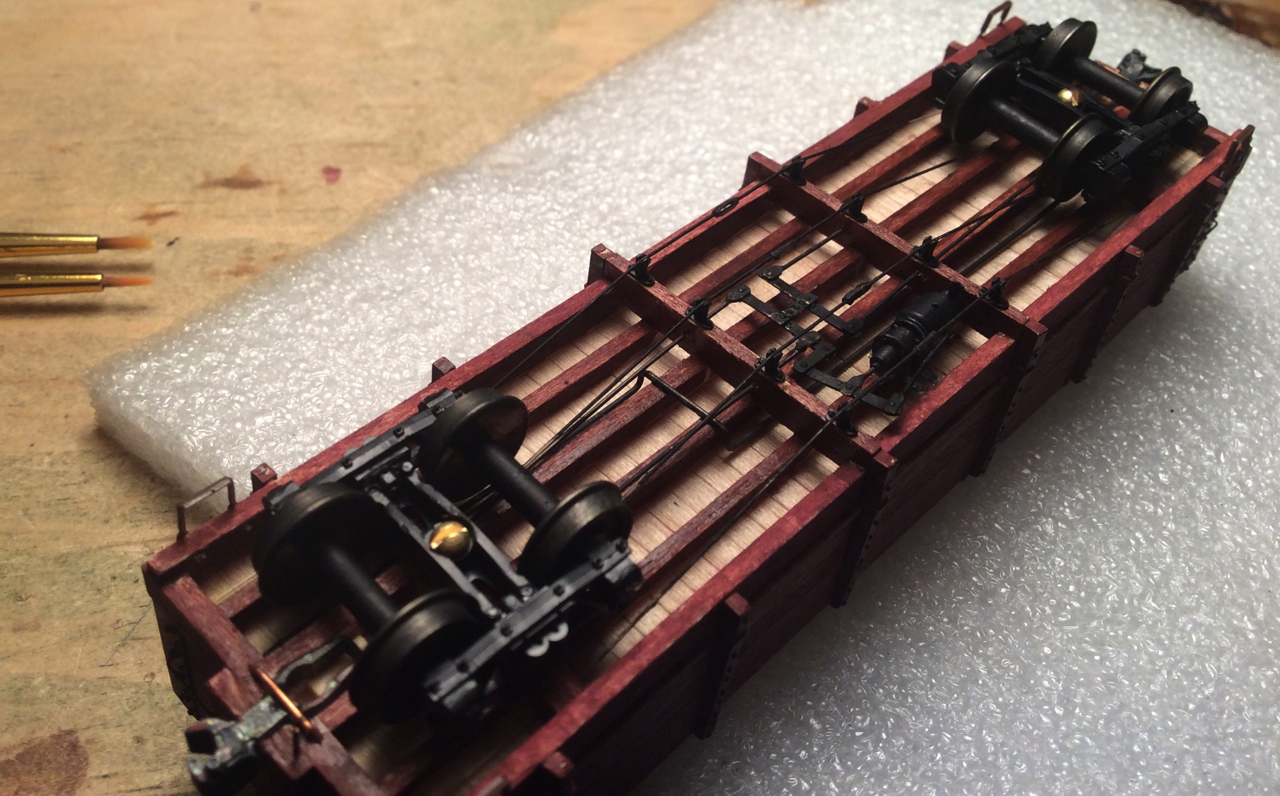 I made the brake rigging out of brass bits, and that was before the discussion, on some other thread, of how the center connector strap is hung from the car body. At some point I'll remake that, incorporating my improved understanding. These are not correct trucks, I'll get some of the Rio Grande models ones sometime soon. After I put on the nbw's, I need lettering. I will get the HO C&S freight car set from the Leadville shops, looks like it has what I need? thanks to Keith and Jim and Jeff for the inspiration of your super work shown on this thread! John John Greenly Lansing, NY
John Greenly
Lansing, NY |
|
Great work! Sent from my iPhone
|
|
In reply to this post by John Greenly
John,
Very impressive work and even more so since it's in HOn3. Can you tell us if the brake rigging is scratch or from the kit? If scratch maybe a few words on how you did it. Thanks and again impressive work. Lee Gustafson |
|
In reply to this post by Robert Stears
thank you Bob Stears,
you set an unapproachable-by me anyway- standard with your superb work, so kind words are a great encouragement! Can you tell me, does the C&S HO freight car set from TLS have the right things for the block lettering scheme for this car? elsewhere in this thread you talked about making up a set for the earlier lettering schemes in HO scale- is the one listed on the TLS site that set? very many thanks, John
John Greenly
Lansing, NY |
|
In reply to this post by Lee Gustafson
Hi Lee,
For the brakes on this car I used the 8x8 brake cylinder from a Grandt C&S set. There is no rigging in that set though, so I made it out of .008" brass sheet and bronze wire. I cut strips off the sheet, embossed them with rivet heads at suitable places, and soldered them together. The rod ends are not real clevises, but are only the half that you see. The Grandt set includes a diagram of the rigging that I followed, but I couldn't understand exactly what was going on with the center link strap, as I mentioned above. Now I know how to make the hanger for it I'll do that sometime. I did take a photo or two while making the rigging so I'd remember better how I did it for the next time. I'll see if I can find those and post them. thanks for your kind words, John
John Greenly
Lansing, NY |
Re: Phase "Zero" / St Charles Coal Cars
|
In reply to this post by Keith Hayes
One of the last details to address on these cars are rods on the car interior which are bolted through the floor and wrap the top board. One bar is adjacent to each stake, toward the centerline of the car from each stake.
My first effort resulted in wobbly rods. It occurred to me to use a square to draw a pencil line to use as a guide. I figured that the line will go away as a shadow. 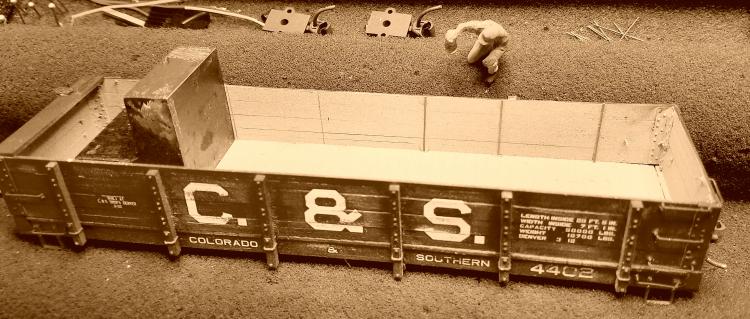 I used some brass included by PVC for grab irons, and colored it with a paint pen. Then I cut the wire to length. I placed a drop of CA on the floor and one on the top board and placed the wire. Next, I need to find some thin and narrow styrene, preparing this and wrap these over the top board at each location.
Keith Hayes
Leadville in Sn3 |
Re: Phase "Zero" / St Charles Coal Cars
|
Keith,
those hold down rods, I made mine, albeit in 1/2" scale, with larger diameter florist's wire, hammering down the ends blacksmith style. Since that blackened wire also came in a very light gauge, why not try that, it certainly is light enough, very malleable and easy to soften again using a torch, assuming you're allowed to use an open flame. 
UpSideDownC
in New Zealand |
Re: Phase "Zero" / St Charles Coal Cars
|
Yeah, I tried that Chris. I tried heating it too. The stuff is too small and too brittle. I was really excited to do this right. Now I improvise.
Keith Hayes
Leadville in Sn3 |
Re: Phase "Zero" / St Charles Coal Cars
|
In reply to this post by Keith Hayes
Keith,
I've tried using 0.005" styrene strips for the top, flat part of the tie-down rods, but they always broke or melted from the MEK, as I tried to make the two 90 degree bends. I've been considering cutting strips of heavy foil, from the top of wine bottles, to form this part, using ACC to secure the 0.012" wire to the floor and the foil strap. I even remembered to drill holes for the tie-downs in the floor, before adding the sides -- a very atypical forethought for me. 
Jim Courtney
Poulsbo, WA |
Re: Phase "Zero" / St Charles Coal Cars
|
Hi Jim, and Keith,
As I mentioned in my post above in this thread about my HO phase 1 coal car, I made tiedown rods out of .0125" phosphor bronze wire (from Tichy). If you pass that through the flame of any small torch for about 1 second, it will heat to a dull red and cool instantaneously, which is what you want to anneal copper alloys dead soft and very easy to work. Like Chris, I then did some blacksmithing, hammered the end of the wire flat, widening it out to about .025-.030", and then embossed rivet heads at two suitable spots (I forgot to write down the dimensions of course, so will have to figure it out again the next time….) so that when bent over the two heads are opposite each other. Here are a couple of closeups. You can see how they look on the whole car in my post above. 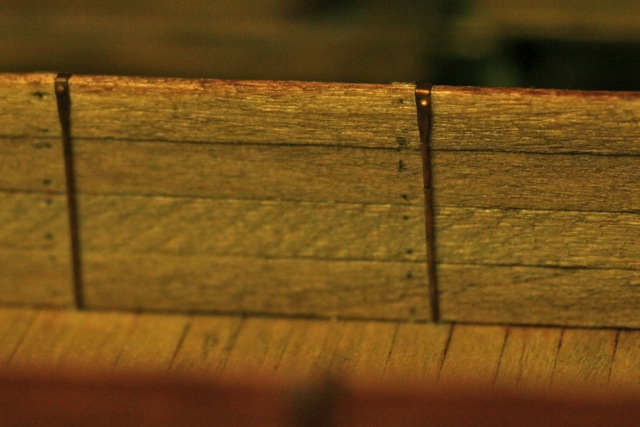 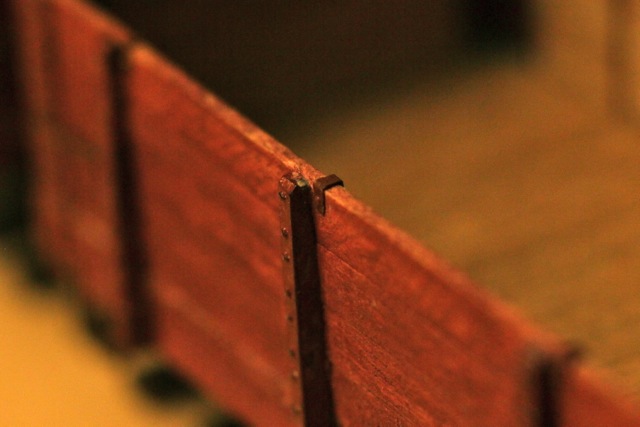 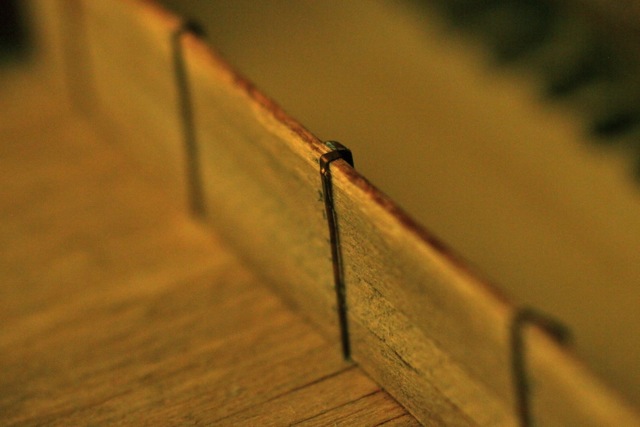 I didn't think to take pictures while I was making them, but I pulled one out of the car just now (they're just set in holes through the floor and side sill like the real thing) and took a couple of (not very good) pictures: 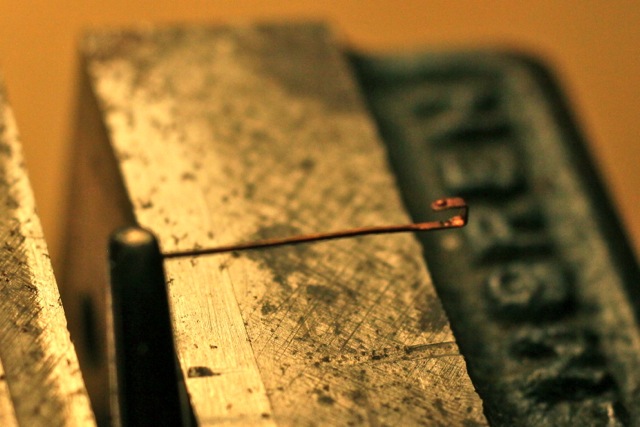 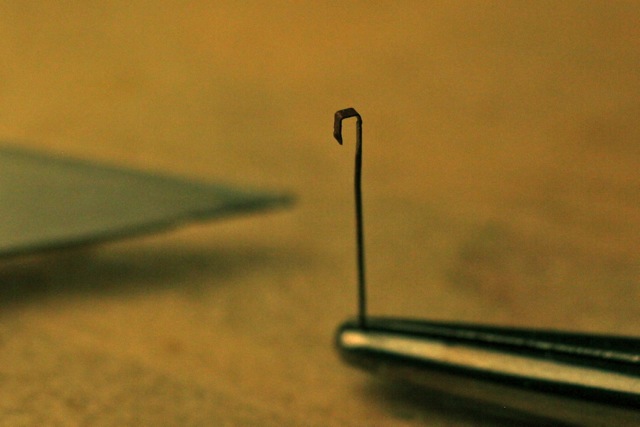 The Xacto blade is there for scale. As I mentioned above, they turn quite red from the annealing, and look pretty good without painting. I did hit a few shiny spots with paint before installing them. The bent-over flattened end fits fairly snugly over the top of the side boards, .032" thick on my HO car. I don't know the actual rod diameter. There's a nice photo looking down into some coal cars with men working in them, on p. 67 of NG Pictorial VIII, and I'm guessing from that that they might be around 3/4 inch diameter. In that case, the .0125" wire is somewhat too big for my HO car, a little over 1 inch. But I didn't have a die handy to make rivets small enough to fit on a narrower piece than this wire hammered out to .030" wide, and even this size is not so easy to get the rivets centered on the strip. For S scale this size would be really nice I think, or you could go up to .015" wire, which is quite a bit easier to work with (I tried that first but decided it was too big for HO). The key is annealing the wire. I tried it without that first and it work-hardens hopelessly when hammered and can't be bent without breaking. Even after the annealing it does work-harden some from hammering, and you get one try at bending it afterward, any more will start to crack it. I didn't try too hard to get them absolutely straight, that same photo convinced me that in use they got bent up quite a bit, not surprising I guess. After a couple of false starts and experimental versions I think I spent about half an hour on each of two evenings to make a dozen for my car. hope this is of some use, Cheers, John
John Greenly
Lansing, NY |
Re: Phase "Zero" / St Charles Coal Cars
|
In reply to this post by Jim Courtney
Another possible option is to use one of the Archer decal products. They make all sorts of cool stuff besides the rivets that I have found very useful. I don't know the product number, but they offer "resin decal" raised lines in various thicknesses that are very useful for simulating these pesky interior coal car support rods. Plus, they can be colored rust with a Sharpie pen or even painted prior to installation and applied after the coal car interior has been painted and weathered. The clamps that go over the top of the side boards can be simulated with thin styrene stock. Bob Sent from my iPhone
|
«
Return to C&Sng Discussion Forum
|
1 view|%1 views
| Free forum by Nabble | Edit this page |


