The Central City 1899 Brick Depot in C&Sn3. A Bucket List Project.
1234


1234
Re: Central City 1899 Brick Depot Details.
|
This post was updated on .
See the Chris Walker calendar post on the previous page.
Thanks so much, Chris! I will try to reduce the calendar to 1:64 scale and hang it in the office of the C&Sn3 brick depot . . .  I tried cleaning up a couple of photos from the calendar and found a couple of interesting things: 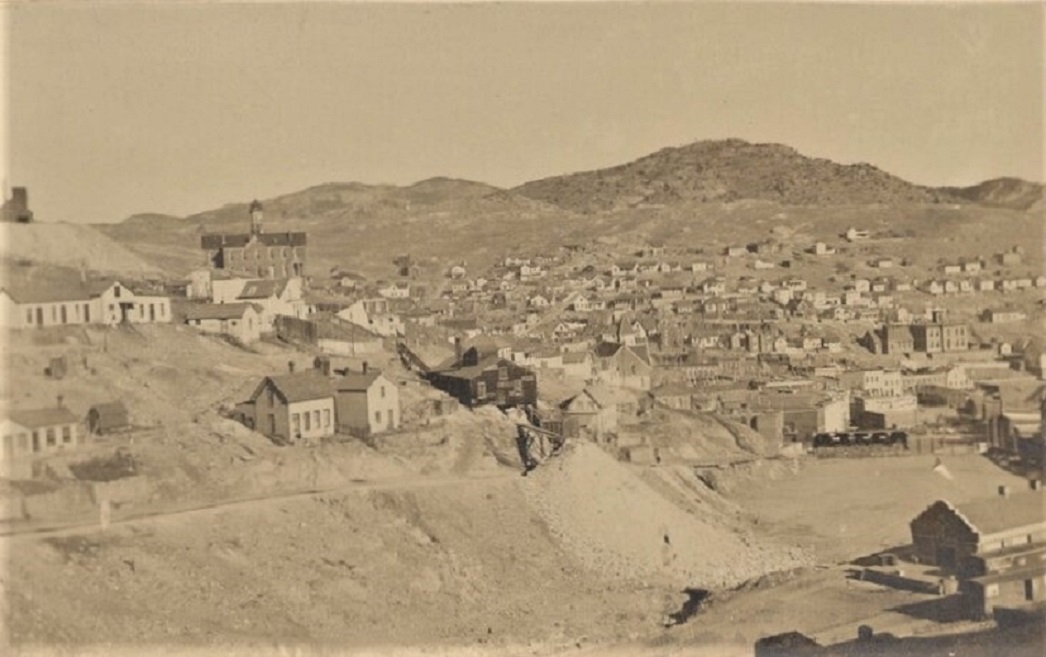 Does the dome of the storage tank (right lower corner) look off-center?? And is that a wood coal bin opposite the near boxcar on the team track spur? And the mine, with its tailings dump over and below Nevada Street is really cool--the tailings are damming up the gulch, protecting the ball field from water run-off. One of the clippings that Chris posted above suggested that the storage tank was for gasoline to power the local mines' machinery, beginning about 1900. The gasoline must have been delivered in tank cars, but the earliest narrow gauge tank car that I've seen is from about 1912, in Telluride -- COLX number 7. Rick, is there any mention of this in Hol Wagner's manuscript? And the locomotive on the Mountain City trestle looks to be C&S number 5: 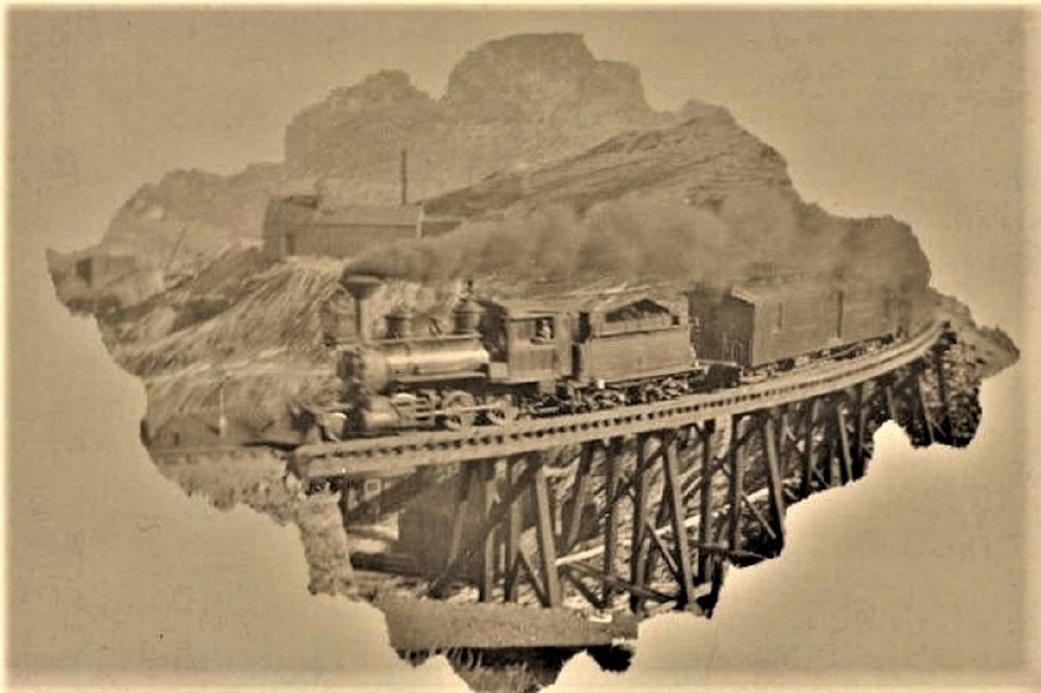 The photo must date to prior to the August 1902 rebuilding of number 5. The long baggage car will later be renumbered as C&S 4, with both the odd sized side windows removed, as well as the platforms. Here is how C&S 5 looked in Denver about 1901, about to depart for Silver Plume: 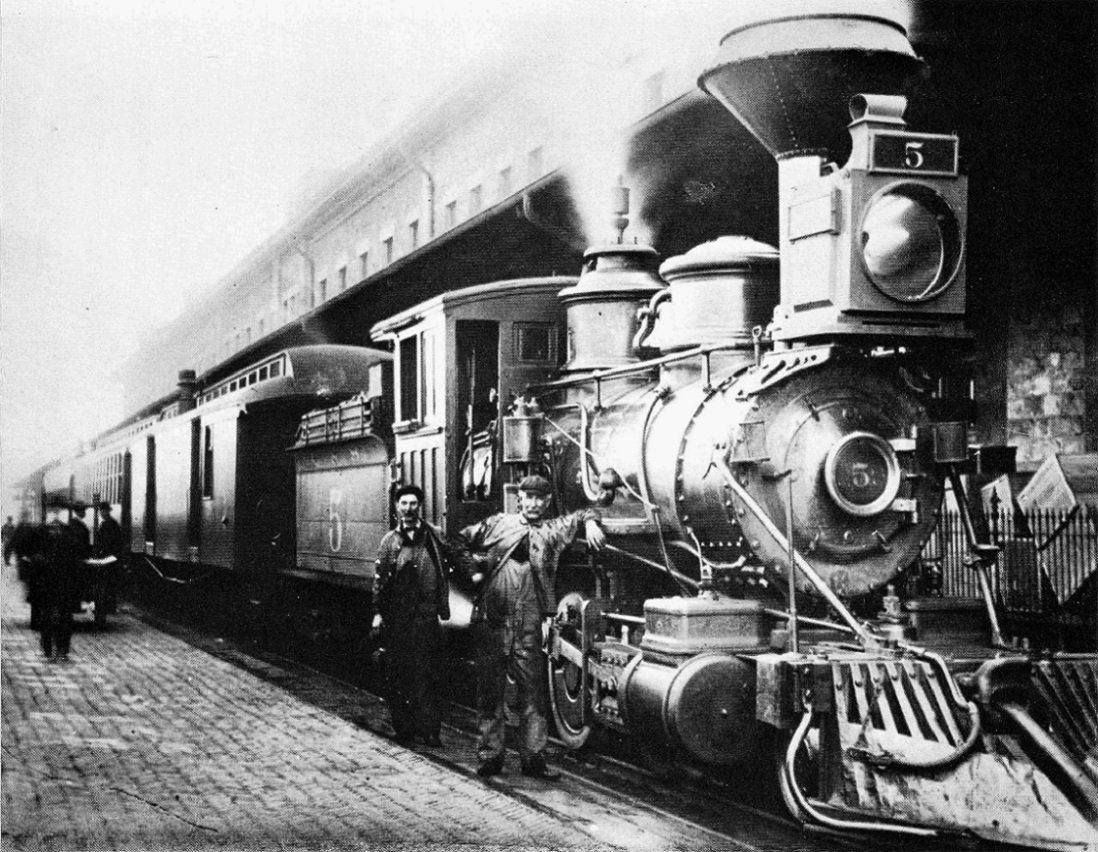 Has anyone seen the photo of C&S 5 on the trestle on DPL?? Is it a Harry Lake photo? I'd love to see the whole photograph. ________________________ C&Sn3 Brick Depot update: The gentleman who has agreed to do the printing of the depot parts for me, suffered acute peritonitis overseas, while working his day job in IT. He was able to finally get me a price estimate for printing all 60 some-odd depot parts--->Less than the cost of a brass passenger car! Unfortunately, looks like the earliest I can expect the depot parts is May, assuming he fully recovers. 
Jim Courtney
Poulsbo, WA |
Re: Central City 1899 Brick Depot Details.
|
And just like Paul Harvey ........
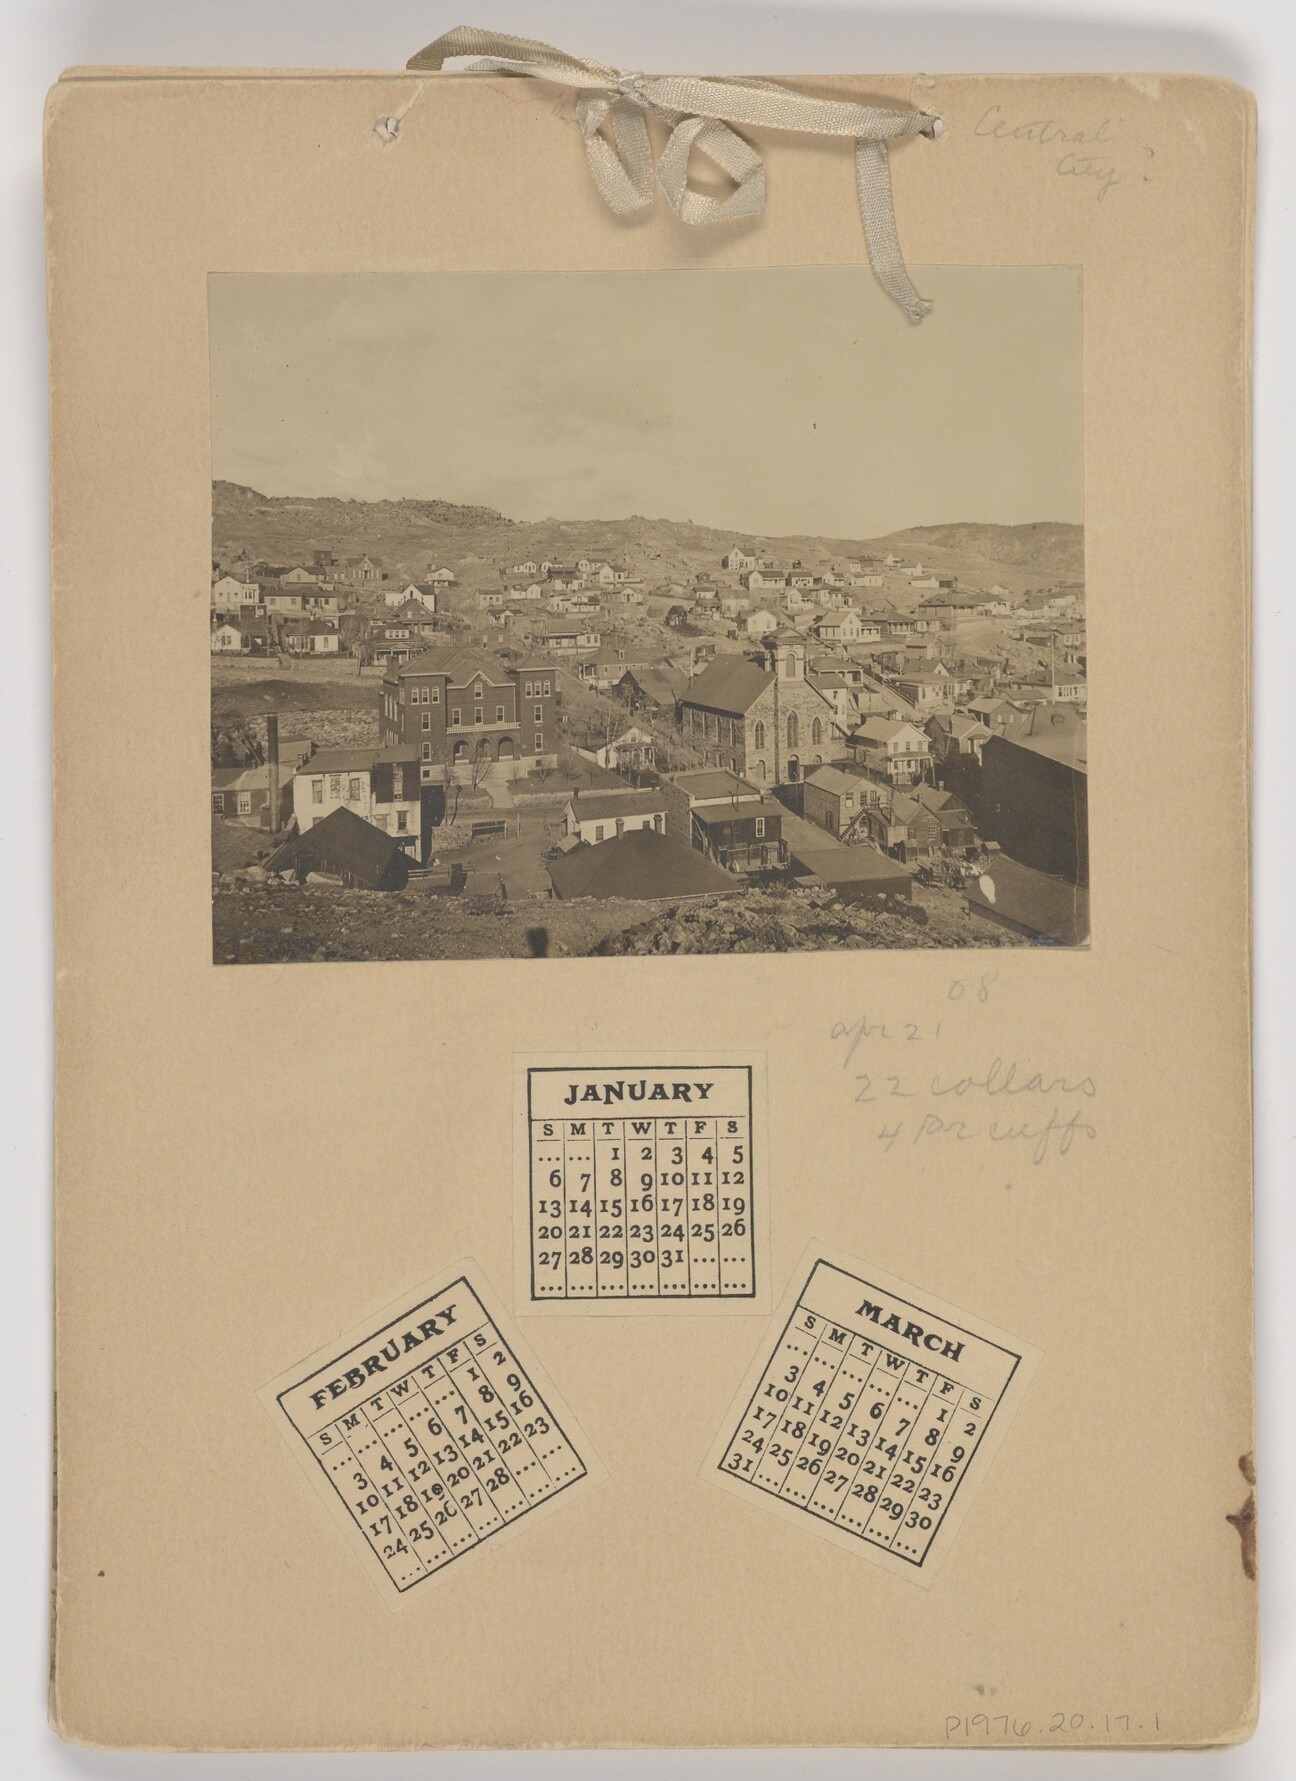 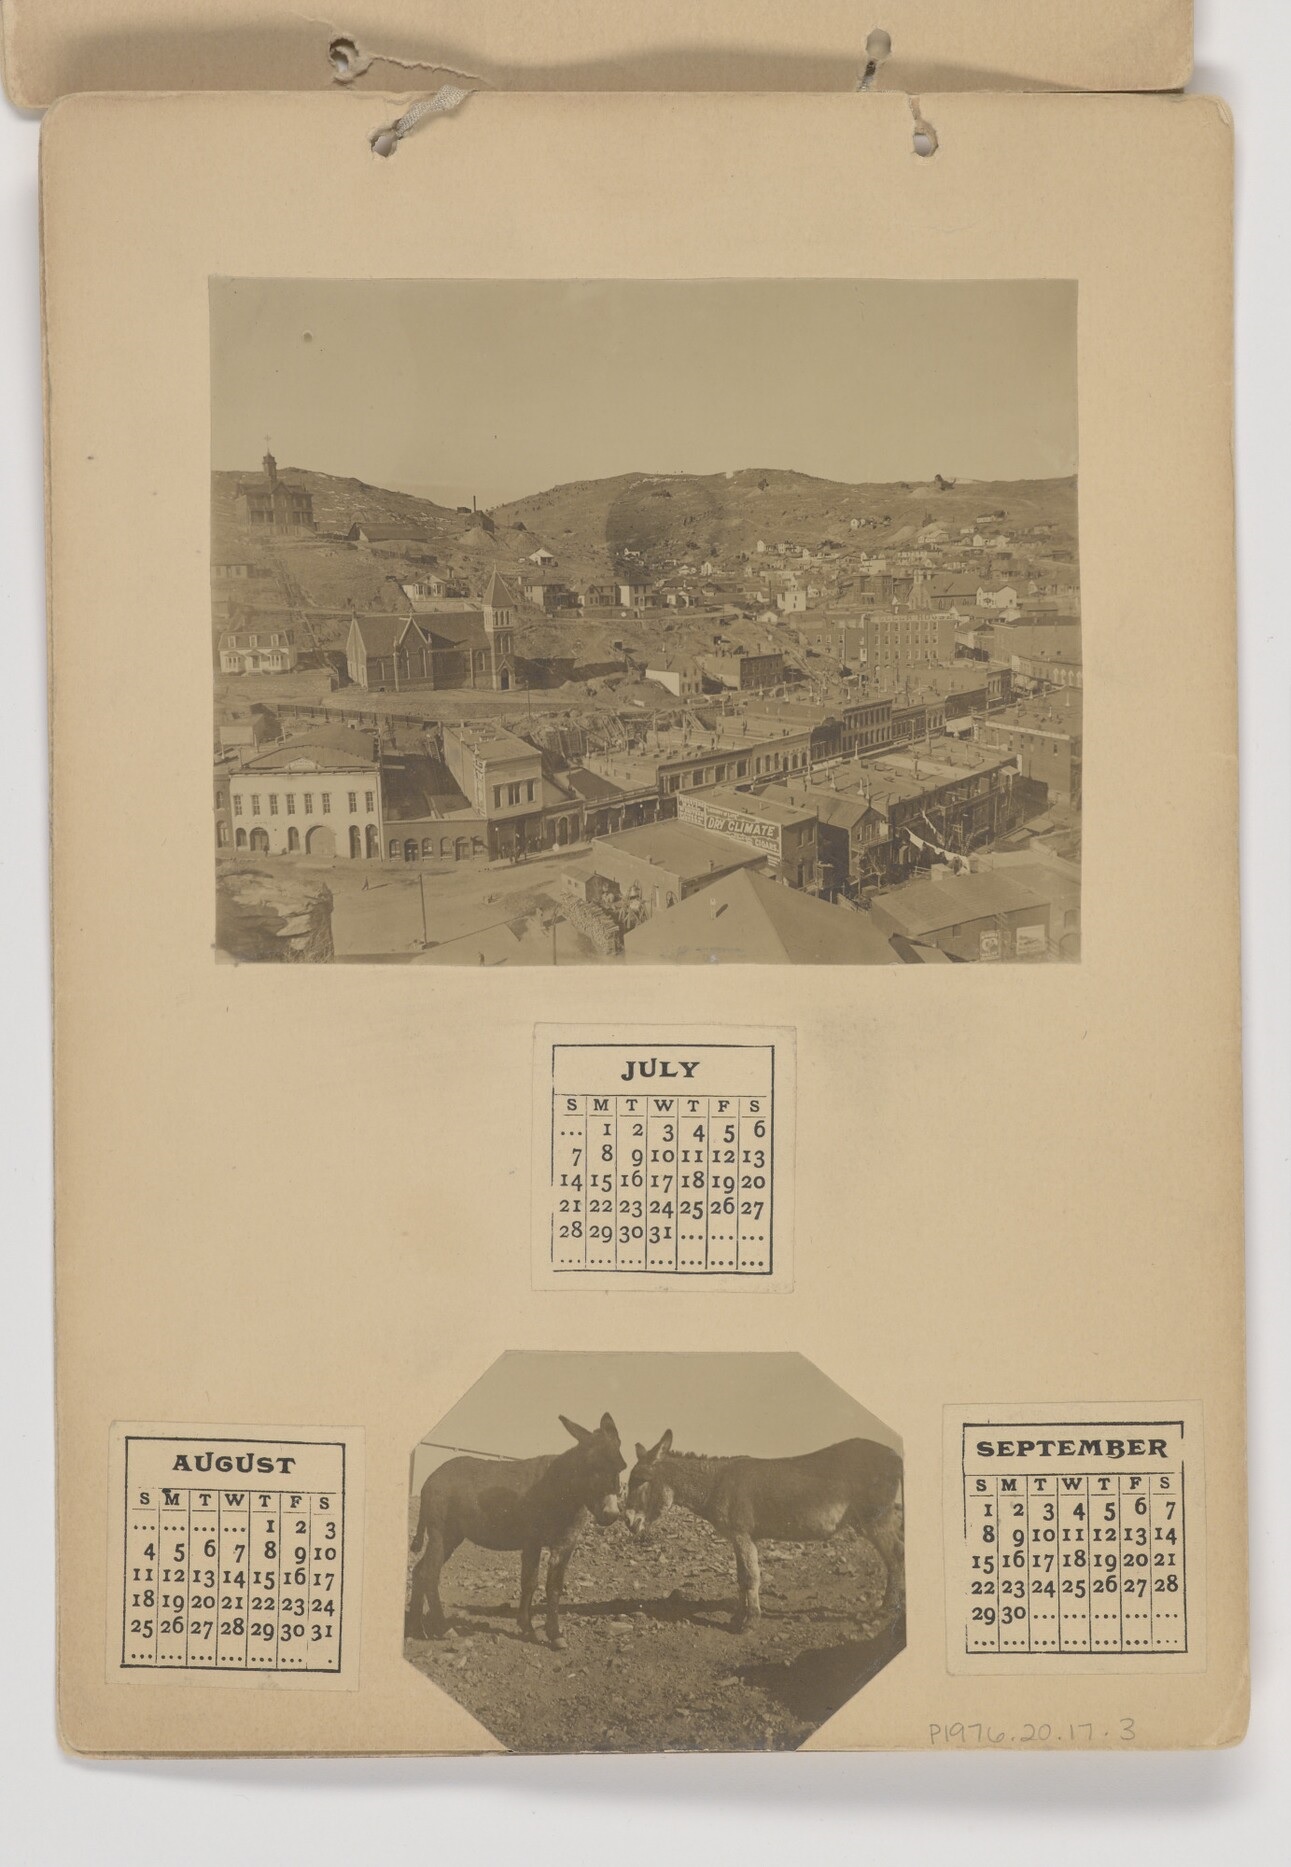 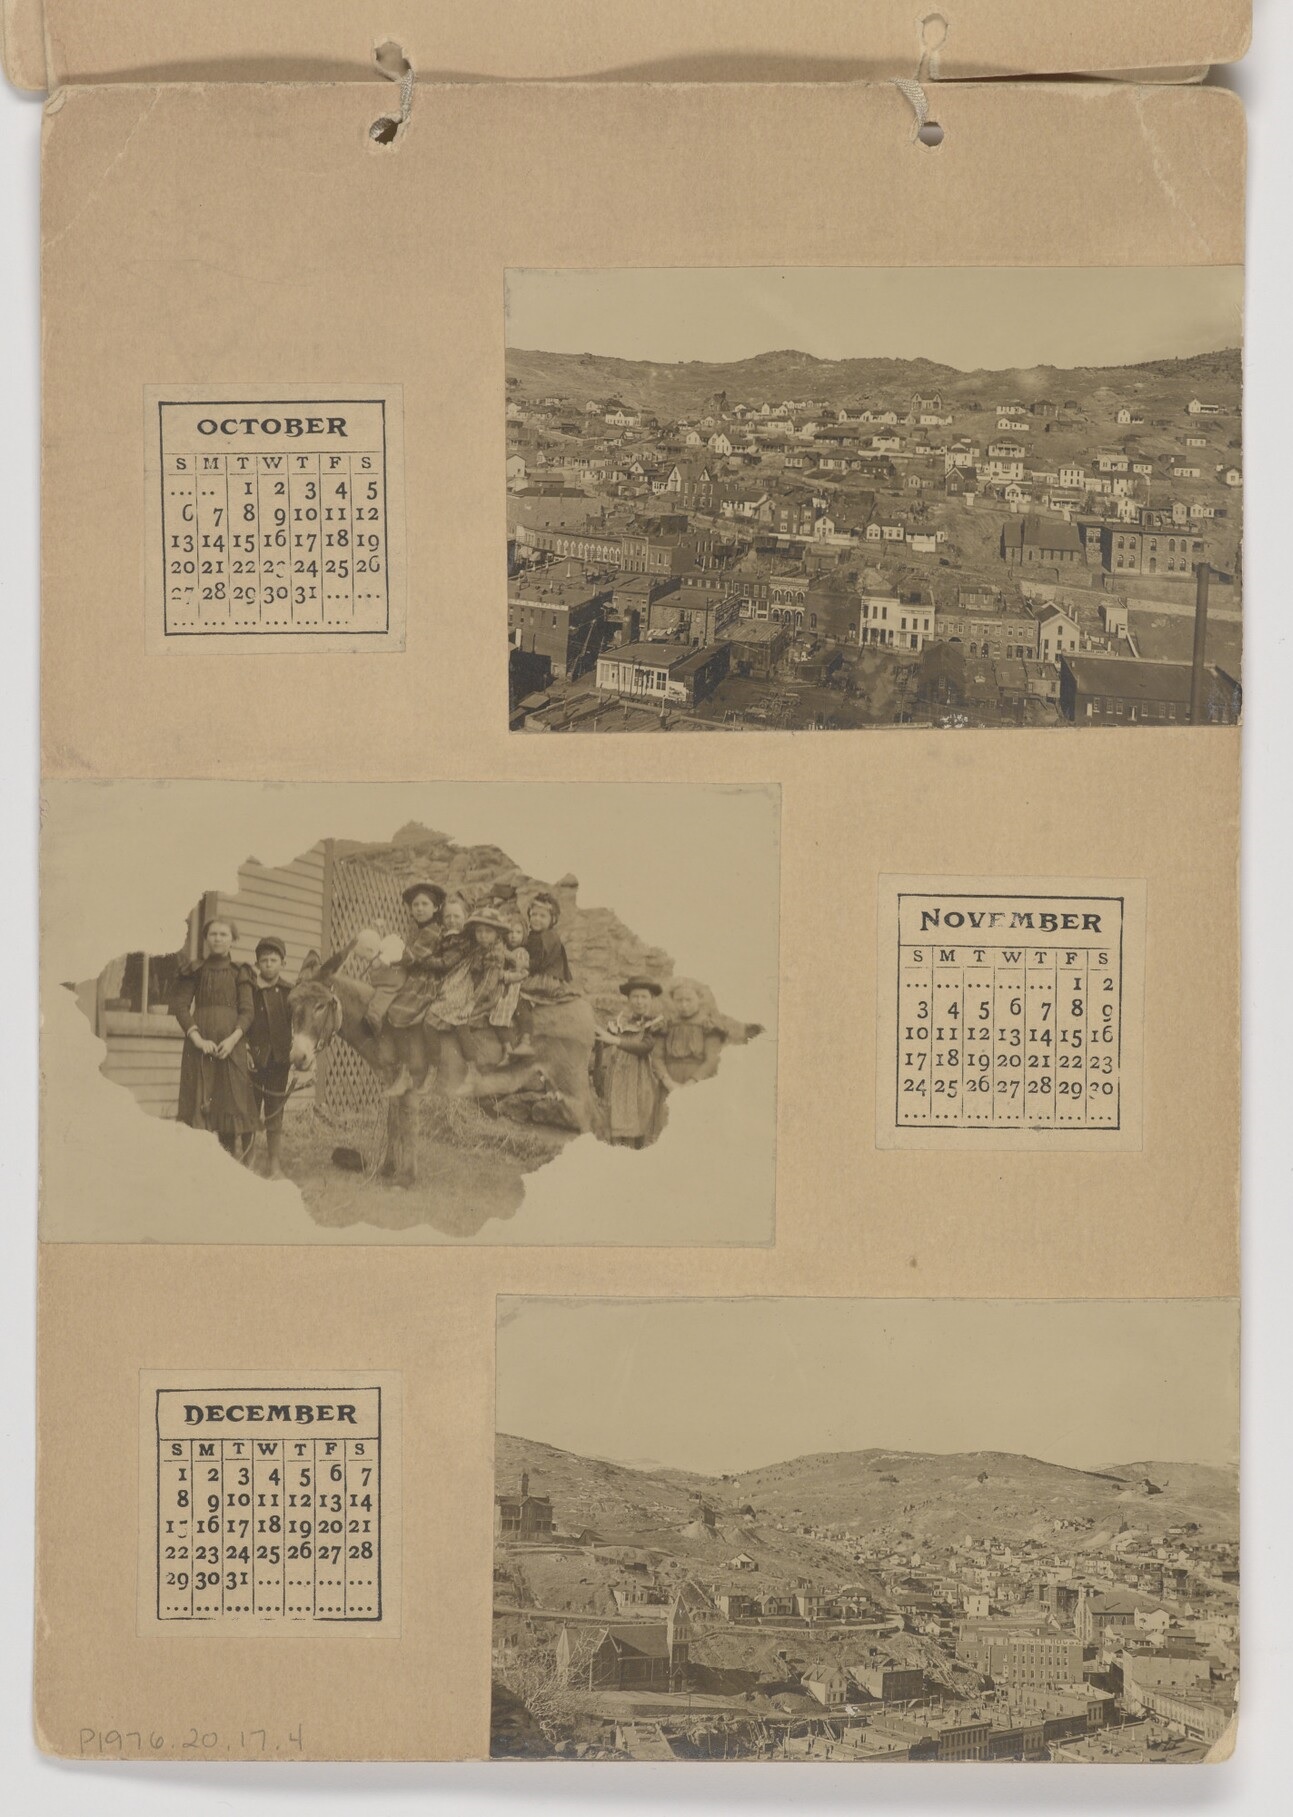   Dave, what year(s) did you think the DRY CLIMATE billboard sign was applied for? Jim, the Harry Lake photo you're thinking of was the C&S#49 and was in the CRRA #10. p.s. Waste rock(or low-grade ore)dumps at Mines, Tailings come from Mills and Dredges.
UpSideDownC
in New Zealand |
Re: Central City 1899 Brick Depot Details.
|
This post was updated on .
Chris,
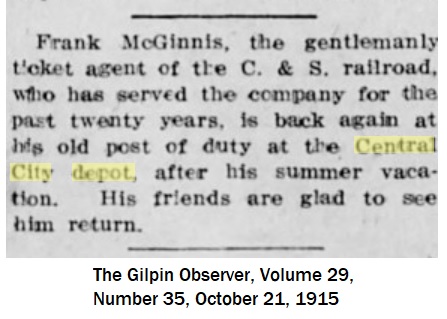
I go away for a week and come back to some great images! To the best of my knowledge, Dry Climate dates from c1905 to c1910. The photo looking across the oil depot toward town shows the original baseball grandstand prior to the expansion in June 1907, which makes sense. In that photo I believe that we're seeing the first horizontal tank placed in the yard (more on why below) and I don't know that it is for gasoline. It well could be. But could it be kerosene or lubricating oil? I'll toss out another thought on Jim's question about the offset dome: I think the shadow cast by the tank is making it appear as if the dome is offset but when I take a hard look, the tank appears to be closer against the hillside in front of the shadow and once seen like that the dome becomes centered. [Addition] Jim asks about a wood platform in front of the boxcar. I think it's a coal car on the team track and perspective is playing it's tricks. Wood unloading tended to be at the other end of the yard where a flat open space at Spring Gulch allowed stacking with little obstruction to the tracks. Just my .02 on this. Here's what I know about the evolution of the oil depot at Central: Per the Gilpin Observer, the first was reported built Sept 7, 1899, just west of the new depot. Prior to this I believe that only products in barrels or other non-bulk manner arrived in Central City, from ca1895 to 1899. Continental Oil business was increasing by March 3, 1901, as the Observer now reports a second tank has been put on the streets, by which I believe they are talking about a delivery vehicle, to handle the demand. On Feb 16, 1905, the Observer reports on Continental Oil asking the City Council to allow installation of a gasoline tank, next to the tank (single, not multiple) in use at the depot, but this request is rejected. A second tank must have been approved at some point after Feb 1905 (perhaps after 1907 as that calendar photo only appears to show one tank) because on June 21, 1917, Continental is reported in the Observer as making big improvements at the yard, including a new warehouse and three new tanks to replace those in use (this language implies multiple were in use by this date) plus also a gasoline tank. In some photos a squat vertical tank may be the gasoline tank. Rick had discovered the existence of three horizontal tanks when looking at the cradles left after abandonment--these cradles dated to 1917. Three tanks are also reported in a 1920 article and relative to one of the abandonment discussions of the Central City branch. I've been away and unable to dig through the few oil depot photos I have to substantiate any dating but the above details may help in this. And, Jim, depending on when you date your scene, this may help answer how many tanks you should add. As to the tank cars, I share the same question as already stated. Looking at the ORER and annual reports, there is no mention of tank cars, except water, in the early C&S years. Unless the oil tanks were Continental owned and not listed on rosters. I sure would like to understand what is going on here. My speculation had been that only barrels and other packaged products had been shipped in boxcars. But how the heck did they get the bulk stuff up there?
Dave Eggleston
Seattle, WA |
Re: Central City 1899 Brick Depot Details.
|
This post was updated on .
One wonders if there were assigned narrow gauge tank cars before the 19'teens.
Most of the smaller COLX tank cars show build dates of 1895-1900 for the tanks, as they were small standard gauge cars, later converted to narrow gauge use. Is is it possible that petroleum products (whether kerosene, lubrication oils or gasoline) were shipped from Texas, Pennsylvania or even the refinery at Florence, CO, in small standard gauge tank cars to Denver, where the trucks were changed out to 3' gauge for the trip up Clear Creek? Perhaps tank cars in use prior to 1913 weren't designated COLX cars, perhaps GATX?? I wonder if the FW&D had any small tank cars on their roster that could have been used. The Klingers' Clear Creek book states that the C&S shipped locomotive oil from Beaumont, TX, to Denver for the experiments with oil fuel for the rebuilt Cooke 2-6-0s in 1902-1903, for "smokeless" excursions up Clear Creek to the Loop and up Platte Canyon as far as Crystal Lake. I think this whole topic deserves a lot more discussion and searching--I'll start a new thread so this stuff doesn't get lost in the "Brick Depot" . . . 
Jim Courtney
Poulsbo, WA |
Re: Central City 1899 Brick Depot -- Update
|
Well it's been three months since I decided to start this project, with nothing to show yet.
The young man who agreed to print the STL files for the Central depot unfortunately had been ill for about 6 weeks back in April. Since he has a day job, he's had a lot of catching up to do. Rob emailed me today. He's finished re-scaling the parts files from HO scale to S scale. He included a photo of the first S scale test prints. 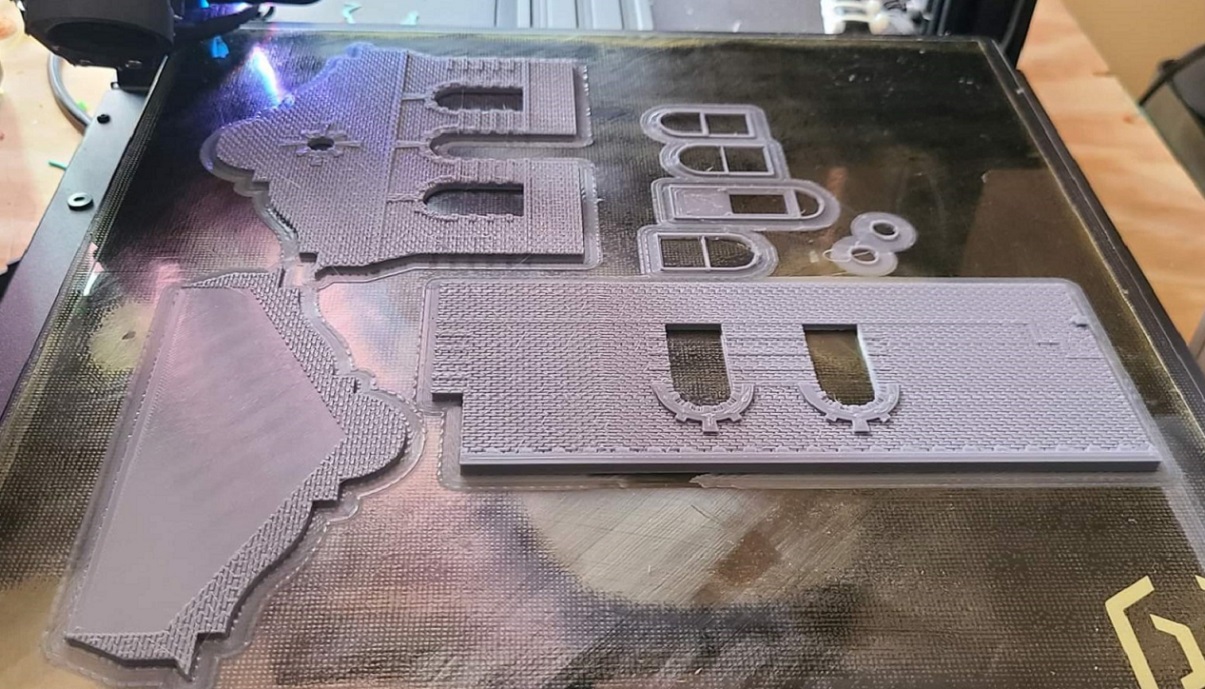 Rob noted: Note that the "halo" (we refer to it as a brim) is just to ensure that the parts stay where they belong during printing, and will not be part of the shipped product. So, it looks like there is some progress -- perhaps my spring project will be a summer project . . .
Jim Courtney
Poulsbo, WA |
|
That is going to look very nice- can't wait to see the finished project. I had mentioned Chuck Dolling's building files in my listing of resources in the Facebook C&S group (and at my clinic at the NNGC in Hickory.) Definitely nice work. Curious what your printing cost will wind up being? I have to admit when I started on Black Hawk to buy the files and have them printed was tempting. Wound up scratchbuilding the Colorado Shoe and the boarding house and kitbashing the grocery out of a Con Cor building that I found at a swap meet. (I'm in HOn3)
Jim
Jim Curran
|
Re: Central City 1899 Brick Depot -- Update
|
This has been an eventful week. On Wednesday I finally got my wife home from the hospital after her fall and pelvic fractures.
On Thursday afternoon a well travelled box appeared on my front porch. It seems that USPS misplaced the box of Central City depot prints for almost a month. Lord knows where the box has been. I unpacked the box yesterday. I'm quite pleased with the plastic printed pieces, with a few minor disappointments: 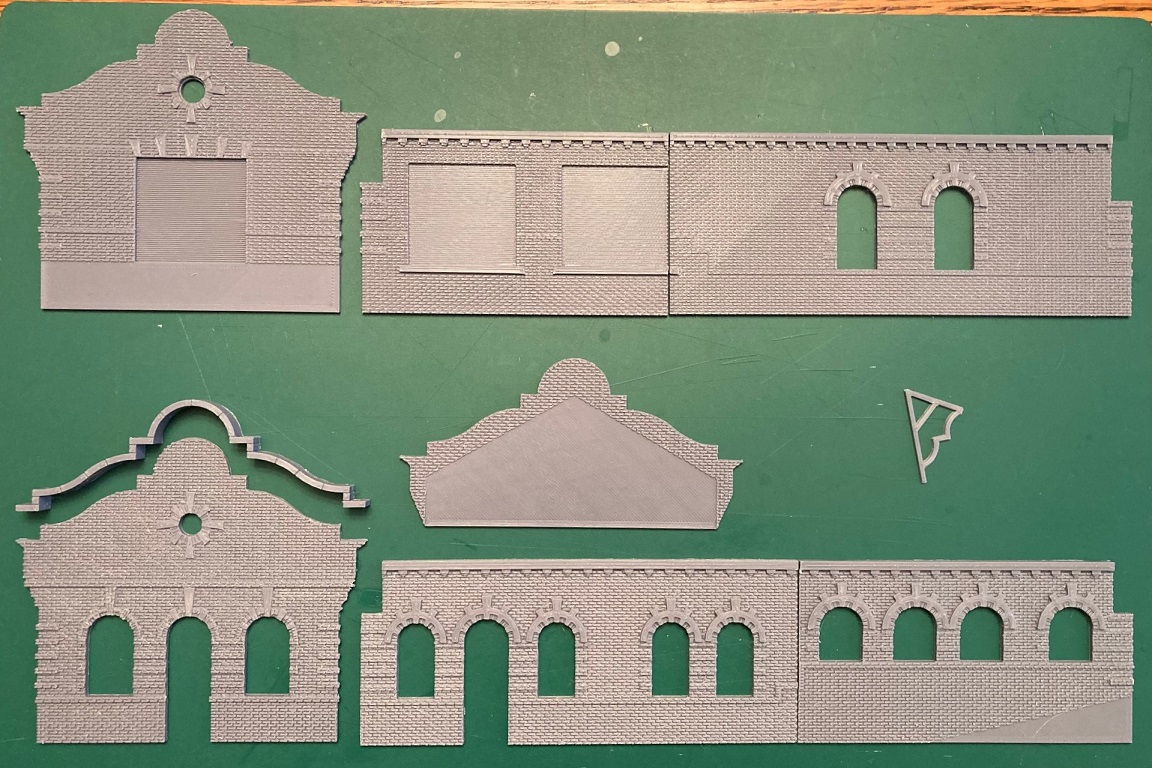 The prints have a very fine diagonal print artifact on the surface, not as coarse and "fuzzy" as some of my Shapeways prints. It seems easily removed with a fiberglass eraser. Most of the side and end wall dimensions seem right on. The gentleman who printed the parts first had to rescale the original HO scale .STL files to 1:64 scale. The bricks and white brick accent rows are nicely rendered. Unfortunately, the very top layer of printed brick--the white brick that formed the arched sunbursts over the arch-topped windows and doors didn't render or rendered incompletely: 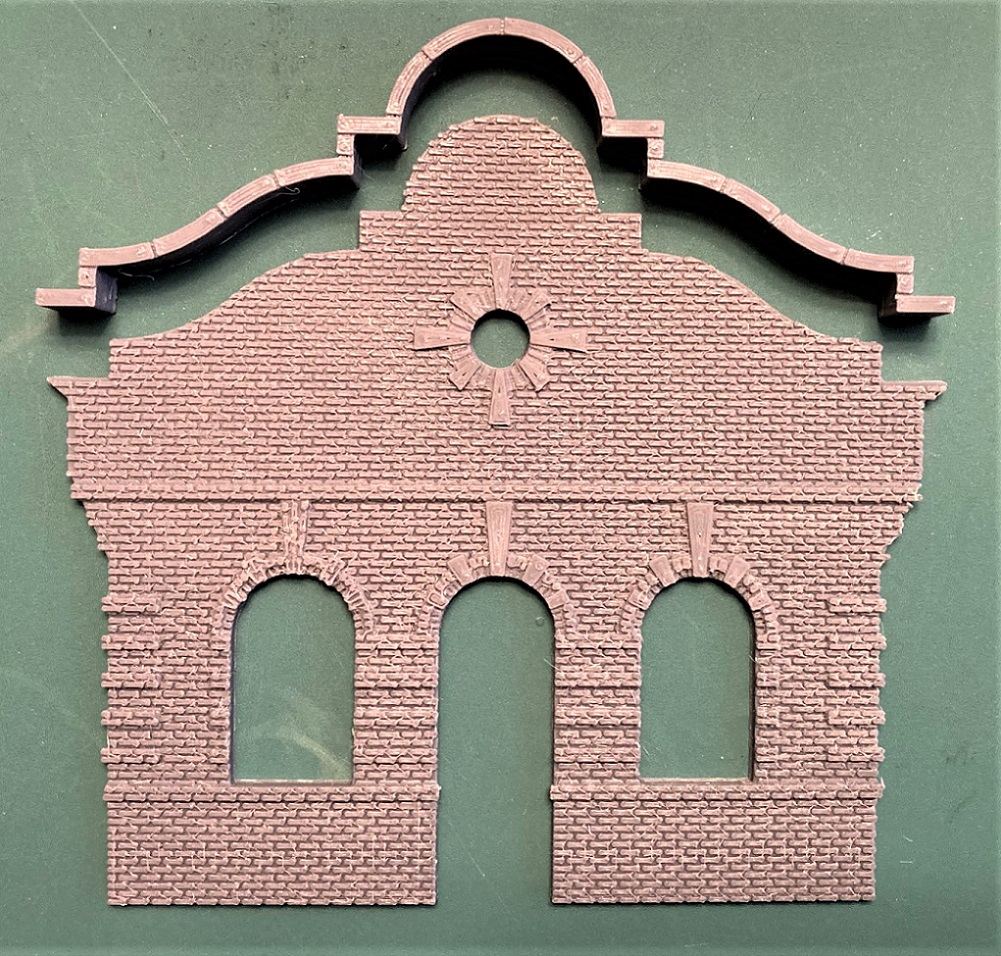 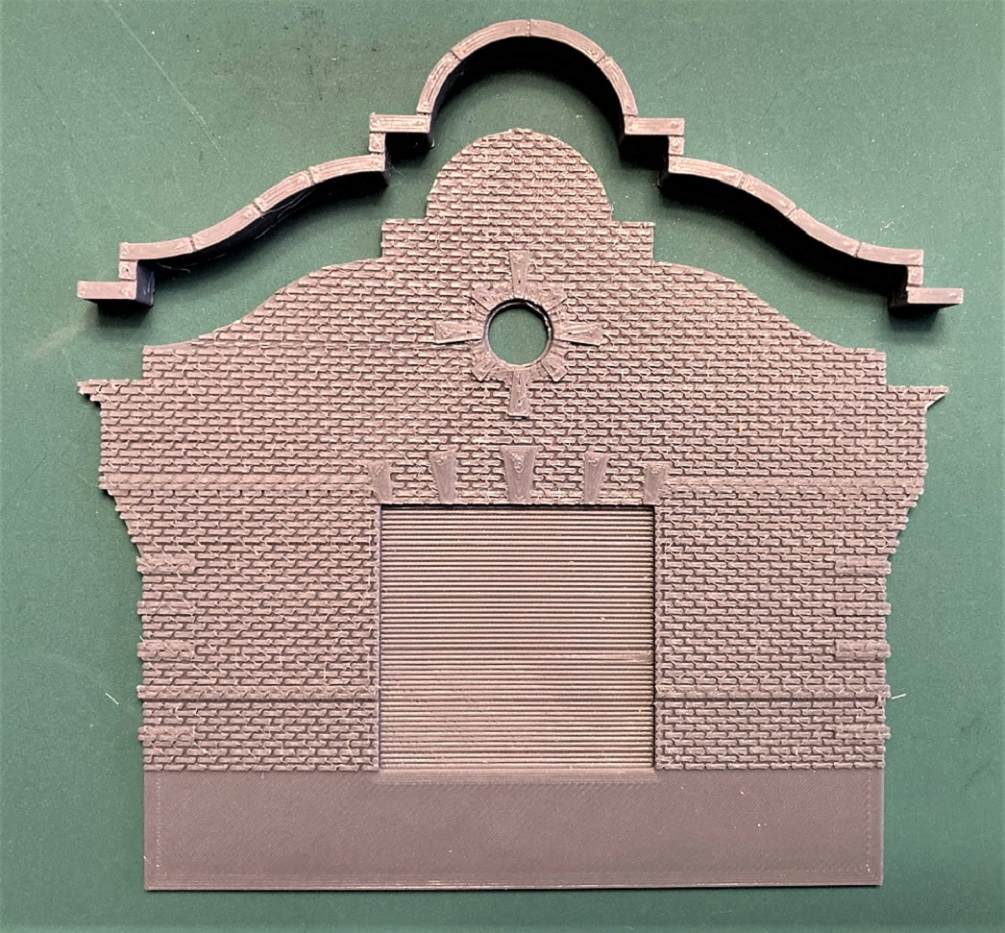 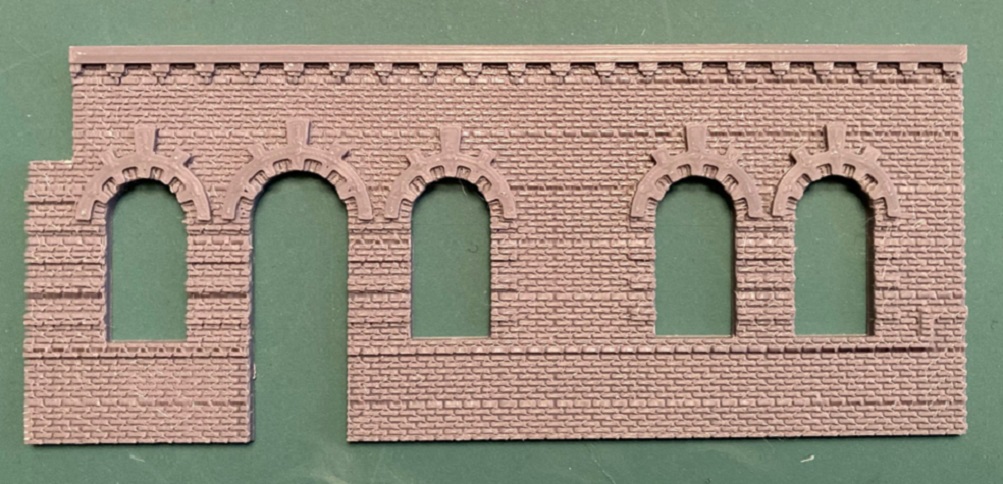 I have sanded most of these areas flat, a few areas will require filling with putty before priming. I may leave these accents flat, as the white brick doesn't really contrast with the mortar. Or I could cut small pieces of 0.010 x 0.020 styrene into individual bricks to build up that detail. We will see. This isn't a "kit". I view it as a collection of parts to scratch build the depot. There are no instructions. As the edges of the end and side walls have no brick detail on the sides to overlap a butt joint, the corners will need to be beveled to 45 degrees. The side walls were printed as two pieces, so a butt joint there will be required, reinforced on the inside. The first order of construction will be to use my NWSL "True Sander" to square up the tops/bottoms and ends of the wall sections, and insure teh sides are of equal length. The plastic pieces for the end platform and passenger side ramp didn't render the wood grain at all. These will be built up of stained strip wood, using the plastic pieces as templates. I'm considering Dave's idea of cutting out the end and one side freight door, so the interior of the freight room will be visible for detailing and a "look through" the building. The door, window, eave brackets, chimneys, etc., are printed on a single "raft": 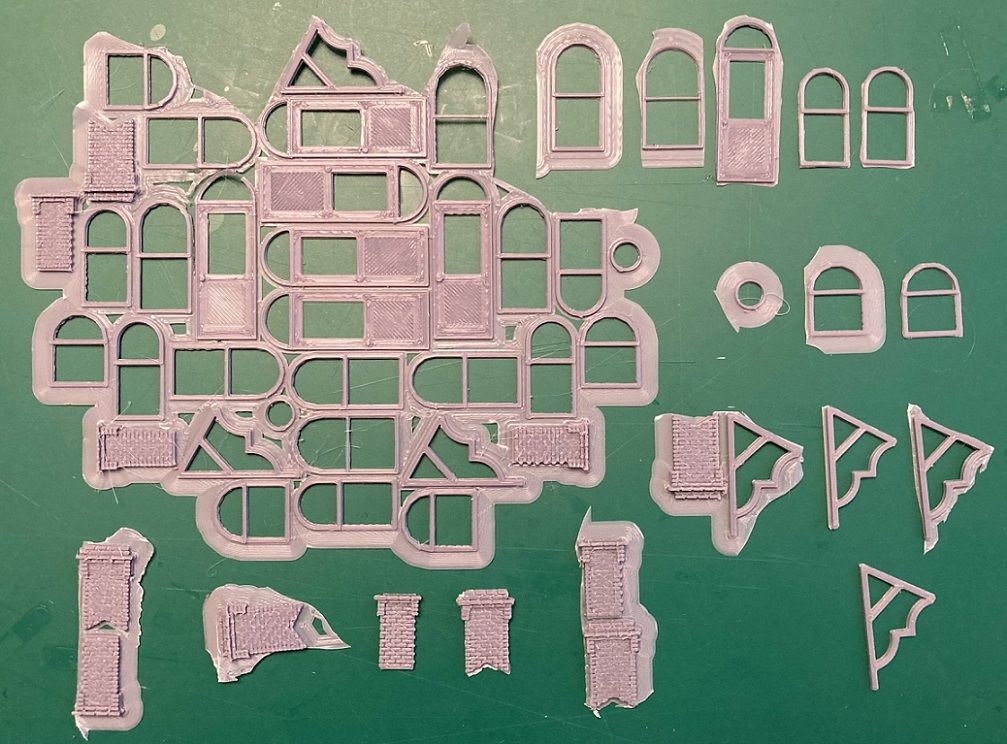 I see weeks of carefully removing flash from all the parts, and careful sanding and filing, prior to priming and painting. The man doors below the arched transom windows didn't render well. I will likely scratch build the doors of styrene, perhaps leaving the side door open. and then there is the question of interior detailing and lighting to consider. Since the Leadville brick depot and the Central brick depot were built about the same time, I wonder if Keith could share more info on how he painted his depot: What paint colors for the brick, trim pieces and stone accents? How was the mortar done? It looks like this bucket list project is possible after all -- it will give me something to do this fall, in the house, while my wife recuperates and learns to walk again.
Jim Courtney
Poulsbo, WA |
Re: Central City 1899 Brick Depot -- Update
Interesting point. But did the Leadville depot use bricks and stone sourced in the same places as Central City? I know, it probably doesn't matter; who knows what the real color of the Central City station is? :-)
Dave Eggleston
Seattle, WA |
Re: Central City 1899 Brick Depot -- Update
|
In reply to this post by Jim Courtney
Well, Jim, since you asked....
We in architecture like to say that places are the color of the places they are built. Seattle has a lot of wood close by...so lots of the houses are built of Doug Fir and Cedar. Until that caught fire, and they found some clay bodies and started making terra cotta. Other locations used the clay bodies to make brick, and the color of the brick is dependent on the color of the clay bodies. Reds are pretty popular as iron seems to be just about everywhere. The same is not true for yellows and whites. There is not much clay in Leadville, so I am all but certain the UP shipped brick in from Denver via the...oh, they owned the railroad.  I forget the exact date of the construction of the Central City depot, but I am guessing it is a bit earlier than the Leadville model. It is Italianate in style with the ogee roof parapet on the end, the quions at the corners and keystones at the arches. I speculate that the bricks also came from the Denver area, possibly Golden, and I bet they were red. Or orange. Because clay bodies are not consistent, neither are buildings. I painted Leadville using Vallejo brown with oversprays of rust. No need to be neat, go camo. I speculate that the trim brick are either white or yellow, so maybe sand for the former and aged white for the latter. Or white with a drop of yellow. You don't exactly have a scrap to test this on. We are thinking the window and door frames, are green, right? First off, the castings are going to need some work. Because they were printed flat, it looks like the print head left a dab of goo as it moved from finishing one brick and moved to the next. This will take some careful sanding to remove--too bad there is not a good CNC milling machine to take care of this! Of late I suggest primer and a coat of the black. the military guys seem to really like the Mr. Hobby projects and Mr. Surfacer primer, which comes in black and brown. If you like, you can follow with a light dusting of white from above. then the Vallejo brown and some spots of rust. I recall I used some powdered grout product available from Bragdon. It worked surprisingly well. The window and roof brackets will require some careful work. I have NO IDEA how they built the real roof brackets--that was an enormous job than is made much easier though 3d printing! Jim, you are about the most careful guy I know and will make easy work of these parts. I think wood is the way to go for the platform. I learned from Tom Troughton to create a substrate from tempered hardboard and glue the basswood planks to this--it makes quick work and creates a sturdy product! If I had not settled on Leadville, I would have gone with Central City--this has long been a favorite structure, and I am excited to see someone modeling it!
Keith Hayes
Leadville in Sn3 |
Re: Central City 1899 Brick Depot -- Update
|
Dave and Keith,
Appears I made a misstatement. I've always considered the brick depots at Leadville and Central to be contemporaries. Built at distant major terminals around the turn of the century, both replacing smaller, original depots. Looks as if the Leadville depot was 6 years older than the little brick depot at Central. Dan Edwards's A Documentary History . . ., Vol. 2 doesn't mention the brick depot at Leadville. But the old MR article in my files (the one with the plans) states that the Leadville depot dates from 1893. That would have been after the South Park reorganization as the DL&G, but the year before the DL&G receivership. The Central depot was built in 1899 by the new C&S. News articles state that the building was constructed of local (Denver or Golden) pressed brick. The architectural plans in the back of Abbott's book are pretty clear that the accent brick was "white" brick, not a blond brick. So's I will probably go with an off white. Too bad no one's done an archeologic dig in Central City and retrieved some of the depot's brick. Yes, Keith, the printed parts for the depot are going to require some work. There is a fine thread-like artifact all over the brick, in a diagonal "fish net" looking manner, from when the printing head moved about. You're right, a lot of sanding will be required. Other issues are the wall thickness, only 0.100" (about 6 3/4" in S scale), while the real walls were 12-13' thick, so they will need to be built up, as will the end walls, as they project out to the sides. It will need a lot of touch up brick working to fix the upside down stair-stepping of the brick rows. Seems to me that I will need to paint the sides "brick red" first, then mask off every thing but the accent brick / stone and airbrush it "white brick". Lots of touch up with tiny brushes will be required. It is tempting to try to paint the 4 walls on the flat, prior to assembly. Did you use Bragdon's or Doctor Ben's powders for the mortar on your depot?? Yes, I am a very careful model builder . . . so careful that the majority of my projects never seem to be completed.
Jim Courtney
Poulsbo, WA |
Re: Central City 1899 Brick Depot -- Update
|
What year were you modelling Jim?
UpSideDownC
in New Zealand |
Re: Central City 1899 Brick Depot -- Update
|
In reply to this post by Jim Courtney
So many of us can relate to that, Jim. The problem with research is that I keep finding new info that changes things, or hints at it. Argh!
Dave Eggleston
Seattle, WA |
Re: Central City 1899 Brick Depot -- Update
|
In reply to this post by Chris Walker
Hey Chris,
The little depot will stand in as a facility for C&S models from 1901 to 1924. So some anachronisms will have to be accepted.
Jim Courtney
Poulsbo, WA |
|
In reply to this post by Jim Courtney
Hey Jim,
Glad to hear your wife is on the mend! I am curious about the diamond pattern on the printed pieces--I'm more familiar with SLA printing than filament stuff, but it seems to indicate that the walls were aligned at a 45 degree angle on the build plate to allow them to fit--it'd be easier to conceal any print head movement artifacts by having the X-Y motions parallel/perpendicular to the majority of the bricks. Sound like your print guy was pushing the limits of the build bed size for his printer? The problems with the brick faces themselves, unless the STL model actually tried to texture the individual bricks, would also seem to indicate an issue with the temperature setting of the print head being on the low side, hence pulling some material away as it moved. At least that's what I think I'm seeing here. Steve Guty Lakeway, TX |
«
Return to C&Sng Discussion Forum
|
1 view|%1 views
| Free forum by Nabble | Edit this page |

