New layout room
|
Putting the finishing touches on my new layout room/shop area. I don't want to brag or cause jealousy among the less fortunate, but the space is a robust 38.75 square feet (roughly 52" by 9 feet or so), or as I prefer to think of it - 310 cubic feet! Well, we use what we got... It would make a modestly generous walk-in closet...
It's a little alcove off a one-car garage that I pushed out about a foot and put a nice heavy exterior door up. The space is hooked up to the house's H&AC with a supply and return so it should be comfy in the winters and summers of Chicagolandia. The laundry/utility room is just on the other side of the wall, so that was easy. I put down a thin sub-floor to help insulate the slab floor. The Sherline mill is in one back corner and a spray booth will be put in the other, vented to the outside just above or below the existing dryer vent which you can see in the photo. Along the right side is a decent sized modeling bench, the wife will be happy to get my stuff out of the family room, but to her credit she hasn't complained. Anxious to start using the mill (bit of a beginner) to mill notches in the side and end sills of some C&S coals, figure that will be a decent way to build up some experience.  The layout will rest on the heavy-duty shelf brackets along the right side and the back wall, which will put the track at about 60". There is a hole in the wall, temporarily plugged, which will allow for a 10-12 foot staging yard out in the garage along the wall, which will need to be weather-proofed. Modeling in Sn3 will require some creative planning, but that's my scale and I'm stickin' to it. The space is too skinny to allow a decent radius curve to utilize the left hand wall, but that would make things pretty tight anyway and the corners will be prime real estate. I'll be hard pressed to have a half dozen turnouts. The space restrictions are part of the deal though and will be a neat challenge that I'm looking forward to. Some people would see this space as half full, I see it as half empty... Whatever...   Maybe someday I'll have more space for a larger layout, as long as I can resist the temptation to go overboard. But right now I have an actual layout room, and it's all mine! Well, except for the Christmas decorations up on the high shelves... The layout will be freelanced with both heavy C&S and D&RGW influence. The threads about early interchange have been particularly interesting and I've been drawn to the Leadville/Breckinridge/Dillon area as well as being a long-time 3rd division fan. Era will be 30s-40s but will probably model the occasional out-of-time rolling stock. For power I've got a bag-o-parts C-21 and a basket case C-16, so I have some work cut out for me. Hope to pick up a C&S connie or mogul as well but will alter all power to have a family resemblance as well as a mix of C&S-D&RGW influences. Will keep y'all informed of my progress, I do tend to model within a geologic time frame so don't hold your breath... Two weeks until the Symposium... Mike McKenzie |
|
I am excited for you.
No mater how much space you have it is never enough. With that said... Looks like you have plenty of room to make a great looking layout. Be sure to keep us updated with pictures. |
|
In reply to this post by Mike McKenzie
Congratulations on acquiring space with HVAC for your next RR empire. Can you add a hinged or removeable shelf across the door to create a U shaped layout? Tra k on the added shelf Coulee fed from the staging shelf. A mill would give you traffic in and out - coal, ore, machinery and supplies in, bagged ore out. Look at Blackhawk as a scene. Town had turntable, mills and neat town buildings. Throw in line to Central City abovev the commercial district and you have RR. Build your C21 as #537 and C16 as a leased D&RGW C19. Have fun and send updates. Bill Uffelman On Thursday, March 23, 2017 4:44 PM, Mike McKenzie [via C&Sng Discussion Forum] <[hidden email]> wrote:
Putting the finishing touches on my new layout room/shop area. I don't want to brag or cause jealousy among the less fortunate, but the space is a robust 38.75 square feet (roughly 52" by 9 feet or so), or as I prefer to think of it - 310 cubic feet! Well, we use what we got... It would make a modestly generous walk-in closet...
It's a little alcove off a one-car garage that I pushed out about a foot and put a nice heavy exterior door up. The space is hooked up to the house's H&AC with a supply and return so it should be comfy in the winters and summers of Chicagolandia. The laundry/utility room is just on the other side of the wall, so that was easy. I put down a thin sub-floor to help insulate the slab floor. The Sherline mill is in one back corner and a spray booth will be put in the other, vented to the outside just above or below the existing dryer vent which you can see in the photo. Along the right side is a decent sized modeling bench, the wife will be happy to get my stuff out of the family room, but to her credit she hasn't complained. Anxious to start using the mill (bit of a beginner) to mill notches in the side and end sills of some C&S coals, figure that will be a decent way to build up some experience.  The layout will rest on the heavy-duty shelf brackets along the right side and the back wall, which will put the track at about 60". There is a hole in the wall, temporarily plugged, which will allow for a 10-12 foot staging yard out in the garage along the wall, which will need to be weather-proofed. Modeling in Sn3 will require some creative planning, but that's my scale and I'm stickin' to it. The space is too skinny to allow a decent radius curve to utilize the left hand wall, but that would make things pretty tight anyway and the corners will be prime real estate. I'll be hard pressed to have a half dozen turnouts. The space restrictions are part of the deal though and will be a neat challenge that I'm looking forward to. Some people would see this space as half full, I see it as half empty... Whatever...   Maybe someday I'll have more space for a larger layout, as long as I can resist the temptation to go overboard. But right now I have an actual layout room, and it's all mine! Well, except for the Christmas decorations up on the high shelves... The layout will be freelanced with both heavy C&S and D&RGW influence. The threads about early interchange have been particularly interesting and I've been drawn to the Leadville/Breckinridge/Dillon area as well as being a long-time 3rd division fan. Era will be 30s-40s but will probably model the occasional out-of-time rolling stock. For power I've got a bag-o-parts C-21 and a basket case C-16, so I have some work cut out for me. Hope to pick up a C&S connie or mogul as well but will alter all power to have a family resemblance as well as a mix of C&S-D&RGW influences. Will keep y'all informed of my progress, I do tend to model within a geologic time frame so don't hold your breath... Two weeks until the Symposium... Mike McKenzie If you reply to this email, your message will be added to the discussion below:
http://c-sng-discussion-forum.41377.n7.nabble.com/New-layout-room-tp8005.html
To start a new topic under C&Sng Discussion Forum, email [hidden email] To unsubscribe from C&Sng Discussion Forum, click here. NAML |
|
In reply to this post by Mike McKenzie
Keith,
Glad you're moving forward building a layout with the space available! There is a hole in the wall, temporarily plugged, which will allow for a 10-12 foot staging yard out in the garage along the wall, which will need to be weather-proofed. I'm scheming to do something similar. A 'round the wall C&S shelf layout in my 10'x20' shop area, above my tools/work benches. I'd like to add a double ended staging yard via 2 holes in the wall between the adjacent, but un-insulated, un-heated garage. How are you planning to weather proof your staging yard? Sn3 is a great scale for model building, but does eat up the available layout space! I sometimes wonder if Jeff and Don aren't on to something with HOn3.
Jim Courtney
Poulsbo, WA |
|
In reply to this post by Don Gustavson II
Mike,
Congratulations, and stride forward briskly.... Gerry |
|
In reply to this post by Jim Courtney
Bill, I hadn't thought of that. Come straight out of staging - one line curves off down the right side - the other line goes across the door opening on a hinged or lift-out section and curves down the left side with a trailing point turnout leading back into the corner just inside the door. Hmmm...
Jim, the garage is insulated but unheated and can have a nearly 100 degree range (granted, extreme) from summer to winter. So I'm thinking basically a long box with a hinged lid, lined with 1" foam. More to keep the cold and heat out of the alcove (man cave if you prefer) than the staged trains warm... Mike |
|
Just one of my cars takes up that much space ! When I began building
my "layout room", I had 9 cars and enough junk to fill three 12'x30' storage units, so the finalized plan was a 30'x70' building, with 2 floors. I can see certain advantages to modeling in scales less that 12":1' !  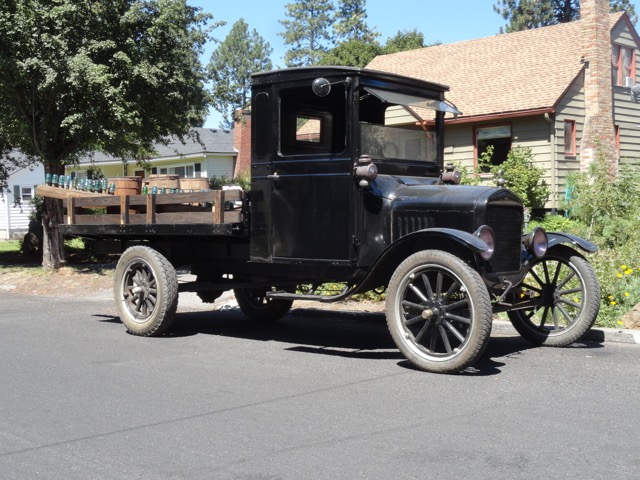
"Duty above all else except Honor"
|
|
You know, I ought to offer layout space for some of you go-to South
Park modelers. I can enjoy all the work without buying all the expensive model kits and gear ! 
"Duty above all else except Honor"
|
|
In reply to this post by Mike McKenzie
I conjecture that one of the most painful aspects of model railroading is the preparation of the room for the layout. I am here to tell all who will listen that taking the time to finish the room will pay off in the end. The lure of starting construction is a far stronger motivation than proceeding and having to "get around to" finishing the room later.
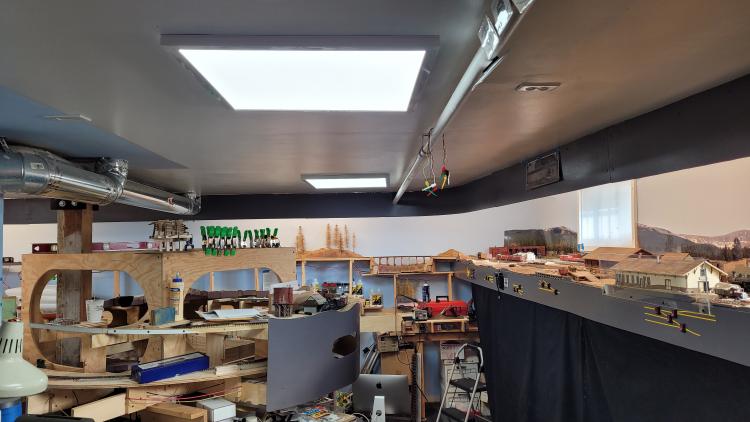 I did finish the room and I installed (3) 16" square fluorescent ceiling lights as area or work lights. These have served well for the past decade (has it really been that long?!?). But you may have heard of these new fangled LEDs? The circular fluorescent lamps are now hard to find, and the plastic lenses are brittle and apt to crack when replacing the bulbs. I happened to use the same lights in the kitchen and one went out about 3 weeks ago. Spousal encouragement is another kind f motivation, and I soon found myself at the big box checking for replacement options. I settled on these 24 x 24 fixtures that are only 1" off the ceiling. There is a switch that let me select from three temperatures: I used 3000 degrees in the kitchen and 4000 degrees in the ttrain room. The lights were reasonably easy to change out and they put out a TON of light. The pair of fluorescent circular bulbs were 72 watts and I bet the LEDs use only 10 watts. I anticipate the color will degrade over time, but I bet I am good for the life of the layout now. Now I wonder if I should change out the layout lighting to LED tape light? I got a short length to experiment with.
Keith Hayes
Leadville in Sn3 |
|
Definitely let us know on those tape lights. I follow several Brit modelers who use them exclusively to light their smaller cameo layouts. Cheap, effective, not seen when done right. It'll be interesting to hear how they work in your bigger space.
Dave Eggleston
Seattle, WA |
|
This post was updated on .
The following photos are from a friend's layout. All lights are 5000K LEDs; in ceiling, track and rope. Rope is a maximum of 32'.There are two strings behind the valance. They are mounted on 1 x 2's. The 1 x 2' have a 30º or 45) bevel on one edge depending on the depth of the layout at that point. Basically 30ª for 24" or less, 45º for 24" or greater. The string at the front is straight down, the other is on the bevel
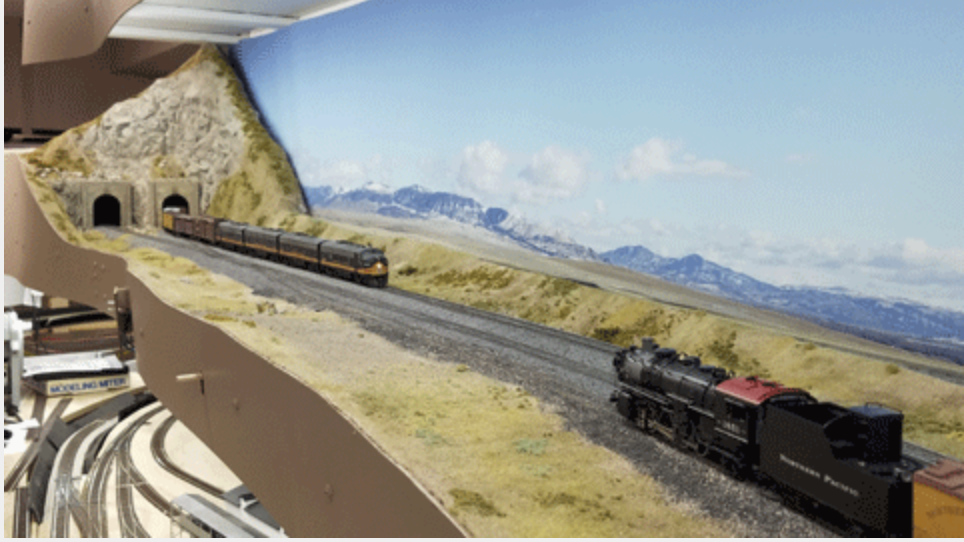 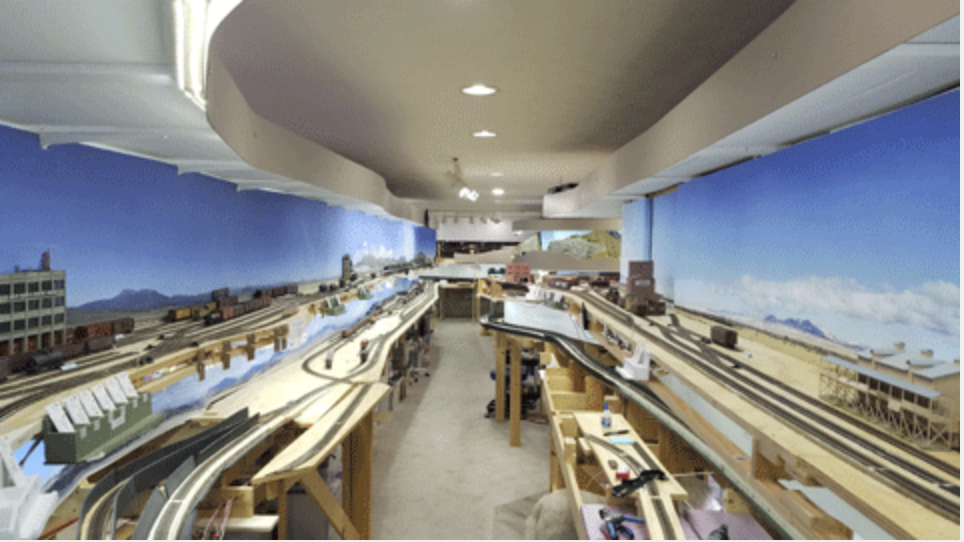 Backdrop is from photos shot in Idaho/Washington/Montana printed on 25 mil polypropylene and range in size up to 24" by 32 feet. |
|
My original post was 2017, if my math is right that's nearly 5 years ago! Working at a glacial pace. Current status of the layout room:
 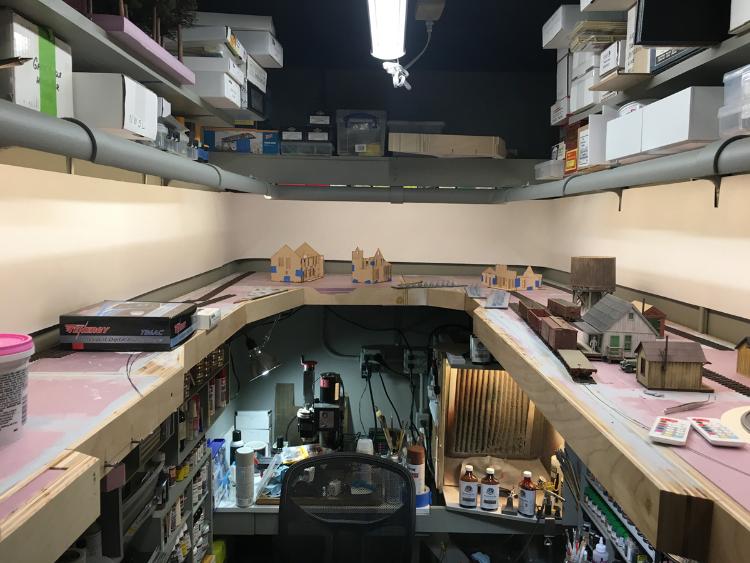 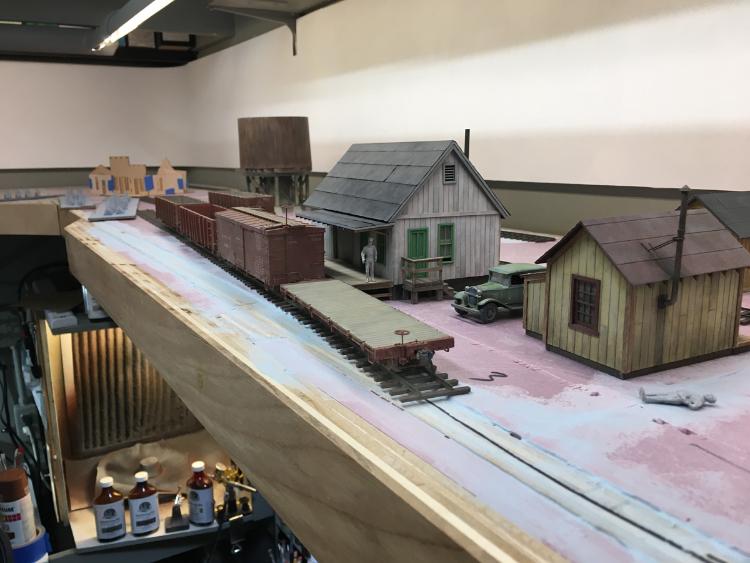 Still figuring out the track plan, trying to get it right as real estate is at a premium. Experimenting with tape lights, brightness and color is adjustable. Backdrop shadows come from the main light which can be turned off. We'll see how that works out. Backdrop will be painted. Battery power so will be no wiring except for switch machines. Not sure if turntable will be near right or in the back. If it's in the back will be accessed from both sides. Width is just over 4 feet so no room for a curve at the far end. Length is just under 9 feet. Top of rail will be approx 62.5". Handlaid with flex in staging, which comes out near right and your options are straight over the lift-out or right into a small yard. Near left will be mine tipples and a couple spots for switching at the rear both sides - mining supply and stock pens at least. Depot and freight house will be on right. Need to be careful and not cram too much into the space, can still be simple and fun to operate. Uh, crew size will be limited... You works with what you got... Mike |
|
Mike,
I like what you’ve done. Very nice balance between the elements, track, structures and overall narrow gauge “feel”. If I can offer a thought regarding turn table placement I’d favor the right side near the front. Turn tables are great show places for locomotives. Keep up the good work. Lee Gustafson |
|
Thanks Lee. Yes I think the turntable near right, just inside the curve out of staging, would work best. A showpiece with easy access, freeing up the back corners for other switching opportunities.
Mike |
|
In reply to this post by Dave Eggleston
I cracked open the package today. I got (4) 1'-0" lengths of LED tape, a controller, power supply and remote. The tape strips connect with 5-pin plugs and the orientation of the controller pug does matter. I assembled the strips and taped the LEDs to the fascia and tried it out.
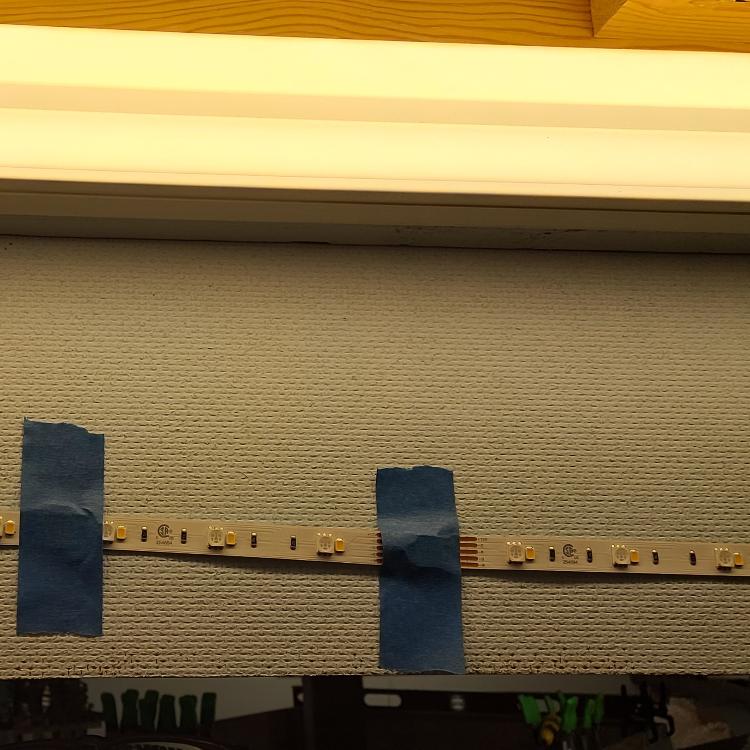 The strips are 1/4" wide. I think folks in the biz would refer to these as RGB-W LEDs. I understand that RGB-Y has a better white render. 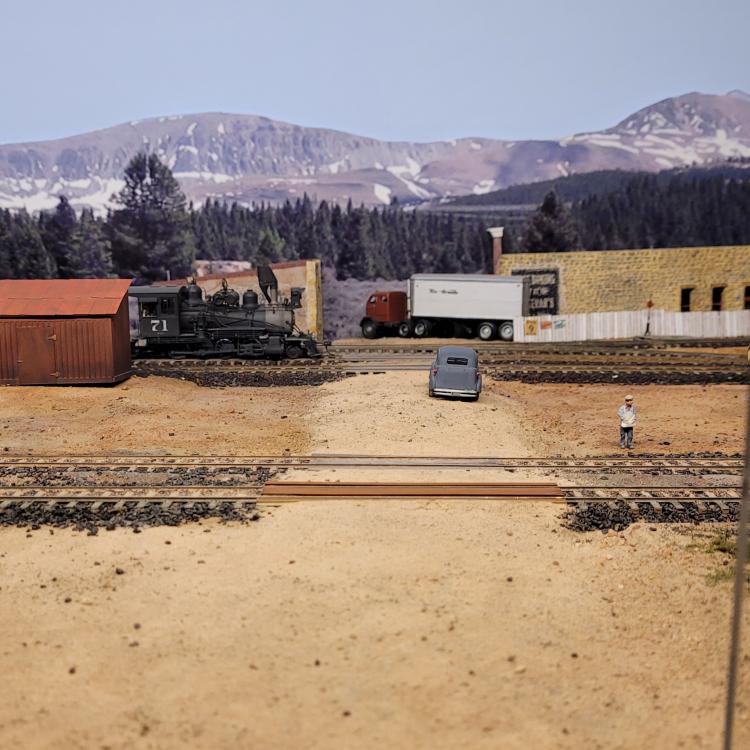 The results are okay. It was more dim than the fluorescent lamps, but I have pairs of T5 tubes, and they put out a bunch of light.The thought occurred to me that fluorescent lamps radiate light around the axis of the tube and some of the light is "lost." The LED is a flat chip shines the light right where you want it. The controller has 12 color presets, including 4-5 blues. You can increase the brightness for night running. I doubt I would use it, but it is a nice feature. I think it will take two strips of tape to equal the fluorescent brightness. Someone on the web just did this and used two strips applied to a beveled board: one angling 45 degrees into the scene and the other pointing down. Some experimentation will be in order.
Keith Hayes
Leadville in Sn3 |
«
Return to C&Sng Discussion Forum
|
1 view|%1 views
| Free forum by Nabble | Edit this page |

