C&S RPO 11: Linn Moedinger’s Shapeways Print in Sn3 and Hon3

Previous Topic Next Topic
 
classic Classic list List threaded Threaded
105 messages Options
123456
Reply | Threaded
Open this post in threaded view
|

Re: C&S RPO 11 in HOn3

Jim Courtney
This post was updated on .
Keith made a good point:

If you check the archive of these pages you will find my post questioning the cost of a full car print in 1:64. In fact, Linn's print is at a price point that though expensive, it is reasonable in comparison to brass. Sure, the Cimarron kits were in the $100 range and this is more expensive, but considering the fact that it is unlikely a C&S car will be mass produced, it is a reasonable alternative

More to the point, I doubt that anyone will ever produce brass imports of C&S passenger cars again. Only three C&S passenger cars were ever produced -- RPO 13, coach 70 and AC&F coaches 74-76 by Overland in HOn3 and Sn3; Overland only imported the two types of coaches in On3. So if anyone wants a C&S passenger car in the future, it will require scratch building or waiting for one of us to die and hope to get one from our estate sale.

To my way of thinking, 3-D printed passenger cars of C&S prototypes isn't just a "reasonable alternative", it's the only alternative.
Jim Courtney
Poulsbo, WA
Reply | Threaded
Open this post in threaded view
|

Re: C&S RPO 11 in HOn3

Ken Martin
Jim,

Soho did the 70 in HOn3 and Hallmark did their inaccurate 911 in On3.

Ken Martin
Reply | Threaded
Open this post in threaded view
|

Re: C&S RPO 11 in HOn3

Jim Courtney
Ken,

Yes, I forgot the Soho HOn3 coach. I actually owned one back in the 1970s. As I recall, the truck side frames were stamped instead of cast. Overall the car was rather crude compared to the later Overland offering.
Jim Courtney
Poulsbo, WA
Reply | Threaded
Open this post in threaded view
|

Re: C&S RPO 11: The Parts List

Keith Hayes
This post was updated on .
In reply to this post by Keith Hayes
During a slow period during a meeting today, I jotted dow a list of the parts I will need to complete the RPO in 1:64:

-Trucks (PBL)
-Couplers (Kadee #58)
-Coupler Boxes (Coach Yard)
-Brake Wheels (Foothills On3 Part)
-Brake Chain (parts box)
-Protection Chain (larger links, Clover House 10 links to the inch)
-Brake Cylinder and Retainer (parts box)
-Air Tank (scratch from styrene)
-Queen Posts and Needle Beam (looking...)
-Turn Buckles and Truss Rods (PBL)
-Air Hose and Train Line (PBL rubber part)
-Various sizes of wire
-Evergreen Styrene (scribed sheet and strips)
-Soundcar (Soundtraxx)
-A big speaker and enclosure (Soundtraxx)
-KA 4 Keep Alive (TCS)

I am making a pretty good dent in the list: now the thing I need is some time. Painting the interior is moving up on the list, as is drilling out all the nicely placed holes for grab irons. And I will have to form a grab with dents to keep the top of the ladder in place for the carmen so they can do whatever they have to do on the roof.

Regarding the trucks, I have a photo essay almost ready to go on my modifications of the PBL trucks (MCB with outside hung brakes) to the cast steel trucks with inside hung brakes used on RPO cars. It appears to me that C&S 10-13 all had the cast steel trucks, as did the 'long' RPOs on the D&RGW used on the name trains after 1939. Curiously, the short RPOs used on the Chili line appear to have maintained their MCB composite trucks to the end. I wonder why/ how?
Keith Hayes
Leadville in Sn3
Reply | Threaded
Open this post in threaded view
|

Re: C&S RPO 11: Grab Irons

Keith Hayes
This post was updated on .
Or...whatever you call the parts that let you swing up to the car or keep hanging on.

The mail end.


The baggage end.

Being that crews did not seem to make time to turn the RPO at the end of the run it would be difficult for the train crew to get in the baggage compartment en route. I guess that means there was not much need to access this car while the train was moving.

Oh, and the floor is mostly done, too.

The inside of the floor.


The outside (bottom) of the floor.


Oooh, some paint while we wait for more parts.
Keith Hayes
Leadville in Sn3
Reply | Threaded
Open this post in threaded view
|

Re: C&S RPO 11: Grab Irons

Jim Courtney
Looking great Keith!

But "point of detail" (that I just figured out). Ken Martin's plans and the Quick Pic book for RPO 13 show retainers at both ends of the RPO cars.

I'm use to all freight and passenger cars having only one retainer, on the "B" end of the car, but the RPOs (maybe the baggage cars, too??) seem to be an exception.

I'm hoping to work on the floor for my RPO 11 this week.
Jim Courtney
Poulsbo, WA
Reply | Threaded
Open this post in threaded view
|

Re: C&S RPO 11: couplers

Keith Hayes
This post was updated on .
In reply to this post by Keith Hayes
While gathering parts for this project I realized that I was running low on Kadee #26 couplers.

As I have a bunch of unbuilt kits here at the home hobby shop (a problem I suspect others have as well), I don't want to have to stop construction to paint a coupler or wheelset. So I buy some extras and paint them, then trade out the painted parts for unpainted parts in the new kit. I also have found the hard way (multiple times) that one should never brush paint a coupler.

PBL has been issuing kits with trucks and couplers for a while, and I think I have metal wheels for all the older kits that came with plastic. But I haven't built a kit in a while. Instead I have been focusing on the tank car fleet, Phase I coals and some passenger cars. Consequently, I used up my stock of painted #26s.

So, I got some packages of couplers and got them painted, before I lug the compressor upstairs to blow out the sprinkler system  (It snowed last weekend in Denver).

Jim Courtney suggested some 16" On3 MacLeod Western brake wheels would scale out about right for the RPO (I am partial to the large wheels on the C&S head end cars). I ordered some, and they will work out great.

While visiting Caboose,  I also purchased a Soundcar,  keep-alive and speaker. Now all I am lacking is the needle beam/queenpost bit.
Keith Hayes
Leadville in Sn3
Reply | Threaded
Open this post in threaded view
|

Re: C&S RPO 11: Roof details

Jim Courtney
This post was updated on .
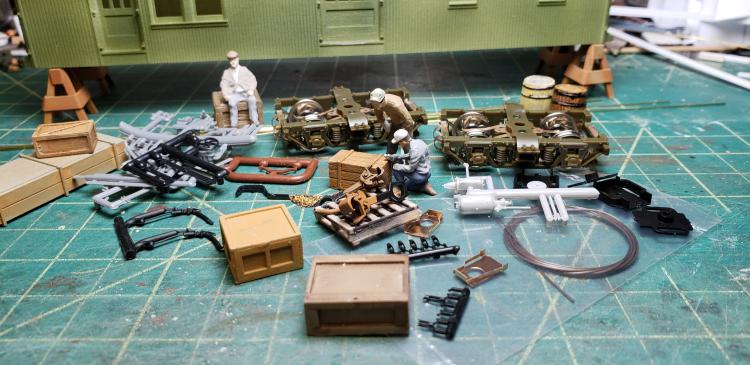
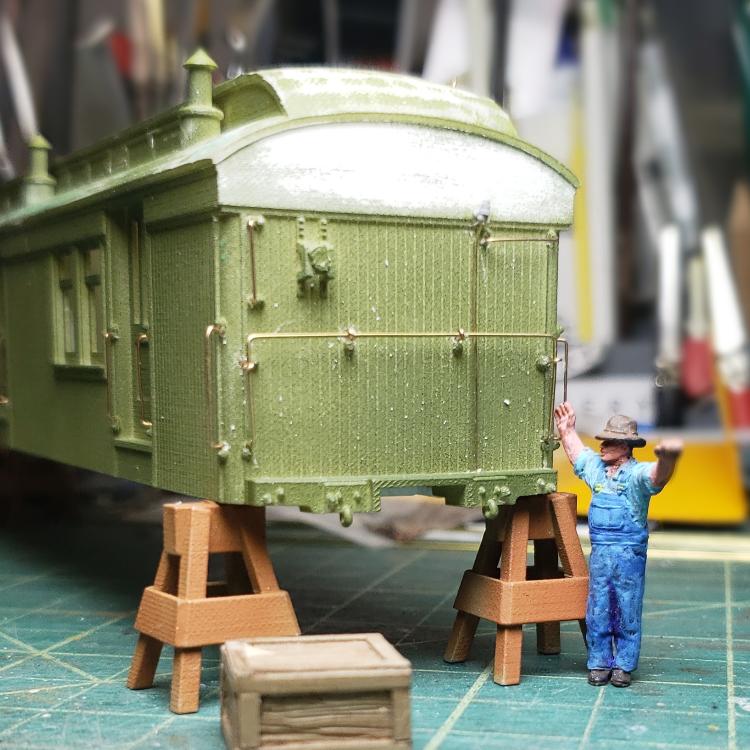
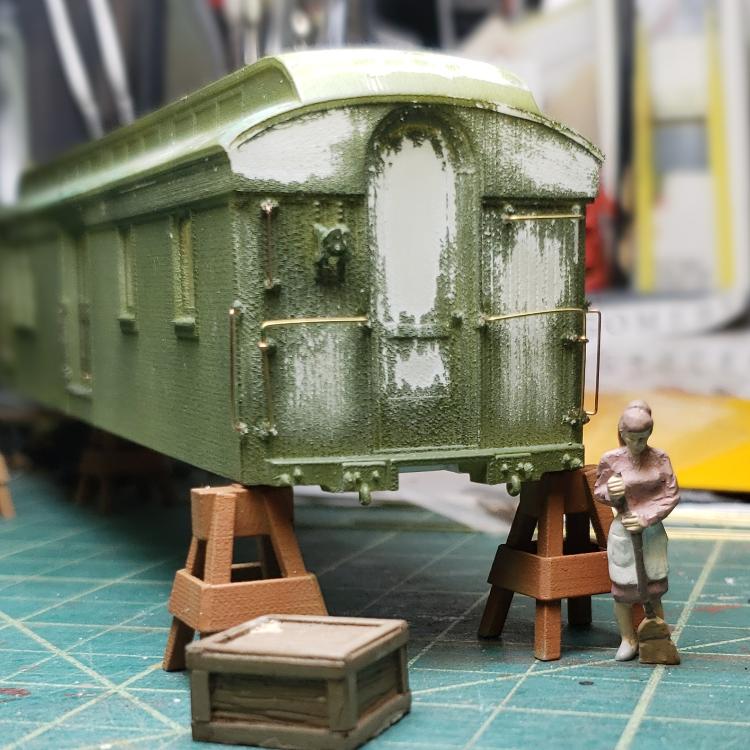
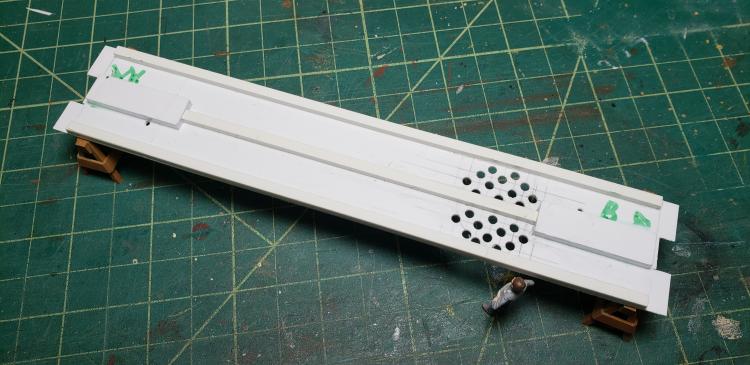
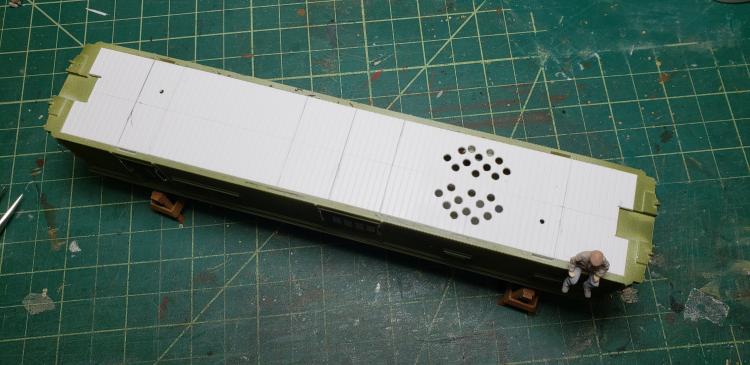
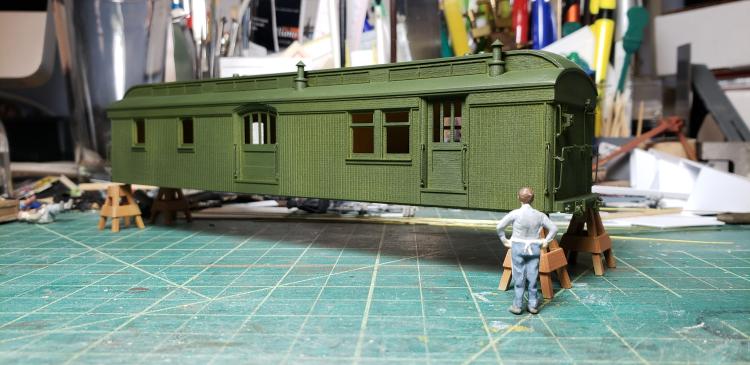
Once again Keith is pushing on with our RPO 11 project faster than I can keep up. I'm still laying out the basic HOn3 floor on my print.

But before Keith gets too far ahead of himself, we might want to pause and consider the RPO roof details.

Lamp vents:

Linn's Shapeways print of C&S 11 has two pair of roof lamp vents, one pair over the RPO section located on the centerline of the car, and one pair over the baggage section, laid out perpendicular to the car centerline. But having studied the photos and folio floor plan, it seems Linn missed a pair. There is an additional pair of vents, perpendicular to the car centerline, located over the sorting area further back over the RPO section:


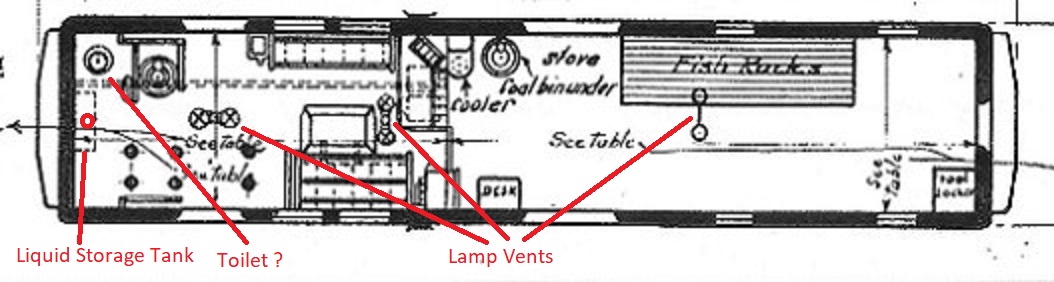
These vents are visble on a couple of photos:


The later 1930's photos are confusing, in that they suggest a single lamp vent over the baggage section, on the center line of the car.

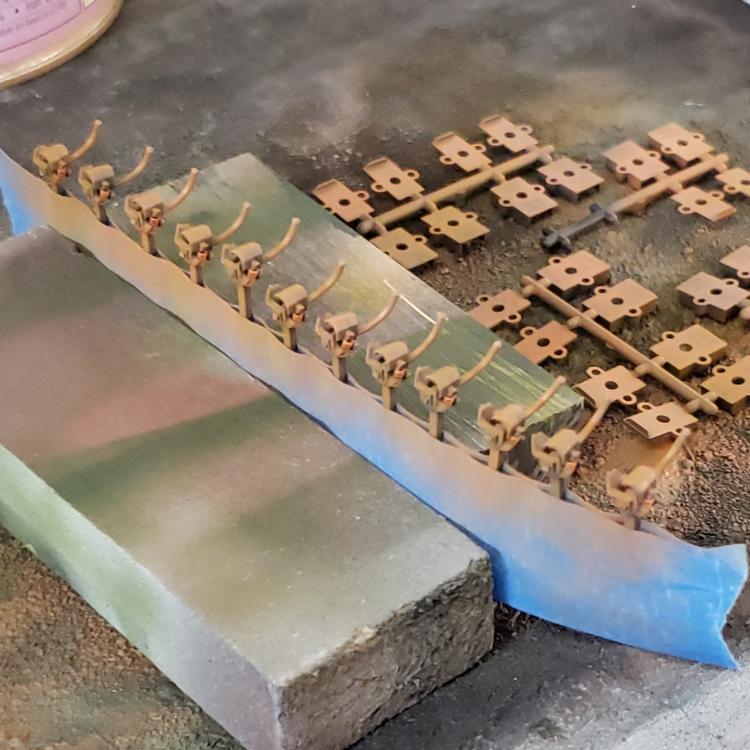
Since I cannot match Linn's printed roof vents, I will likely clip Linn's 4 vents off with a sprue nipper and replace them with 5 or 6 commercial vent castings by Grandt (plastic) or Tomalco (brass). I haven't decided on paired or single vents on the baggage end. In 1927 there still may have been paired vents.
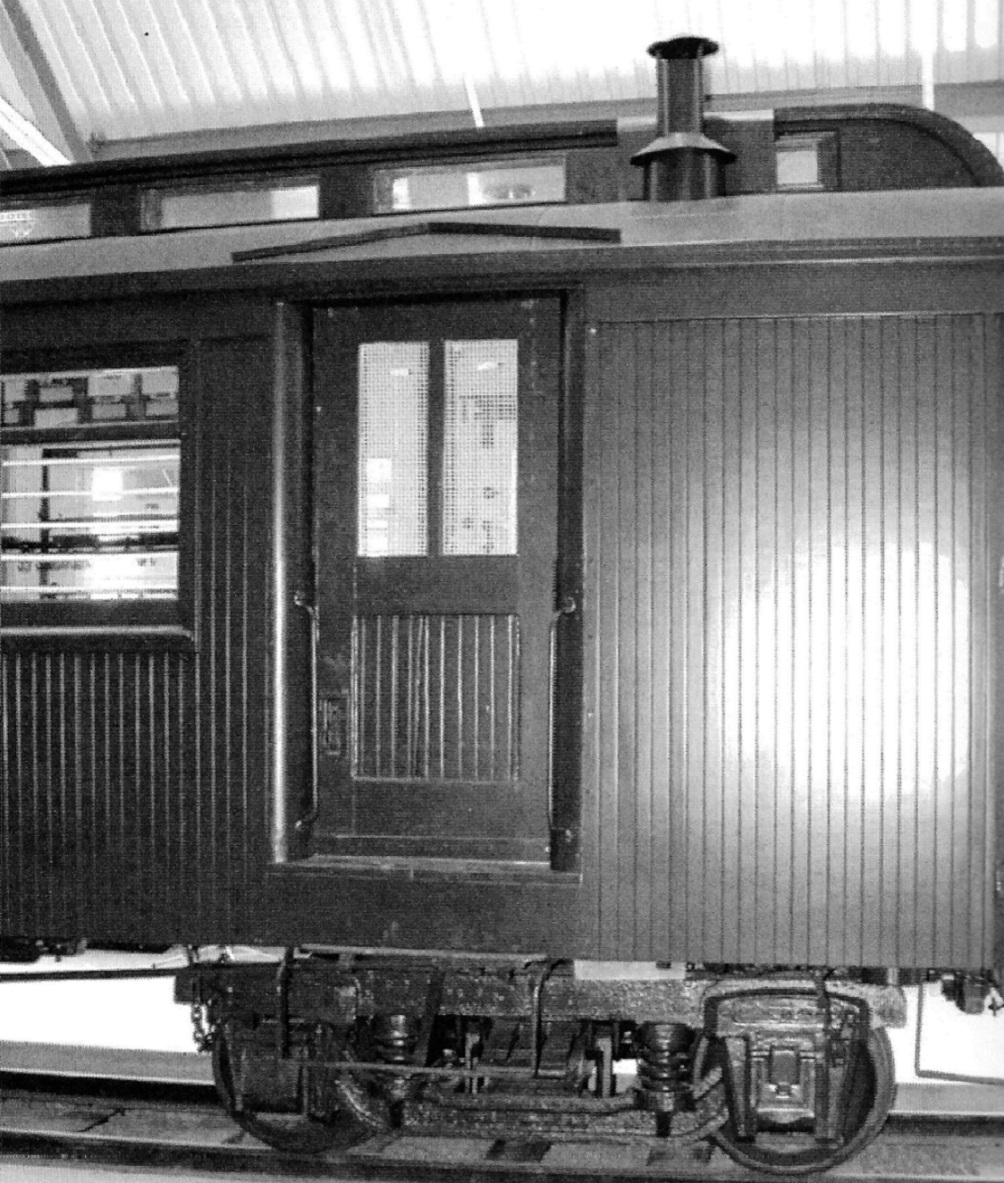
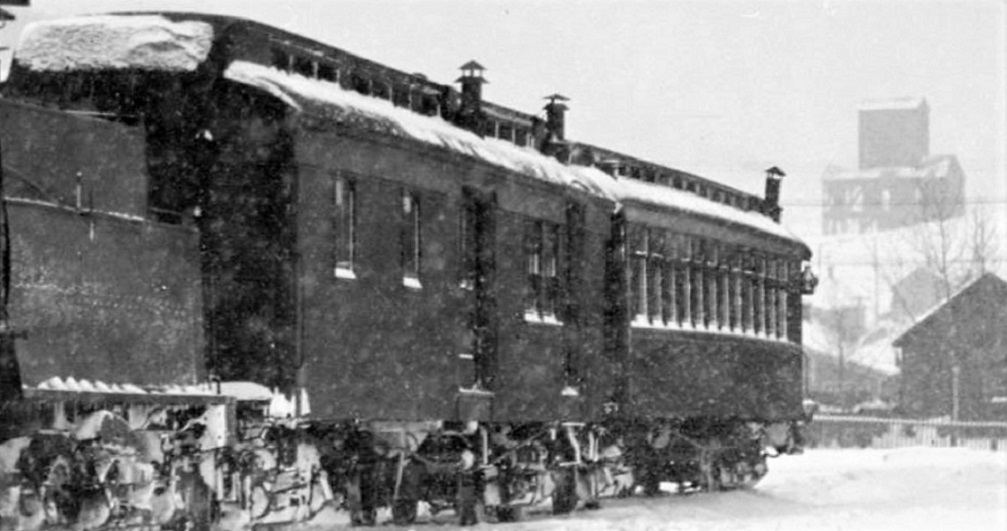
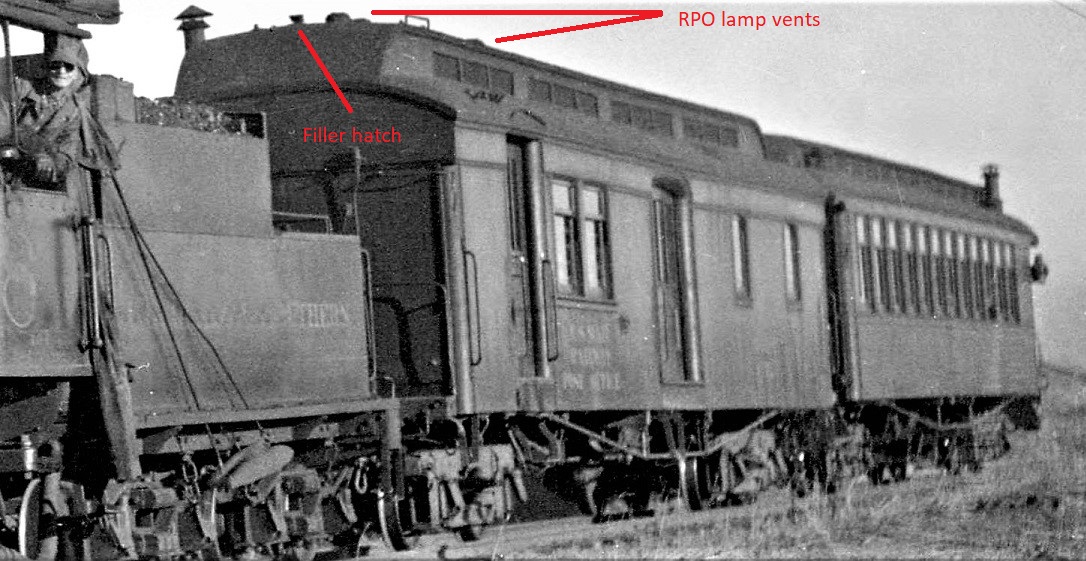
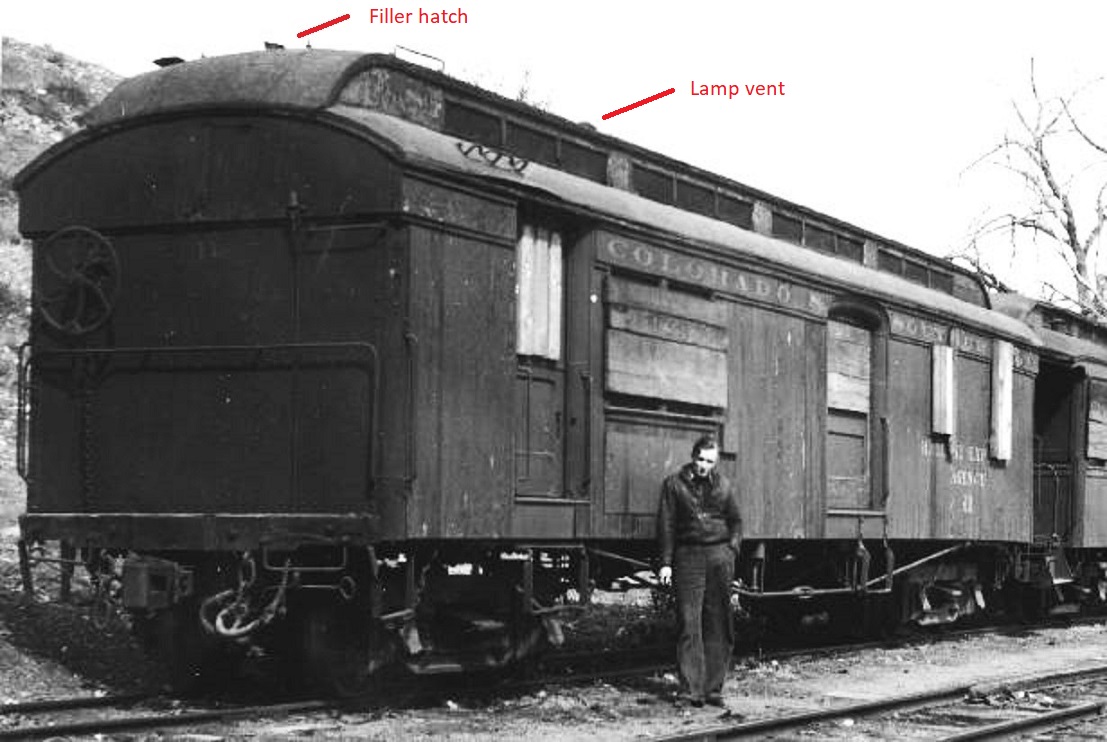

Roof filler pipe / hatch:

Both of my Overland (Sn3 and HOn3) brass RPO 13 models have a small filler pipe / hatch located on the extreme RPO end of the upper clerestory roof:


The filler pipe appears to be 4'' in diameter and has a 6" diameter hinged hatch. It is placed on the roof centered in a piece of metal flashing, 24" by 18". It is barely visible on the roofs of the 10-11-12 RPOs in the above photos. Its approximate location is the red circle on the RPO end of the Folio floor plan.


I had no idea what this little detail was for. The Folio floor plan shows a rectangle in dashed lines on the inside of the blind wall of the RPO section.

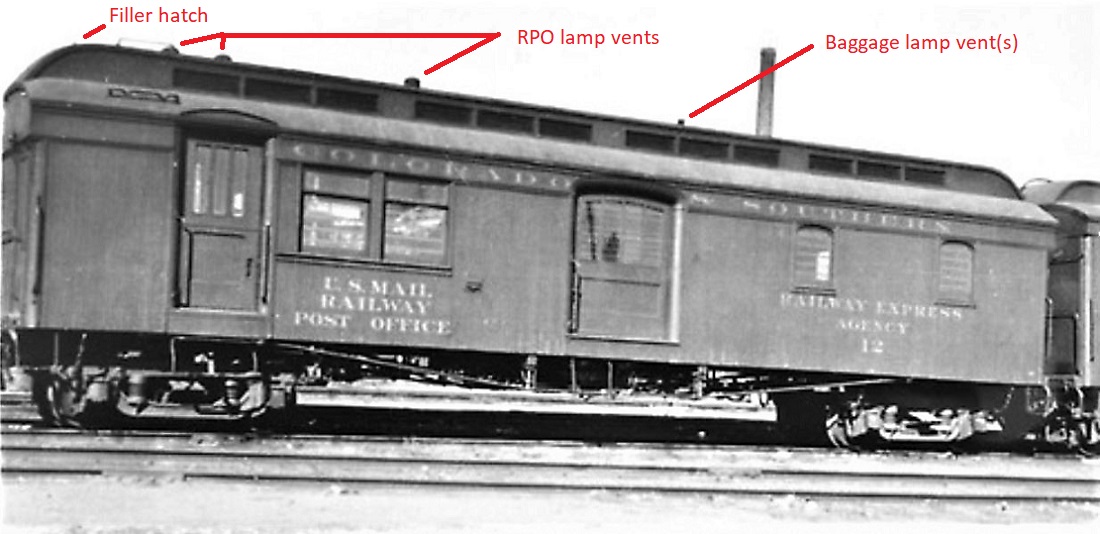
The Quick Pick book of RPO 13 solved the mystery--the roof filler pipe and hatch connected to a cylindrical storage tank mounted on the end wall of the RPO section, up near the ceiling. This appears to be a potable water storage tank, connected by a small pipe, up near the ceiling, to the water cooler in the RPO section:


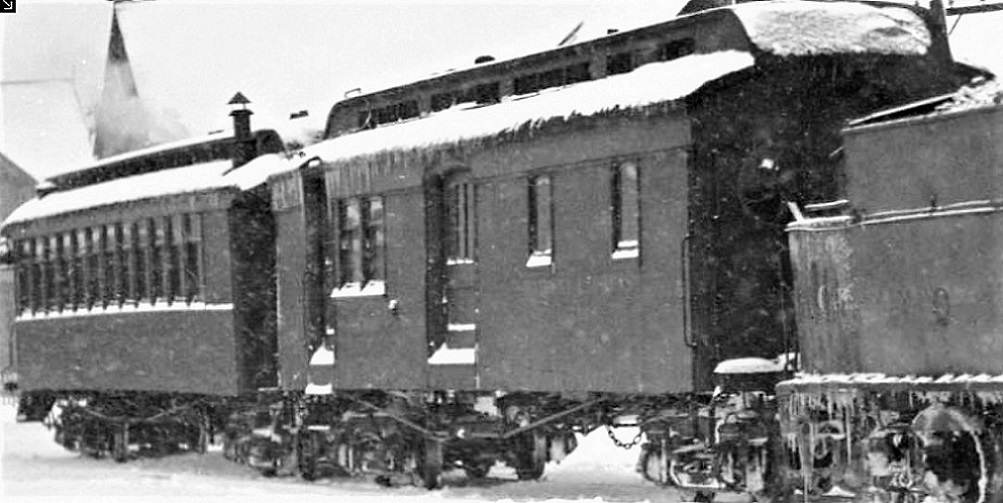
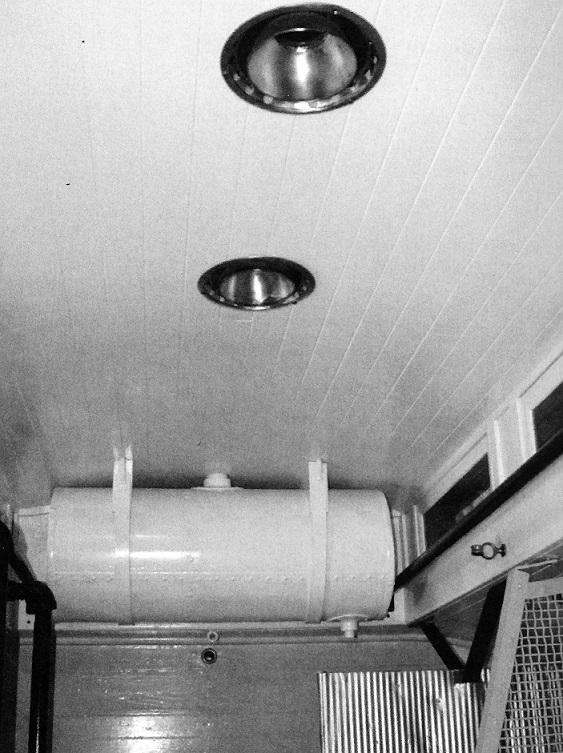
Note the forward pair of lamp vents in the ceiling.


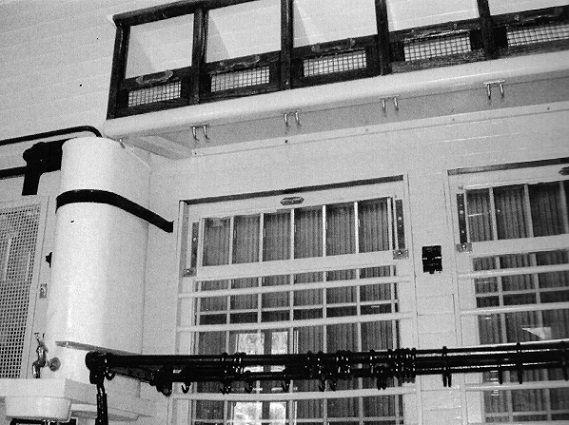
Pipe from cooler to water storage tank at upper left, above RPO door.

This explains the two grab irons on the RPO end of the roof: When the car men in Denver serviced the RPO between runs, they leaned a ladder up against the 24" curvy "ladder rest" grab iron on the lower roof section, climbed up on the upper roof using the straight (20-22") grab iron to steady themselves, and dragging a hose behind, filled the water tank with drinking water for the thirsty postal employees.

Also note on the Folio floor plan, a toilet is tucked up in the corner of the RPO section, between the coal stove and the blind end wall. The proximity to the stove makes for an excellent "seat warmer" for the USPS employees on those long, cold trips over Boreas Pass in winter.
Jim Courtney
Poulsbo, WA
Reply | Threaded
Open this post in threaded view
|

Re: C&S RPO 11: Roof details

Keith Hayes
Jim, thanks for the note on the filler hatch. I wondered why the RPO had a ladder grab rung, and specifically the RPO. While this was a NG railroad, and subject to national regulations regarding safety, I thought this very modern SG detail seemed odd. It all makes sense now. My Grandfather was always proud of the taste of Denver water, which I still find tasty in spite of the fact I am probably drinking small doses of a precipitate from some abandoned operation up Georgia pass past Webster or one near Alma. Anyway, a detail explained, and one I will try to add. Also, I see there is a drip on the roof above the RPO door: damn the railroad men (and women), but by golly protect those postal employees.

I had also noticed the missing roof vents but thought discretion was the better course because I am just happy that Linn went to the trouble to make the model in the first place and did the hard work for me!

(There is also the matter of the missing letter deposit on both sides of the car, while we are picking nits).
Keith Hayes
Leadville in Sn3
Reply | Threaded
Open this post in threaded view
|

Re: C&S RPO 11: Roof details

Jim Courtney
Hey Keith,

All 4 of the C&S narrow gauge RPOs were rebuilt in 1916 or so with standard USPS 15' mail compartments. Typical of our federal government, I suspect that all of the specs for this compartment were standardized and compliance by the railroads was required to maintain the mail contract, including interior layout, stoves, lamps, water coolers and toilets. The potable water storage tanks, filler pipe on roof, even the roof grab irons may have been a strict requirement of the Post Office. Got to protect our government employees, you know.

One roof detail I over looked was the piece of sheet metal flashing between the stove jack and the clerestory side:


A piece of thin styrene or perhaps some of the lead foil from the wine bottle might do the job nicely. I'll have to open another bottle of Pinot Noir . . .
Jim Courtney
Poulsbo, WA
Reply | Threaded
Open this post in threaded view
|

Re: C&S RPO 11: Roof details

Jeff Young
I used painted aluminium foil for the Silica bunkhouse’s heat shields.  I’m not sure black was the right colour though….

Reply | Threaded
Open this post in threaded view
|

Re: C&S RPO 11: More details

Jim Courtney
This post was updated on .
For the past month I've been wracking my aging brain, trying to remember where to find these photos. I found them in David Digerness's The Mineral Belt Volume II.

In January of 1929, the outbound Denver Water Board Special took the siding at Buffalo to let the afternoon Denver-bound passenger train pass:


The DWB photographers climbed up the side of the hill opposite Green's store and photographed C&S number 4 and passenger train making the station stop:


And look, it's our very own RPO 11, with offset baggage door, in the consist! A straight on side elevation, too.

The photo answers a lot of questions . . . in the late 1920s, the car still had paired lamp vents on the baggage end. This rare view from a bit above clearly shows the filler pipe, grab irons and lamp vents on the roof. But enlarging the photo, while blurry, gives more great info for modeling purposes:


While RPO 11 may have originally had four truss rods, by the 1920's I can see only two that are visible (well . . . that will make modeling the underframe a lot easier!) and the trucks appear to have inside brake shoes with no visible outside brake beams. I haven't gotten out the dividers yet to see if I can approximate the truck wheel base -- are they the original 5 foot wheelbase trucks?

Keith, I'm beginning to wonder if the 4 C&S RPOs had more rebuilding in 1916 than just a new standard 15' USPO mail compartment. I wonder if the four car bodies had their entire underframes rebuilt to a standard design, complete to the brake fixtures and plumbing.

I'm tempted just to copy the underframe of my Overland RPO 13 when building up the underframe details of RPO 11.

The Cimarron Works did a great resin kit for a C&S coach and business cars in Sn3, that had nice cast brass needle beams with queen posts and braces.  Perhaps Bob Stears or Doug Junda can tell us if these brass castings are still available in S scale.

It doesn't look like postal workers wore a uniform in 1929. I bet one got claustrophobic, locked up in there, working the Leadville train; but in 1929 RPO service only went as far as Como.

Finally, to give Keith an idea of how his finished car will look like in revenue service at Leadville, a couple of Otto Perry views of one of the sister RPOs (number 12 I'm guessing) spotted at the Leadville depot during a snow storm in the winter of 1934:


In that last view, is that a drain pipe, covered by a mine housing, that I see in the distance??
Jim Courtney
Poulsbo, WA
Reply | Threaded
Open this post in threaded view
|

Re: C&S RPO 11: More details

Keith Hayes
Jim, you are the BOMB!

Yes, I have reached out to Messrs. Stears and Junda for a needle beam/ queen post assembly. Call it sacrilege, but I have been planning to build the car with only two truss rods. For all the time I have spent and will spend on fussy break gear, some have observed you really don't see it. Which is why I REALLY like the Overland PIII kits with the single shot brake rigging.

Ken--was 11 constructed by Uncle Pete with the baggage door centered like 10 and 12? Car guys could do anything when rebuilding a car. I find it peculiar that they would reconstruct an RPO with a postal section to USPS specs and then move a baggage door, funky trim and all, a couple feet over. As Derrell discovered with the locomotive rebuilding program, I wonder if 11 was either the first or the last car modified. And what of 13, which appears entirely modern with a far less UP-y looking clerestory/ carlines and a more modern square baggage door.

And yes, I do believe there is a drain pipe on the horizon in that last photo. If you look carefully, you can see it in the snow.
Keith Hayes
Leadville in Sn3
Reply | Threaded
Open this post in threaded view
|

Re: C&S RPO 11: More details

Jim Courtney
In reply to this post by Jim Courtney
Enlarging the Buffalo passenger train photo, I compared the wheel base of the trucks under RPO 11 to the tender trucks of the locomotive and the passenger truck of the following coach.

Comparisons suggest that the RPO trucks are of 5 foot wheel base.

So, free rolling Jackson and Sharp trucks by PBL (Sn3) and Blackstone (HOn3) could be used for the respective models of RPO 11, modified by removing the outside bearing arms, the end beams and hung break beams.

Keith described the Sn3 conversion on the main blog page a few years back:  http://coloradosouthern.blogspot.com/2015/07/overland-passenger-car-modifications.html

I've modified a pair of Blackstone trucks the same way.
Jim Courtney
Poulsbo, WA
Reply | Threaded
Open this post in threaded view
|

Re: C&S RPO 11: More details

Ken Martin
In reply to this post by Keith Hayes
Keith,

I don't know when 11 was built in relation to the other two cars. Like on the C&S on the DSP&P it had the middle number.
I doubt the baggage door would have been included in the PO mods. Which still leaves the question of why was the door offset.

13 was built by Pullman not the UP.

Ken Martin
Reply | Threaded
Open this post in threaded view
|

Re: C&S RPO 11: More details

Robert McFarland
Come on,Ken- #11 was an ex Colorado Central car.
Reply | Threaded
Open this post in threaded view
|

Re: C&S RPO 11: More details

Robert McFarland
But it seems by photographic evidence that it spent a lot of time on the DSP&P  
Reply | Threaded
Open this post in threaded view
|

Re: C&S RPO 11: More details

Ken Martin
In reply to this post by Robert McFarland
Oops, I blame the early hour.

Ken
Reply | Threaded
Open this post in threaded view
|

Re: C&S RPO 11: More details

Keith Hayes
In reply to this post by Jim Courtney
More details.

Ken, the folio notes the car to be constructed by UP
 Is this incorrect, as does a fine collection of drawings.
Keith Hayes
Leadville in Sn3
Reply | Threaded
Open this post in threaded view
|

Re: C&S RPO 11: More details

Ken Martin
In reply to this post by Jim Courtney
> the trucks appear to have inside brake shoes with no visible outside brake beams.
I haven't gotten out the dividers yet to see if I can approximate the truck wheel base -- are they the original 5 foot wheelbase trucks?

Jim,

I first missed this post. The trucks with inside brakes were 5' 6" wheelbase. Check drawings of 13 and 26 on the truck page in my book.

Ken Martin
123456