What's on your workbench, January 2020?
123


123
What's on your workbench, January 2020?
|
Happy New Year all. I am celebrating by cleaning off my work space! I had accumulated about two years of scrap parts, cat hair and model dust. Whew, we can all breathe easier now.
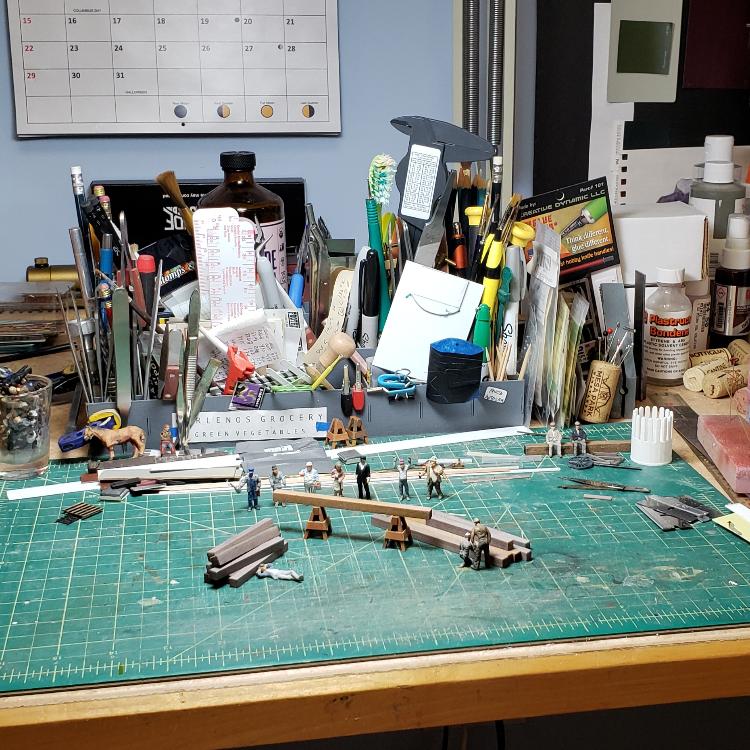 I have parts from the Penrose Mine project and one last Phase I Coal to complete. I also have a surprising number of figures to paint. I need a break from bench work and track construction, so I got out a Banta Baker's Tank kit. I started staining wood last night and am ready to start construction on the bents. There were only three sticks of 12x12 in the kit; fortunately I had some spare material and can move on. So you all know the drill. No judgment here: post a pic of your bench with your latest project. It always stirs up some interesting conversation and heck, you might even get a compliment!
Keith Hayes
Leadville in Sn3 |
Re: What's on your workbench, January 2020?
|
No serious work on my bench. I just have 4 months to go before I retire-retire -- just 30 more 24-hour shifts in the NICU to be exact.
But I have been piddling a bit with a new brass bashing project:  I'm converting my Overland "Early number 5" to a brand new rebuilt Cooke 2-6-0 c.1901, either number 9 or number 10: 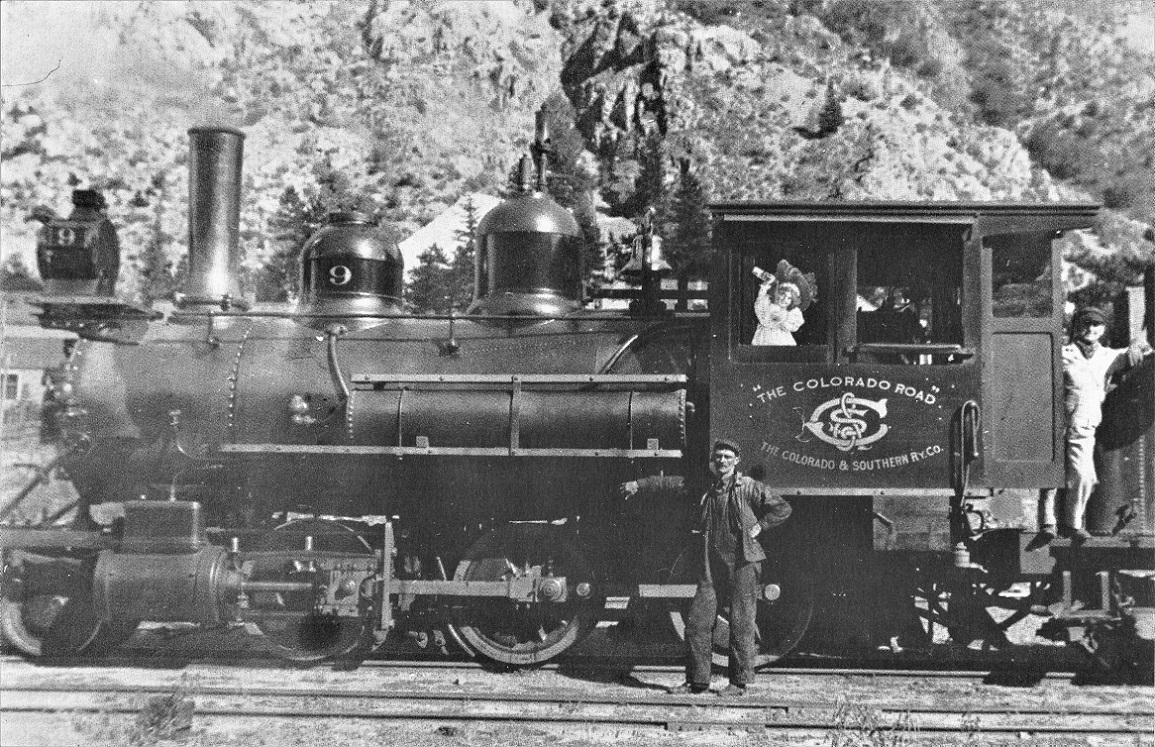 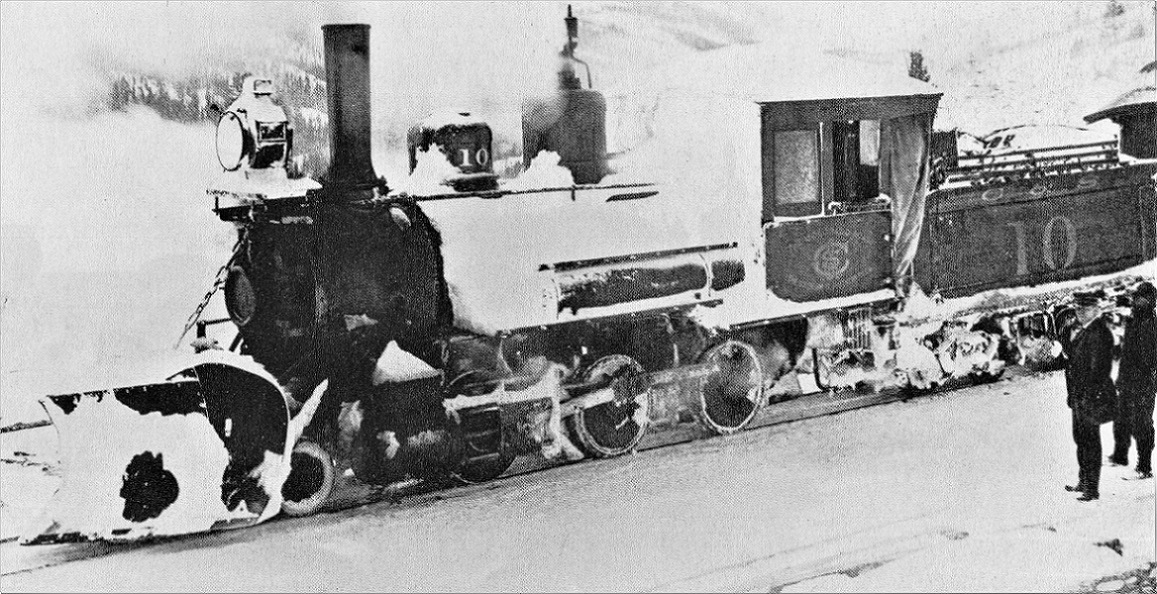 I have a set of domes for number 9, but the steam dome doesn't seat right, without machining. I will probably go for number 10, but since I'll be modeling summer, the pilot plow will be replaced with a wood pilot with link-pin couplers. The cab is from my Overland 1930's number 71 (the original number 5 cab is going to number 71 to back date it to 1924). The cab roof hatches have to go--I'm thinking of laminating thin brass shim pieces to represent a canvas covered roof. (May require a John Greenly consult for that). The shotgun stack is a turning by Derrell Poole from several years back. Anyways, it is a start. Bill Meredith at Leadville Designs kindly printed decal sets from his own artwork: 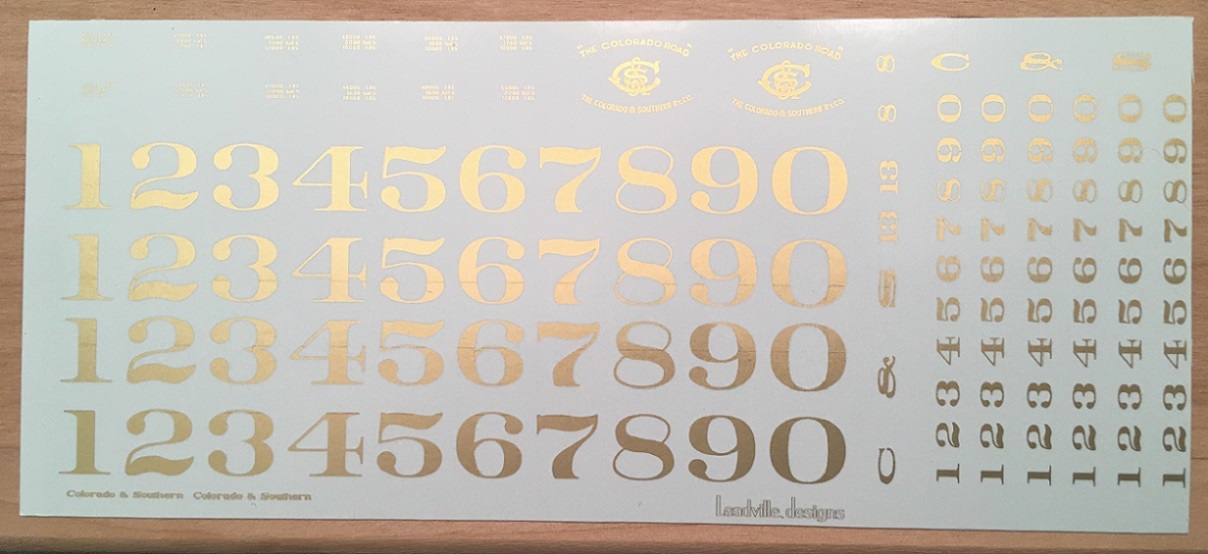 Remeber? Rick Steel said the columbine lettering was in gold, when he restored number 71 down to its earliest paint layers . . .
Jim Courtney
Poulsbo, WA |
|
In reply to this post by Keith Hayes
Seems like I cleaned my bench up just a few weeks ago and can now hardly find it!!
Although I bought these simple Walmart drawers for the counter behind my desk. They are to the left and I call them my project drawers. I use them to put all the parts and pieces of a project that get shoved to the back burner or as a organized place to put all the parts I am collecting for a future project. 
|
|
As far as work being done. Gilpin Shay #2 the "Russell" in HOn30 almost ready for decals and weathering. Cab and coal bunker are just sitting on it to make it easier. Started with a Atlas N scale shay. New superstructure, new, higher cylinders to get rid of the funky "nscale" look.
   
|
|
Not on my workbench per se, but a new room for my workshop and layout is almost done:
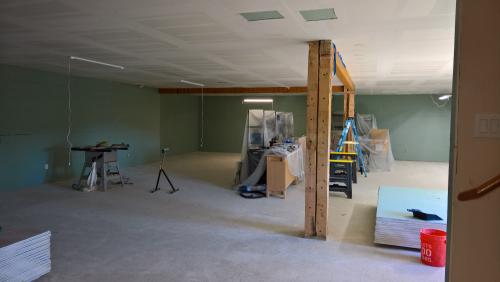 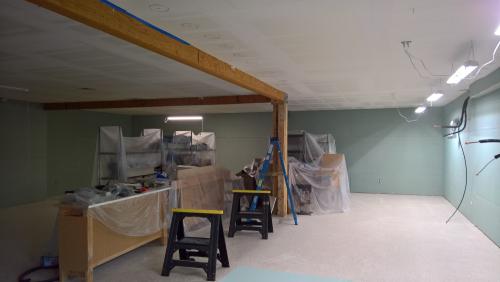 Teaching Texans both how and why to build basements proved more complicated than I expected, but I think it was worth it in the end. Steve Guty. Lakeway, TX |
Re: What's on your workbench, January 2020?
|
As an expatriated Texan, I can attest that basements are not a skill set of most Texas construction companies!
Jim Courtney
Poulsbo, WA |
|
Outside the hill country, I totally get that. But in the hill country, building out from the hillside and having a 12-20 foot tall retaining wall with nothing useful inside made no sense to me, so I found a builder who at least understood the 'cut and fill' logic.
The builder hadn't actually done one before, nor had the inspector inspected one (at least in Texas), so I'm glad I got a second opinion on the engineering load diagrams. 
|
Re: What's on your workbench, January 2020?
|
In reply to this post by Keith Hayes
After a long period of little progress we are now ready for reassembly of 1008’s new frame. We had to disassemble it to move it from our covered patio to the RV pad where the final assembly will take place. I have been adding the final touches to some of the parts and making sure we have everything on hand to begin assembly.
We decided to start painting some of the frame members just because it is easier to do before things are put together. This should also help protect the wood from the elements, mostly rain and sun (we are building a temporary covering as well). I am including a photo of the painted end beams. As I have mentioned in other posts I have learned a lot about woodworking making the parts for the frame and now I am learning about brush painting, mixing paint and paint additives. Because of my inexperience I have stripped, sanded, primed and painted these three times to get the finish I am now happy with. Hopefully we will start the final assembly of the frame by the end of the month. Richard Farmer 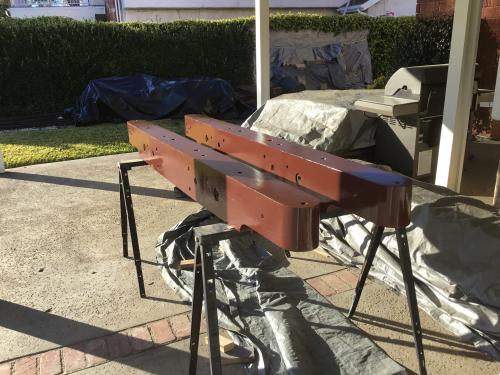 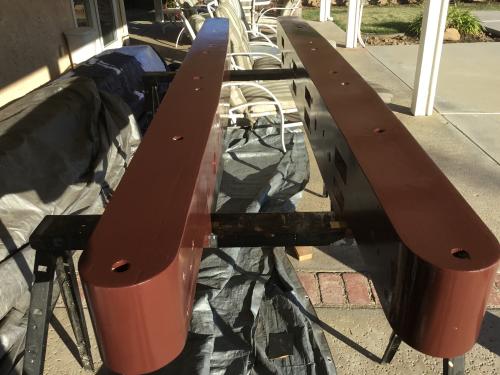 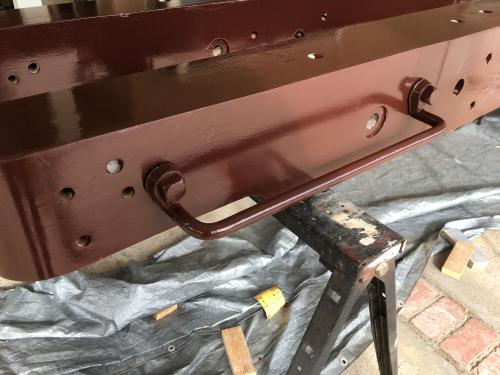
|
Re: What's on your workbench, January 2020?
|
Modeling in full scale. It just does not get any better than that ! 👍
"Duty above all else except Honor"
|
Re: What's on your workbench, January 2020?
|
That's for sure. It makes all these small things we do seem... well, small.
Beautiful work on 1008!!!! Can't wait to see more photos as it goes together. thanks, John
John Greenly
Lansing, NY |
Re: What's on your workbench, January 2020?
|
Administrator
|
In reply to this post by Jim Courtney
Jim, I found some years ago that if I used a deep well socket in a comparable diameter to a particular boiler, I could use heavy sandpaper around the socket to alter the diameter at the bottom of a dome casting so that it could be used. It takes a while, but you could probably fix that steam dome in an evening. I have also done this with a Floquil paint bottle.
These domes include sand domes on both #74 and #76, all domes on #537, and both domes on #7. Remember, when it comes to stuff like this, the old adage, "Where there's a will, there's a way" applies. I'd vote for #9! I have nothing on my "workbench" at the moment. Not that I don't have stuff to do..... |
Re: What's on your workbench, January 2020?
|
Happy New Year everyone.
I‘m experimenting with new tree material (Siflor) and tree building techniques. 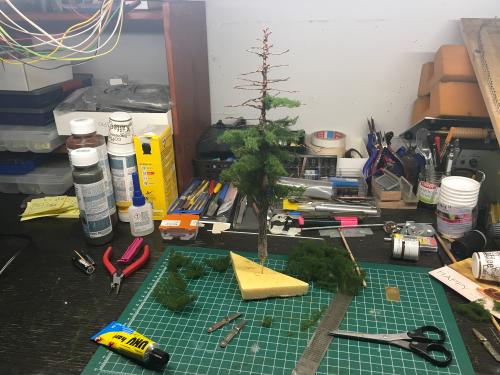 Christian |
Re: What's on your workbench, January 2020?
|
This post was updated on .
In reply to this post by Mike Trent
To clear the many fruit jars full of nails, screws, and gubbins from my
workbench, I moved a bunch of stuff around in the shop and built these shelves. 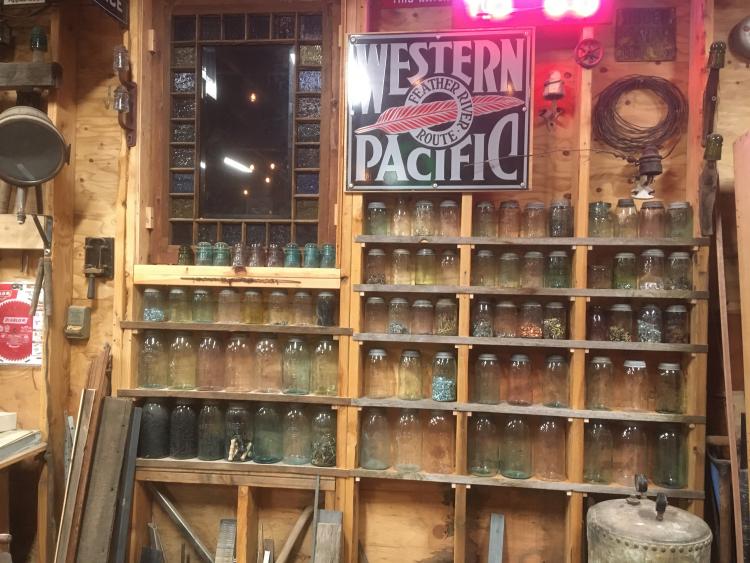
"Duty above all else except Honor"
|
Re: What's on your workbench, January 2020?
|
No one will be surprised to find out I’m still building picket fences….
|
|
You had better "pick" up the pace! Sorry Jeff, Couldn't resist.
More workbench cleanup. Sorted a bunch of stripwood also. 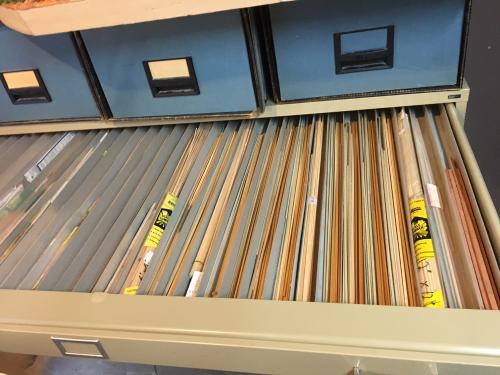 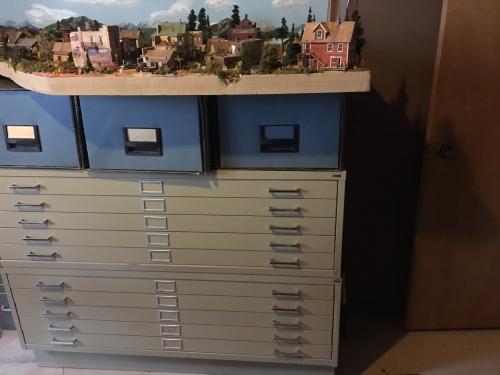
|
Re: What's on your workbench, January 2020?
|
In reply to this post by Jim Courtney
Finish samples or paint chips I removed from the top of 9's steam done in 2003 revealed olive green on the third later underneath the Chinese Red with 2 different shades of black between. In my eye I think one can see the green on the boiler jackets and the tops and bases of the sand and steam domes with black in the center in the second image of Jim's post. Wish I would have taken samples at that time from the cylinder jackets and steam chests to see if they were olive green also.
|
Re: What's on your workbench, January 2020? Early Cooke 2-6-0 paint schemes
|
Well, that's interesting, Jeff.
I interpreted the photo of number 9 c.1901 as a planished iron (Russian iron) boiler, dome tops and saddles, black dome centers, with light graphite smoke box. Your findings suggest a more colorful locomotive. Derrel Poole postulated, in Narrow Gauge Pictorial VI, that the newly rebuilt numbers 8 and 9 might have actually had green boiler jackets. He further suggested that the smoke box was graphite and oil, dark when originally applied, becoming lighter with time. 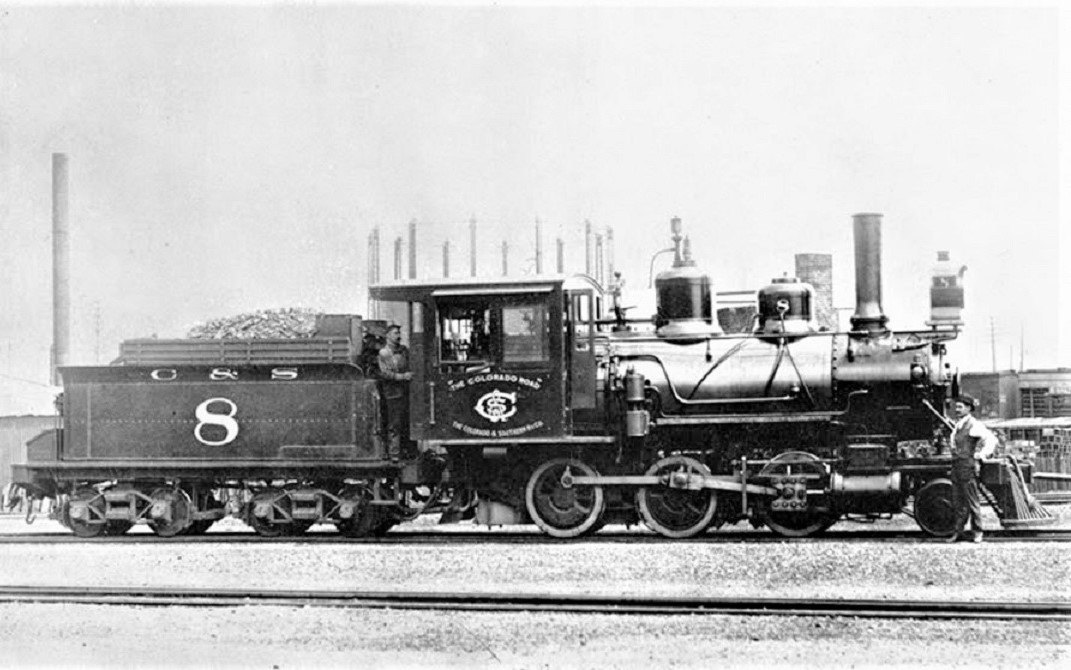 Dever, June, 1901  Platte Canon, after April, 1901 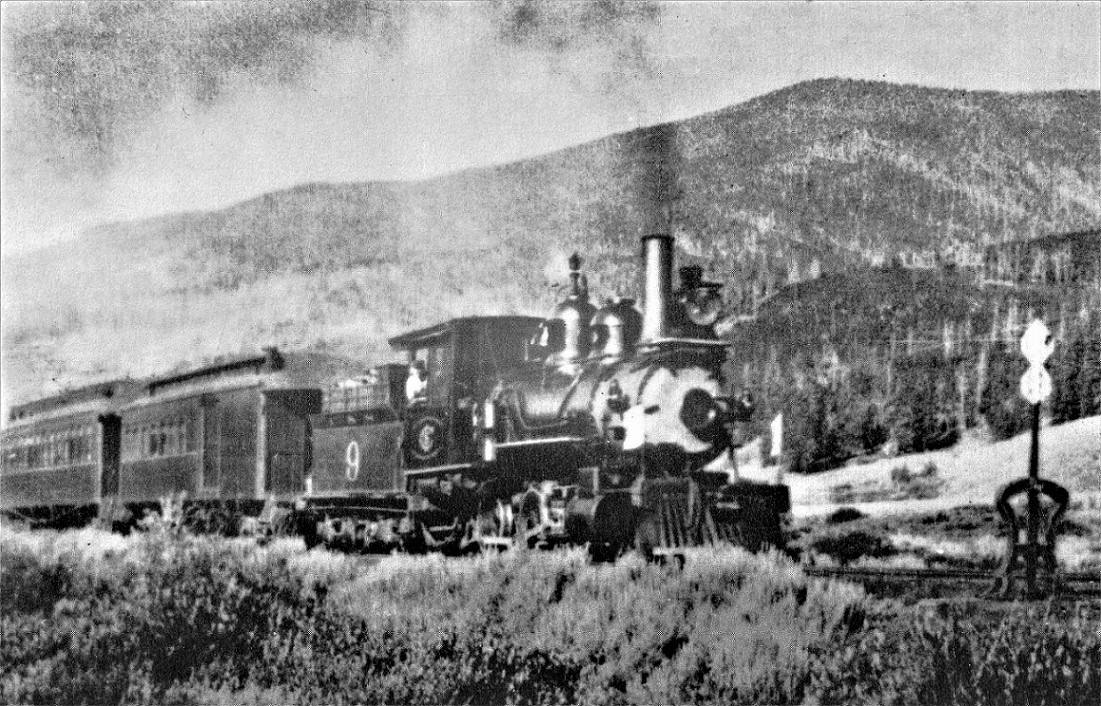 Pitkin,1901-1902. Your observation would fit with a green boiler jacket and dome tops/saddles. Back in a 1914 blog posting http://coloradosouthern.blogspot.com/2014/06/ropers-snapshot-saturday-no4.html, Derrell discussed theoretic paint schemes for the Cooke moguls in the first decade. He even painted his Overland "early number 5" with a Pullman green boiler jacket and domes: 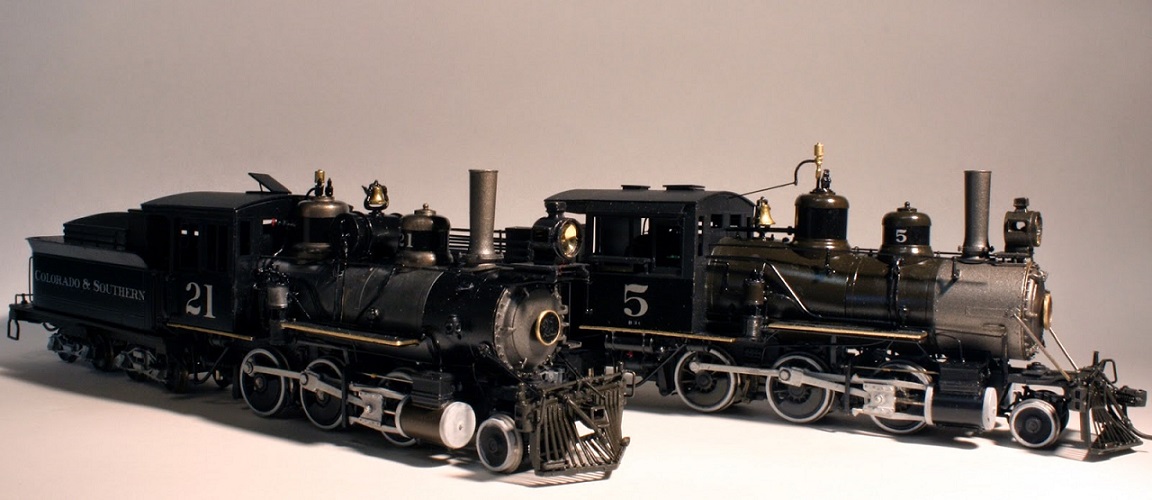 Admittedly, this is like discussing the color of Tiffany reefers from black and white photos. To me, the boilers look lighter, too reflective of light to suggest an opaque dark green, more in keeping with a light metallic color. I was planning to paint my 1901 number 10 like Mike Trent's number 7 before its rebuilding in July, 1902: 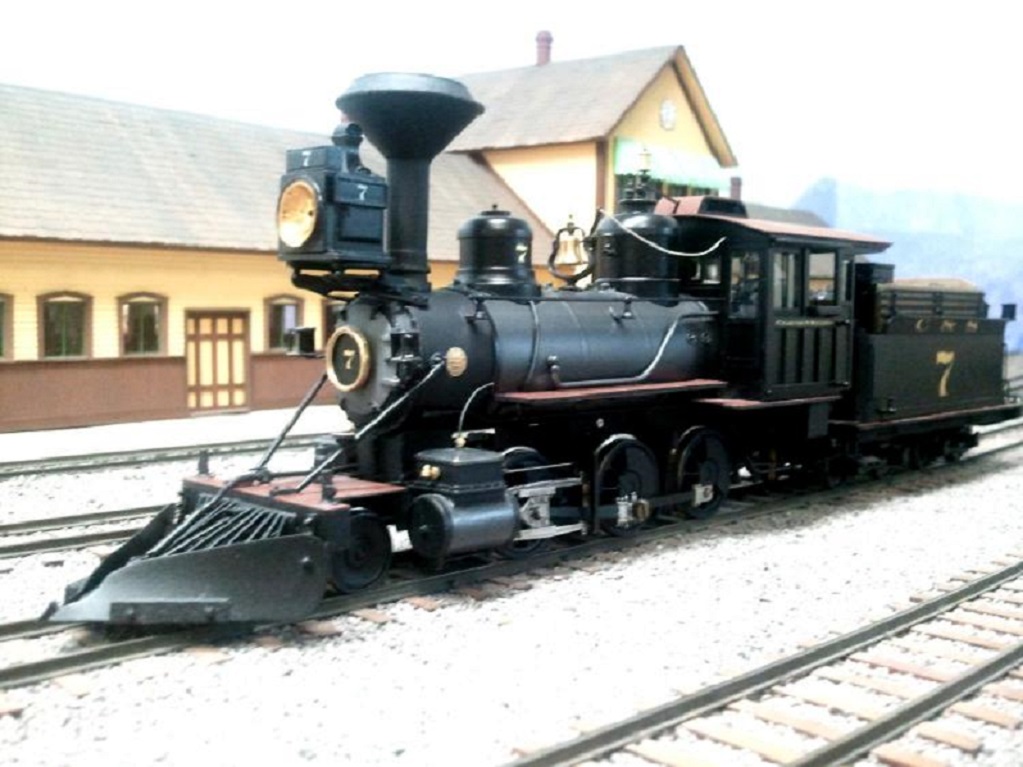 Does anyone know of any other written evidence that suggests green boilers on the Cooke 2-6-0's?? Or, in the absence of any other hard evidence, perhaps we should have a vote in what colors Jim's number 10 should wear, assuming that he ever finishes it . . .
Jim Courtney
Poulsbo, WA |
Re: What's on your workbench, January 2020? Early Cooke 2-6-0 paint schemes
|
<quote author="Jim Courtney">
...a planished iron (Russian iron) boiler, dome tops and saddles, black dome centers... Russian Iron and Planished Iron were anti-corrosion treatments for sheet metal. The dome saddles would be cast, so they wouldn't have this treatment. The tops would have been cast or formed from a heavy gauge material, which'll also probably wouldn't bre be planished. They may have been painted a color that looks similar to the planished iron in a B&W photo, and green seems to be a reasonable guess. The band would have been sheet metal of a gauge similar to the boiler jacket, so it could be planished iron, but I agree that it's much darker with a different story of reflectivity, so probably painted black. |
Re: What's on your workbench, January 2020? Early Cooke 2-6-0 paint schemes
|
In reply to this post by Jim Courtney
Am I imagining things or is there a calender girl cut-out mounted in the front side window of #9 's cab window in the Platte Canyon photo?
|
Re: What's on your workbench, January 2020? Early Cooke 2-6-0 paint schemes
|
This post was updated on .
Yes . . . and my interpretation of the B&W image is that she is a red head, wearing an emerald green hat, pouring a glass of light beer (not stout).
 The "Beer Girl" cutout, in the front fireman's window of number 9, likely came from a painted tin advertising sign. Anyone think that this could be the same girl?? 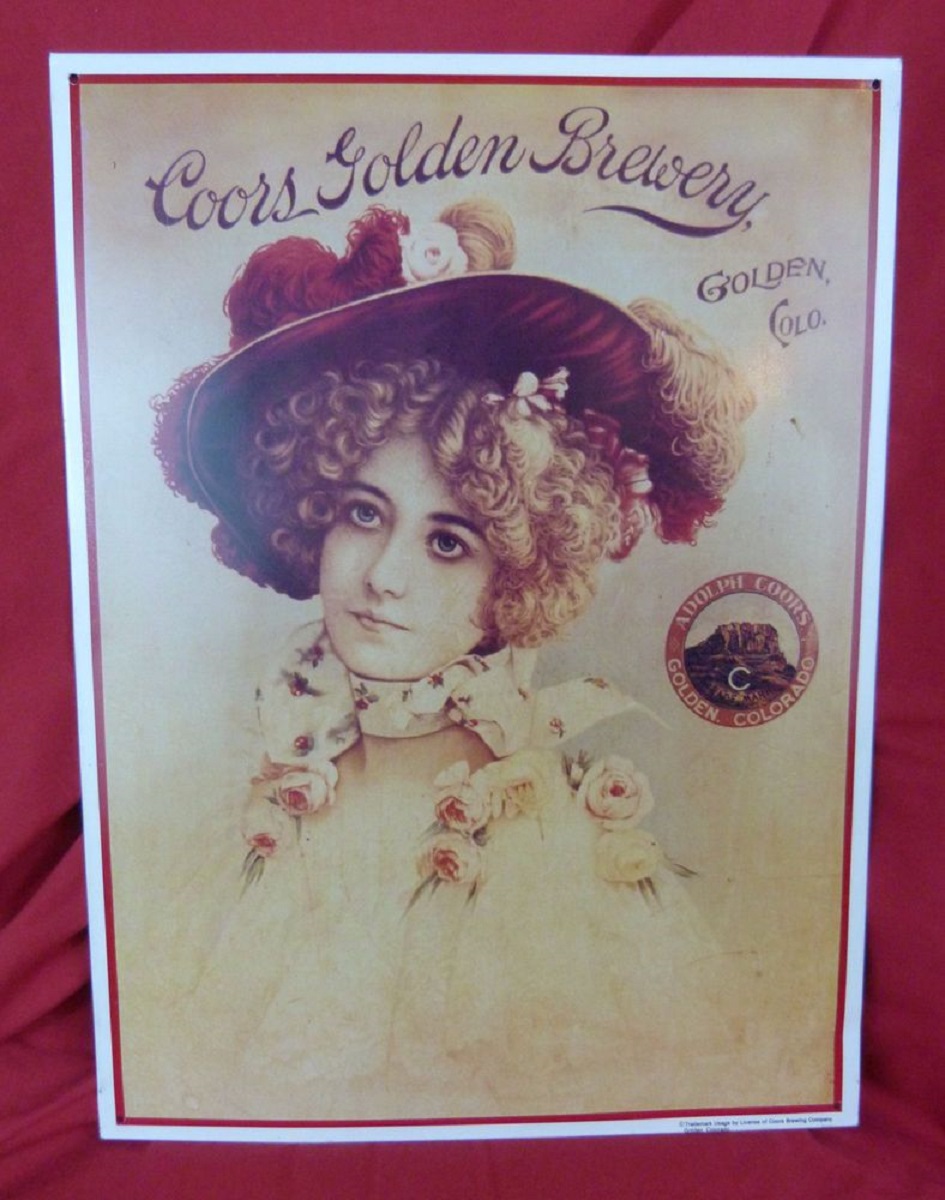 If so, she's a blonde and I got the hat wrong . . .
Jim Courtney
Poulsbo, WA |
«
Return to C&Sng Discussion Forum
|
1 view|%1 views
| Free forum by Nabble | Edit this page |

