Not Como Nevada
123
123
|
Don,
Thank you for sharing your work and your excellent progress. The scene captures the essence and spirit of the area so accurately and beautifully. Please keep the pictures of your work coming. I agree with the request to stage a C&S train in the scene. Lee Gustafson (we might have spelled it with a "v" but a long time ago it was changed to an "f") |
|
Thanks.
I will setup a scene with an C&S train next time I am out there. Normally I got out once a week to work on the layout. Took this week off. So next week I will have have a picture. :) |
|
In reply to this post by Don Gustavson II
As requested. A C&S train making its way up Kenosha Grade.
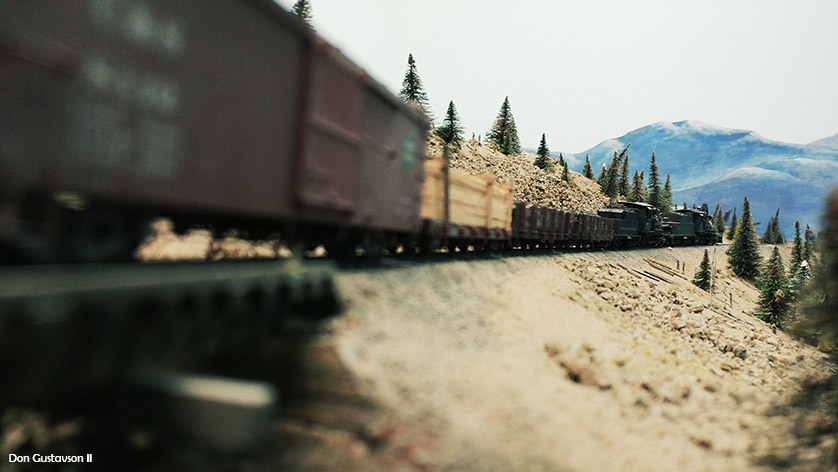 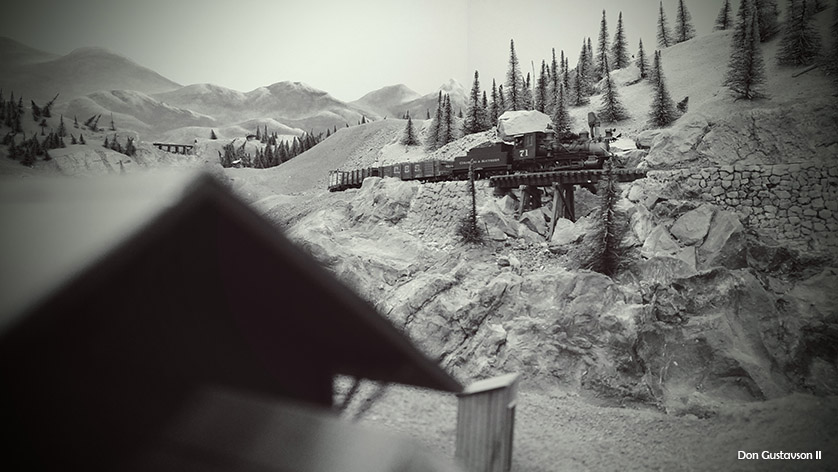 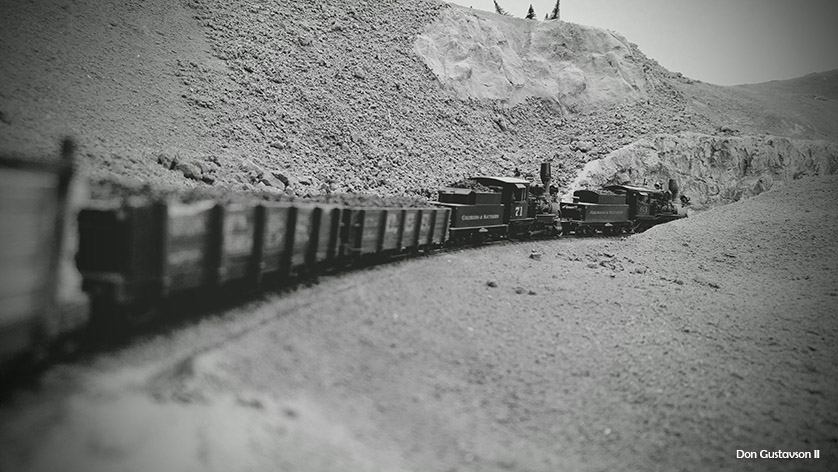 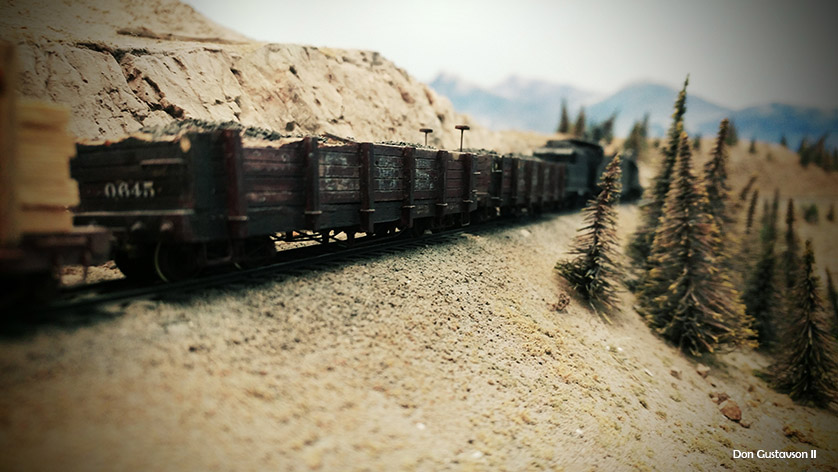 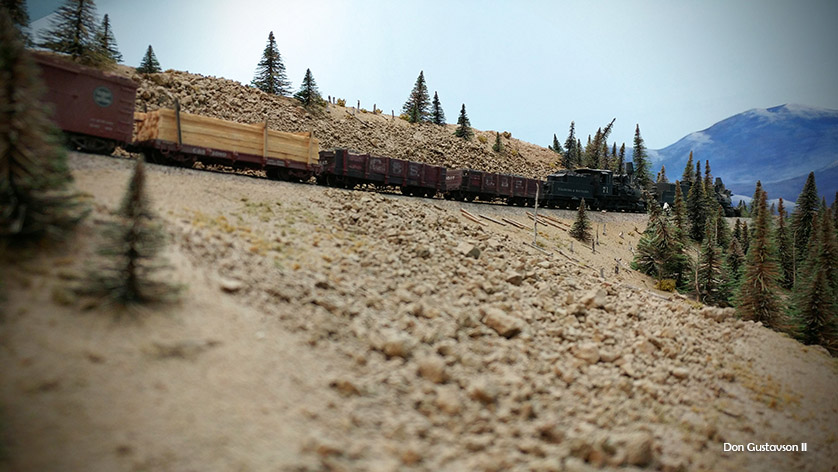  Hard to pick just one to post. These locos are DC. Hope someday to get them converted to DCC. |
|
Don,
Superb! great scenes. Your groundcover, rocks and dirt, are really wonderful. thanks, John
John Greenly
Lansing, NY |
|
Don,
Great pictures! I love the dead trees and stumps too. I’ve definitely got to get a few more of those going. Cheers, Jeff. |
|
In reply to this post by Don Gustavson II
Great pictures and scene.
Bill Uffelman
|
|
In reply to this post by Don Gustavson II
Excellent photos Don!
I really like your talus slopes. You and Jeff are doing much to inspire us C&S modelers to get on with building scenery. Even if it's just a module. I look forward to your ongoing progress. Jim
Jim Courtney
Poulsbo, WA |
|
I am new to this group and forum. I am a fan of the C&S/DSP&P. I am really impressed by your photos. The ones of that train going upgrade on Kenosha pass seem so real! Your rebuild of that excellent layout is totally amazing. Keep up the good work!
Fred aka Oldbear52 |
|
In reply to this post by Don Gustavson II
Don,
Thanks for the excellent models, scenery and photos. The staged train looks outstanding. Again, thanks for sharing your work. Lee Gustafson |
|
In reply to this post by Don Gustavson II
Sweet photos, Don. You capture the South Park well. If Brother d has not asked, you should submit a package to him and have your pike added to the main page.
Keep on keeping on.
Keith Hayes
Leadville in Sn3 |
|
In reply to this post by Don Gustavson II
Thought I would post a couple of pictures of the room our C&S layout lives in.
It shares a room with a Standard Gauge (HO) layout we obtained from a distant relative that passed away. This layout was started around 1970 in Downey Ca. We moved this layout to Nevada about 3 years ago. Took us a week to cut up and load the layout. Had to label and cut a lot of wires. The fact that we got it put back together and running is amazing. It is all DC with some ancient electronics. We are updating things here and there. It now has less 1970s coil switch machines then it did. 
It has a lower yard that runs the length of the layout we have not put back together yet. Waiting to change out more switch machines. Other then that, it is all operational. Just needs more scenery repairs. Plus we are adding some track to it. It has a lumber yard on it. Witch is why I am going to try and squeeze in a little bit of logging onto the C&S layout. And a saw mill somewhere in between. 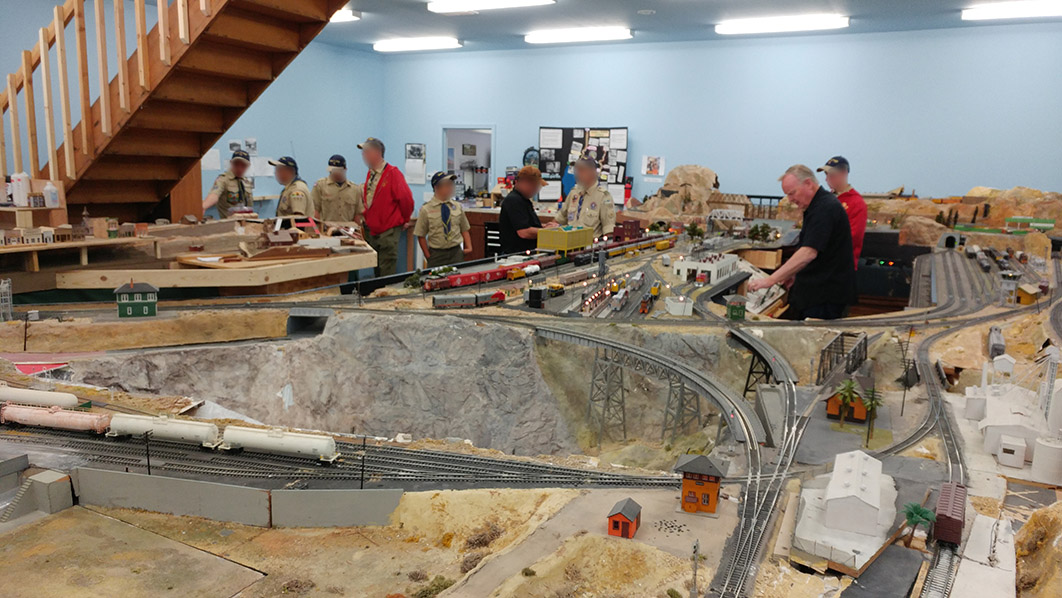
We had some Boy Scouts over to check out the train. 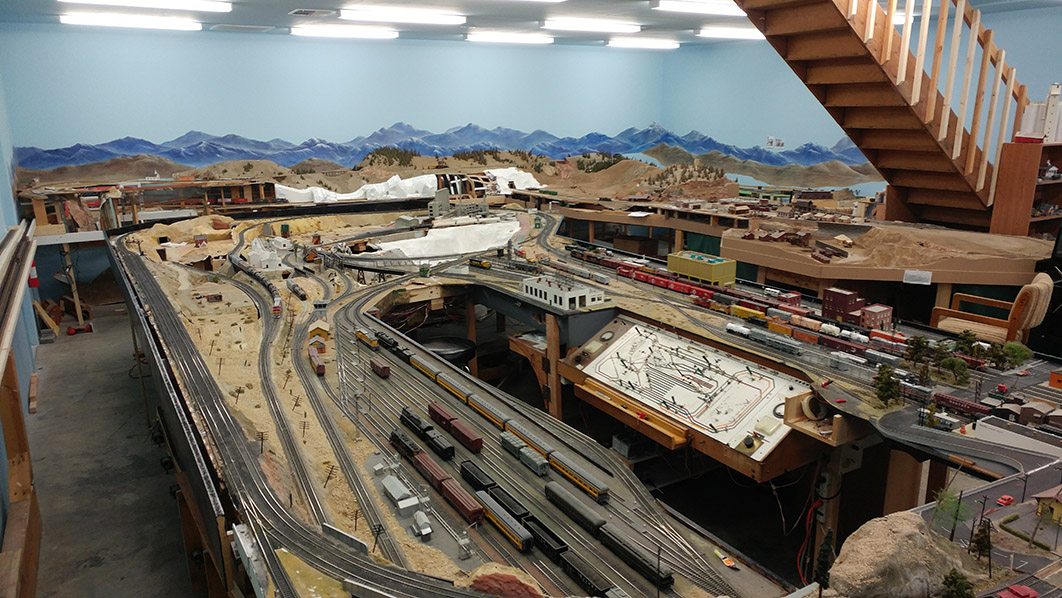 I have started what I am loosely calling Buena Vista. Making this because there was Duel gauge from what I understand. This will connect the two layouts. HOn3/HO. We will have a Standard gauge track that will go around the parameter of the entire room, 75% in place now. You can see a narrow strip of this line on the left side of the above photo. This will connect the two layouts. 20% or so will be Duel gauge. (keep in mind 15% of percentages are made up on the fly, or maybe that is 85%.) In the picture bellow we have extended the front of the existing C&S layout to accommodate the Standard gauge mainline. The nice thing about making Buena Vista, is it gives me a nice opportunity to make the Colorado Midland Railroad Tunnels north of Buena Vista. I hope to focus on this area of the layout for the next few work nights. Want to get it a little more presentable. (May be headed to Sacramento for more Hydrocal) "Some Place in Co." Not sure what it will be. On the HOn3 part of it, there is a Reverse Loop just to the left of the photo (I love DCC. DCC Specialties PSX-AR). There is a siding for a station. And it will have a spur for the top end of a Mill. A short but tall bridge from the original layout is here. And a longer bridge will be built also. The bottom end of the Mill will have two Standard gauge spurs serving it. It will have canyon walls like you might see in Clear Creek Canyon. I may post a picture sometime. But it is real ugly right now. 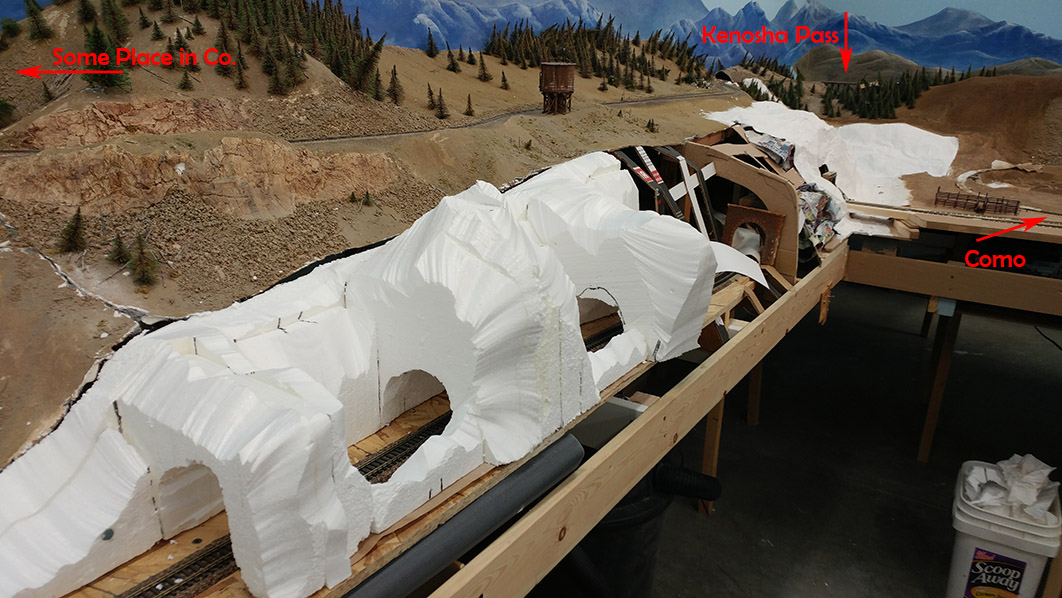 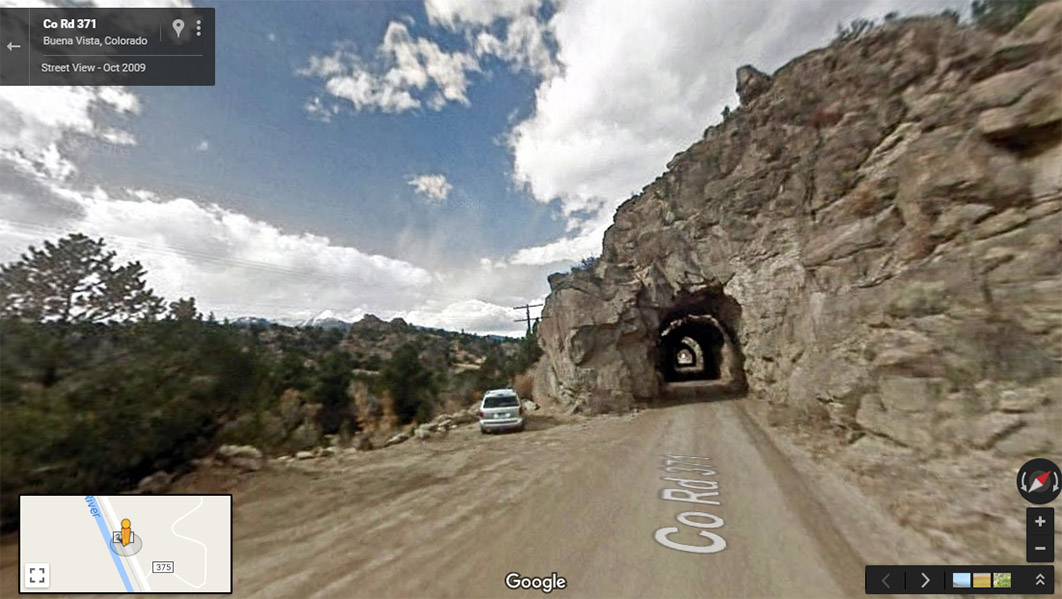 https://www.google.com/maps/@38.8756332,-106.1454759,3a,75y,321.94h,95.42t/data=!3m6!1e1!3m4!1sYEl7COggNEga5f6EnhCkEw!2e0!7i3328!8i1664 |
|
We badly need a close up photo of that C&S water tank, to the left of Kenosha!
Jim Courtney
Poulsbo, WA |
|
Here you go Jim.
Full disclosure. I did not build this. It was on the original layout we got. I will be doing a little repair work on it. 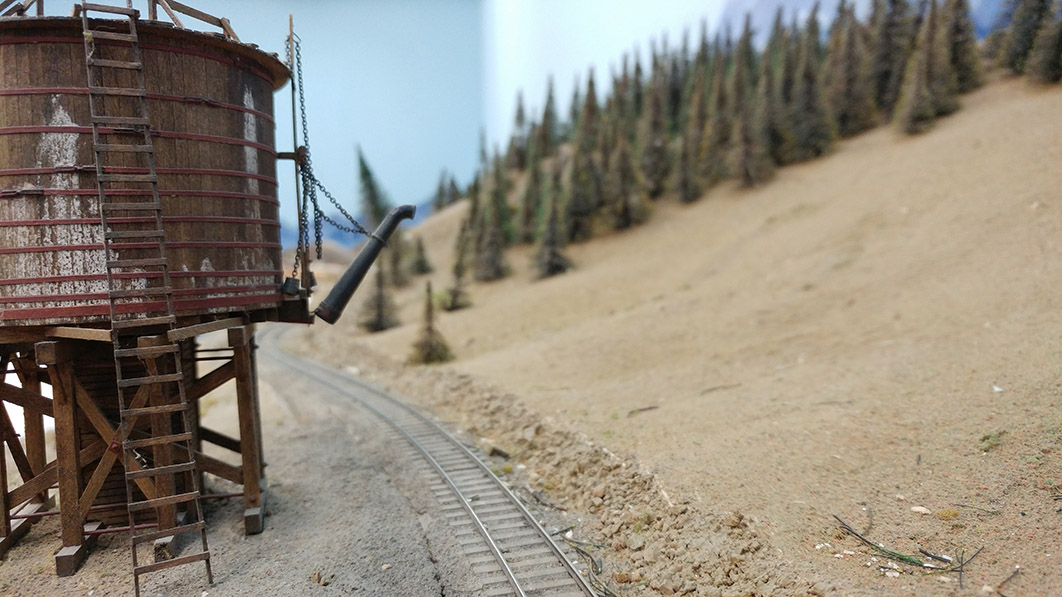 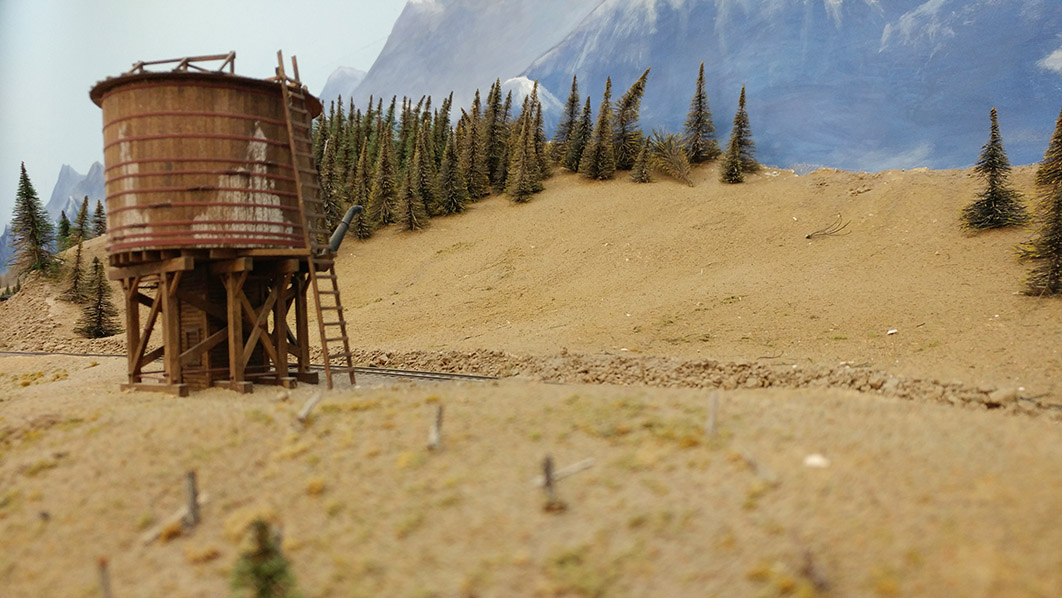
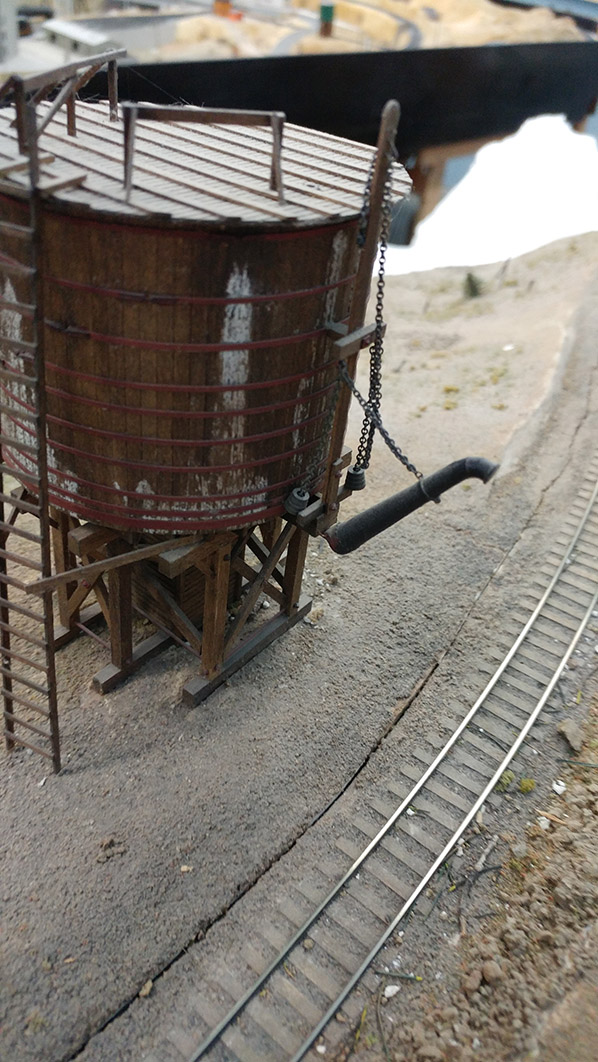 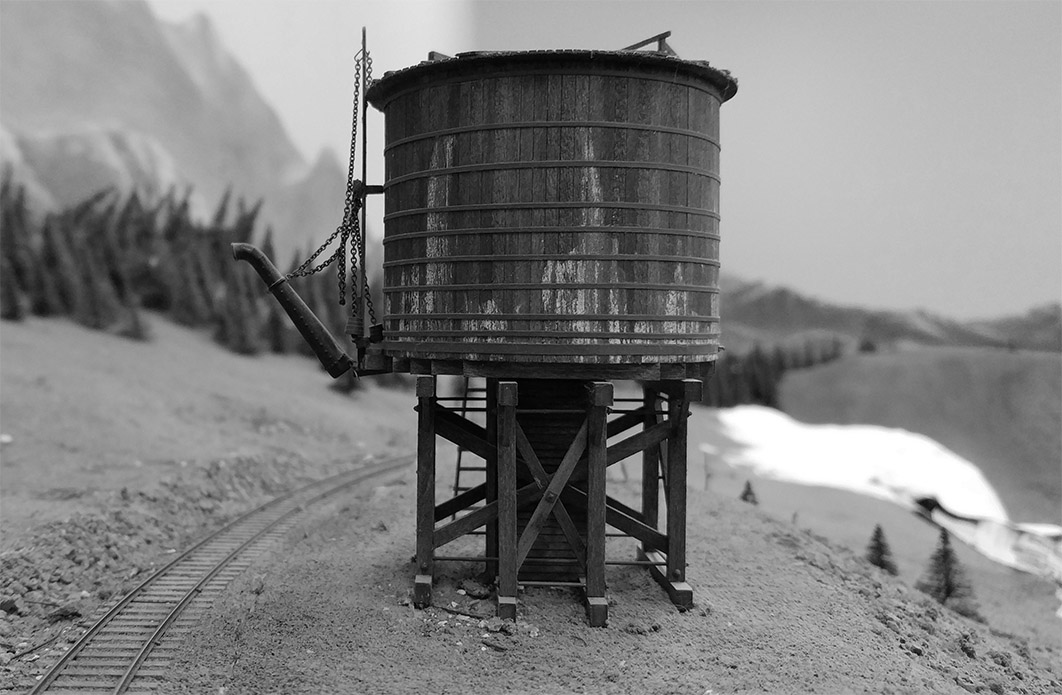 I had wondered if this water tank on my layout was modeled off of a C&S prototype / Photos. So the cool thing is that back on the "Ten Mile Stations of the D&RG" thread a couple of water tanks showed up there. And I can now say that mine was modeled after them (or real close to them). Same curve in the track. Same slope on the hill. I am excited!  At some point I will add some brush, a few more trees, and some power poles and try and recreate this first photo. (Less the snow and Ice) 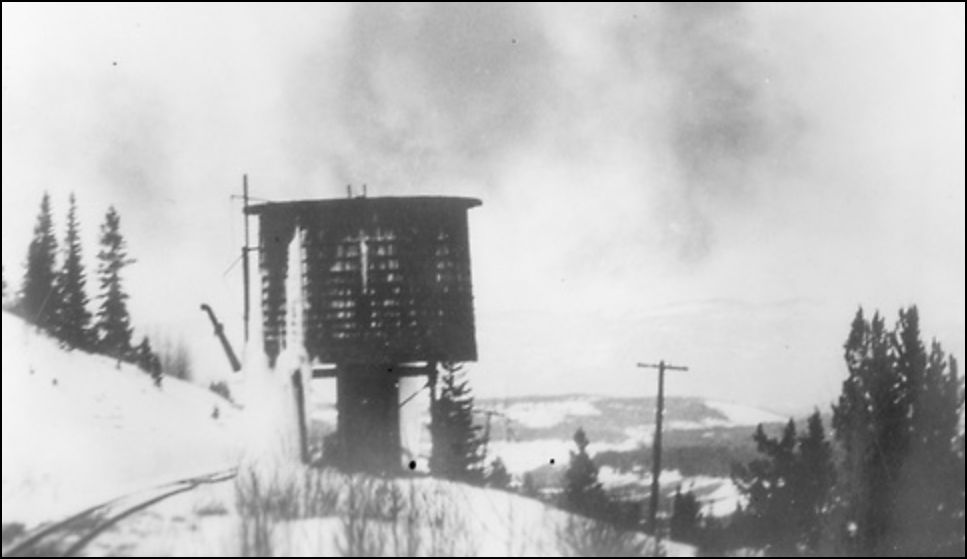 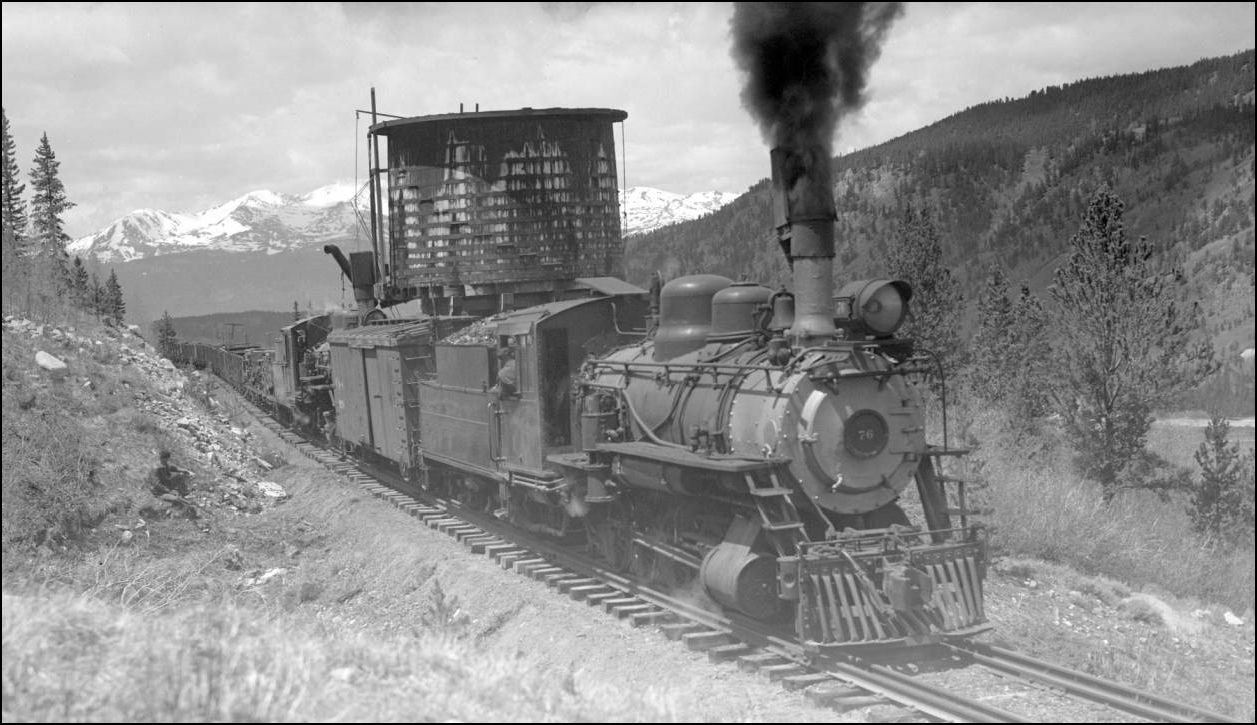 Re-Posted from the "Ten Mile Stations of the D&RG" thread. |
|
An update on my Tunnels.
It is a Standard gauge main line going through them. And I am modeling it based off of a section of the Colorado Midland Railroad. But it is the new front edge of my C&S layout. So I feel somewhat justified in posting updates about it here.  Plus it may give someone ideas on "How To". Keep in mind. It is not "How you should do it". It is just the way I am doing it. Plus it may give someone ideas on "How To". Keep in mind. It is not "How you should do it". It is just the way I am doing it.
On the left end of the Tunnels and picture, the base is layers of Styrofoam, cut with a hot wire. The tunnel portals are bigger then needed. This will give me room to do rock mold castings on the inside. The right end is wadded up paper. (More then one way to build a mountain.) I like the controlled randomness the wadded up paper gives you. The Styrofoam gave us more control over how the tunnels will look. I cut strips of "Printer paper" into thirds. Laid out more then I needed all around me. None of it stacked.(Real hard to seperate paper with rubber gloves and Hydrocal all over them) I then mix up a wet mix of Hydrocal. It will start to thicken up soon. May need to add a little water if you can't keep up with it. Dipped the paper in and laid out strips where needed. 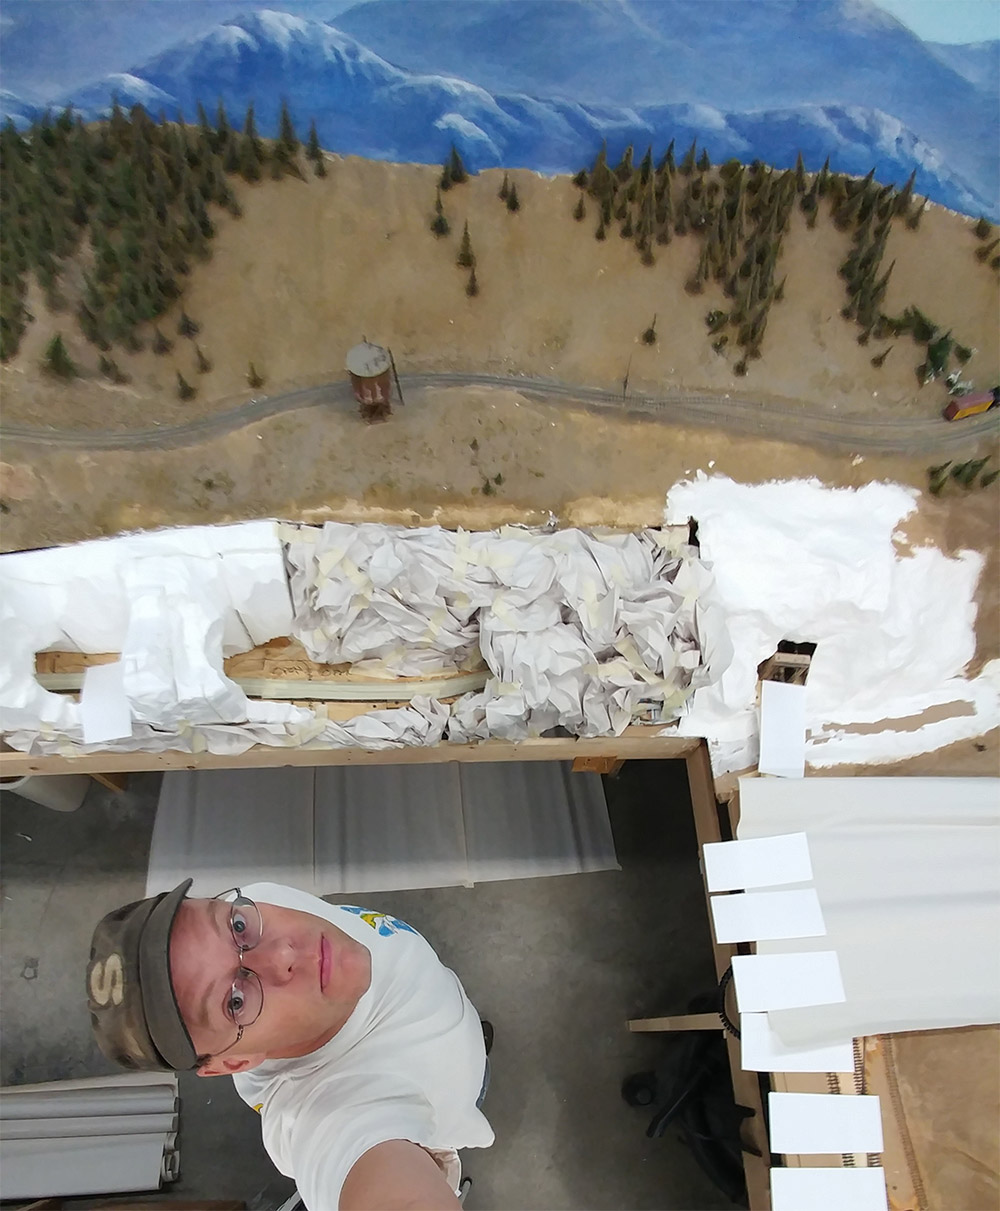
Oh. And be sure to cover up any tack, or anything else you don't want to spend hours picking out Hydrocal from. 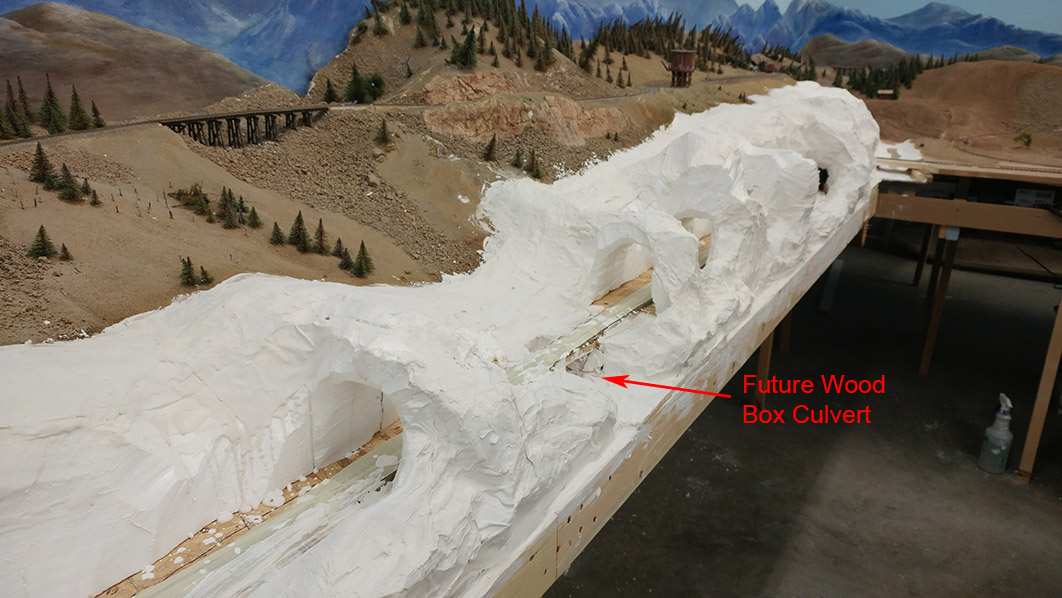 In this case. We are joining new Scenery with old. I took a wire brush to about 2 inches of the edge of the existing scenery. Down the entire length of the edge. I then put a wet layer of Hydrocal on it. This gives the new scenery something better to stick to. It is a good idea to lightly spray down any areas you are going to apply Hydrocal to with some water. Then I laid out strips of paper dipped in Hydrocal across the gap between old and new scenery. Let it dry some and adding more layers where needed. And smeared extra Hydrocal over it. Thickens it up and makes a better transition. On the area where I am laying strips of paper over wadded up paper, and it is steep. Greater then the angle of repose. I build up a few layers. As later on I will be pressing a rock mold onto it. So it needs to be strong. Looking at this angle now. I really like how you do not see the Standard gauge track itself. But when a train rolls through the tunnels, you will see that. Worked out well I think. 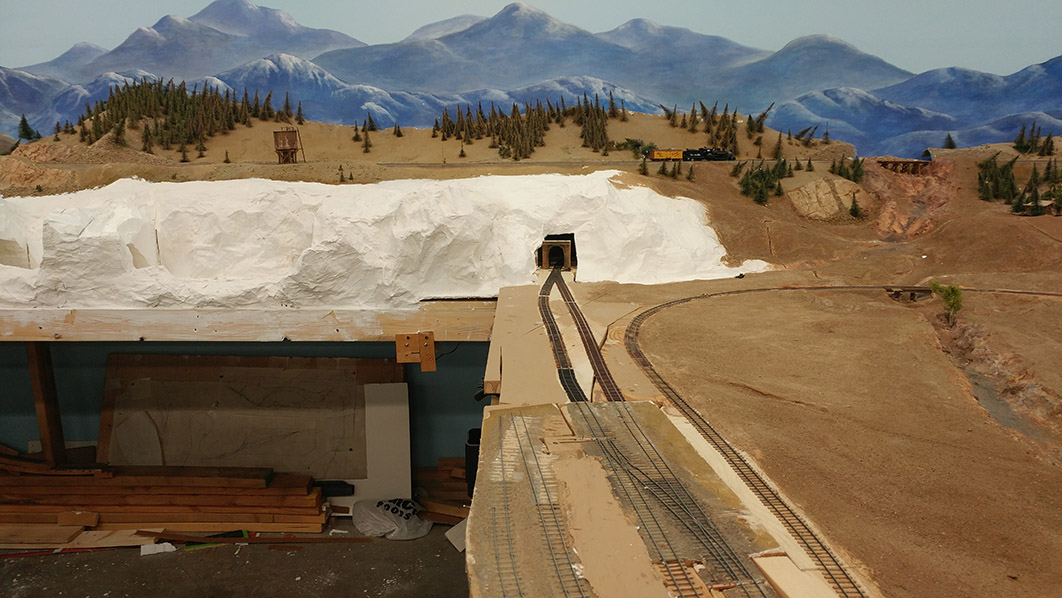 Next I will be spending a lot of time doing rock castings on any area that is greater then the angle of repose. Doing things with Hydrocal will make your layout heavy. Just warning you. |
|
Great pictures, Don.
But with every new set of photos that you post, there always seems to be a new C&S narrow gauge "tease". I'd love to see some closeups of that wood trestle to the left of the water tank. Given the proportions, it sure reminds me of the Selkirk trestle on the east side of Boreas Pass. Keep up the good work and keep those photos coming! Jim
Jim Courtney
Poulsbo, WA |
|
Jim,
I think you know my layout better then I do. I am going to call that bridge the "Selkirk Trestle". I am thinking that the original creator of the layout modeled this Trestle after the prototype. This Trestle is just a few feet away from what was Boreas Pass on the layout. (was not able to keep that part of the layout.) I did not have time to load it up with Locomotives, but here is a picture. 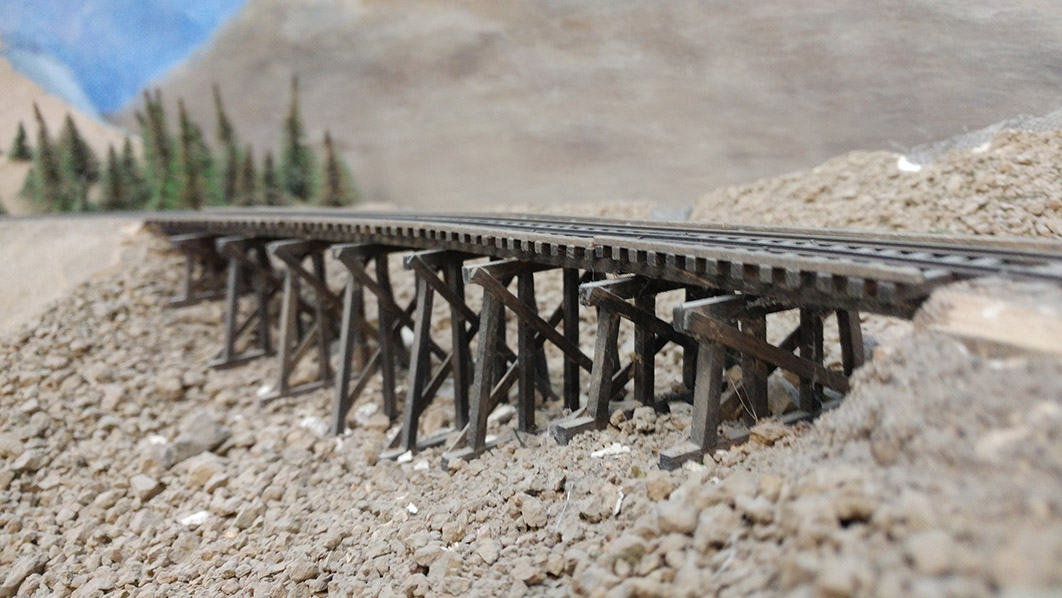 May be one Bent short. There is some kind of support at the near end. 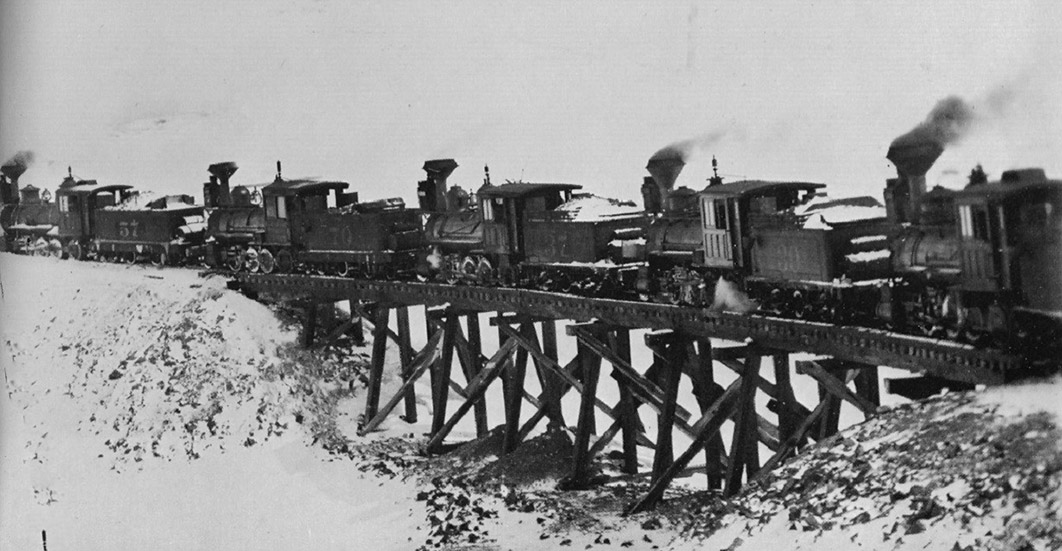 I like the two piles of dirt/? in the middle on the ordinal photo. Maybe a detail I can add. Thanks Jim. |
|
In reply to this post by Lee Gustafson
A quick update. Was able to get rock molds up and painted. Did about half of my tunnels. Ran out of Hydrocal.
It is not done. More detail to be added. 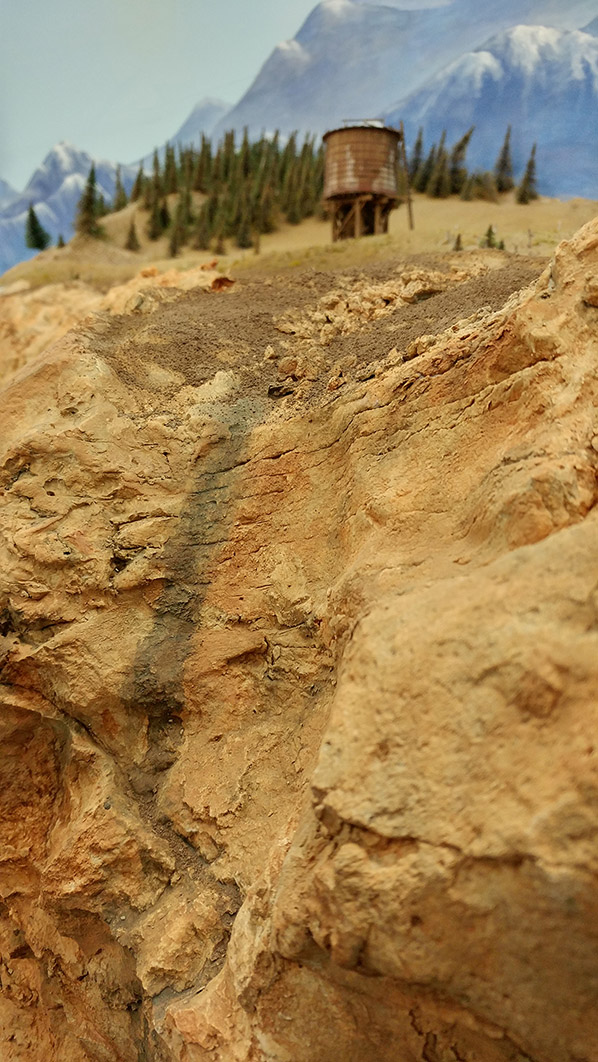 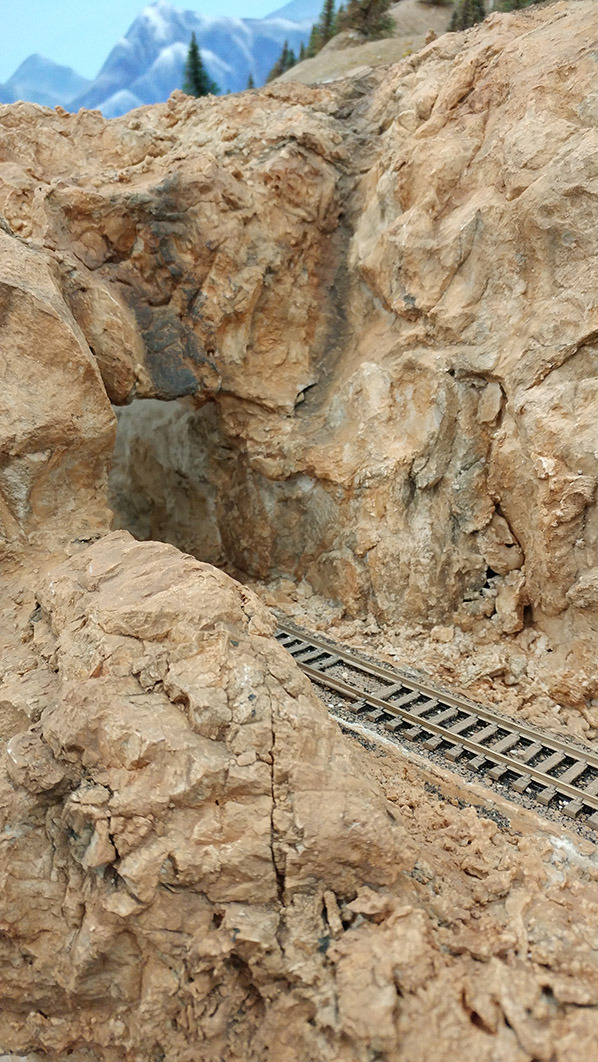 The dirt is a little dark in the picture. It was wet at the time. Just ignore that standard gauge track. (It has to go somewhere)  Still need to do some of the inside of this portal. My painting I think turned out better then my last set of rock molds. I thinned the paint out a lot more with water then before. |
|
The rocks look great, Don!
Cheers, Jeff. |
|
Thanks Jeff.
We have an open house this weekend. Part of a layout tour in our area. So I have been making a big push to get at least some more basic scenery done. Now I just have to put a locomotive back together, clean the room up, clean a lot of track, then see if the layouts still work. God bless my Wife for understanding. 
|
|
In reply to this post by Don Gustavson II
Don,
Your color selections and matches are excellent as are your casting selections and matches. You have under taken a significant scenery project and it looks great. Keep up the excellent work and photos. Best wishes on the open house. Lee Gustafson |
«
Return to C&Sng Discussion Forum
|
1 view|%1 views
| Free forum by Nabble | Edit this page |


