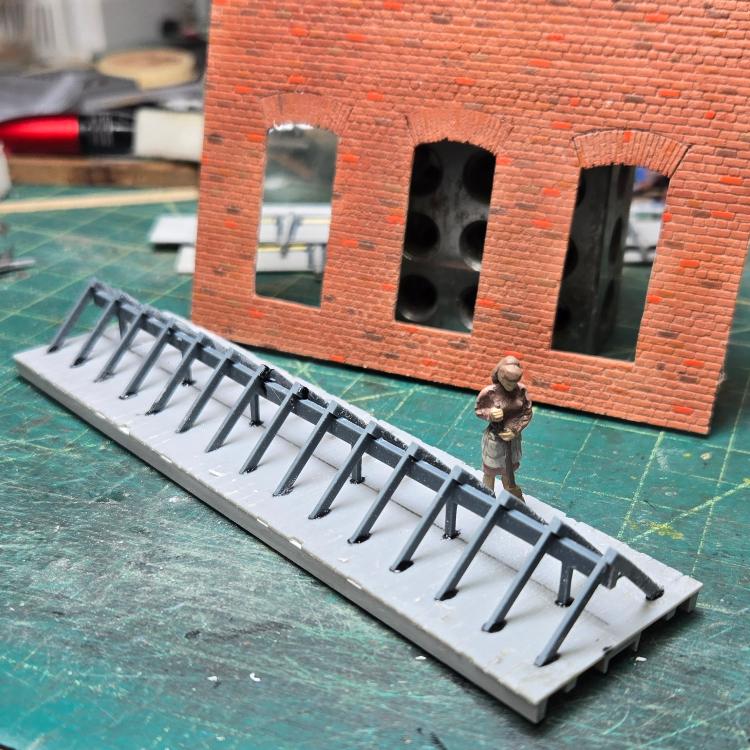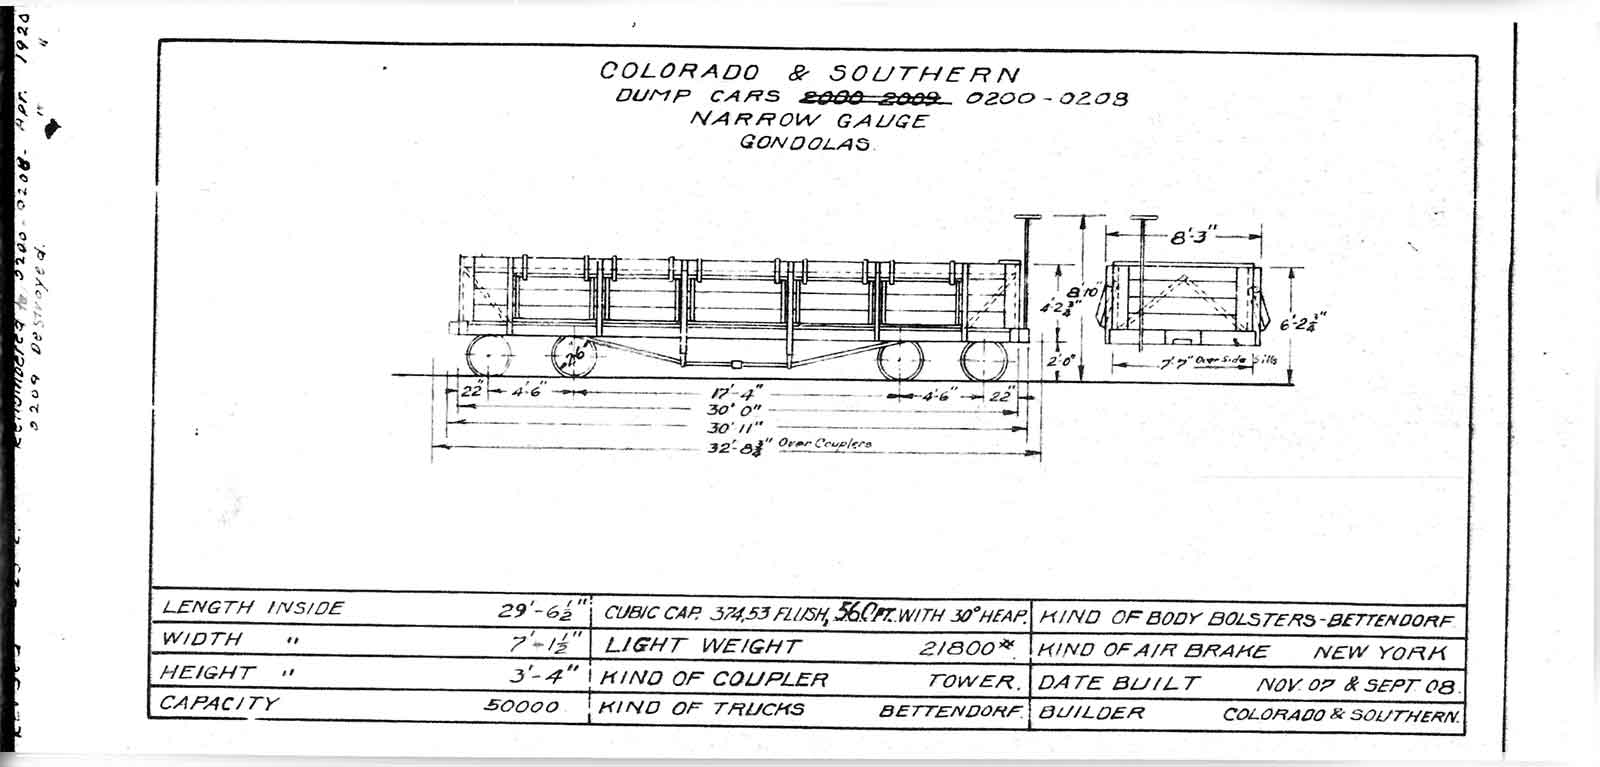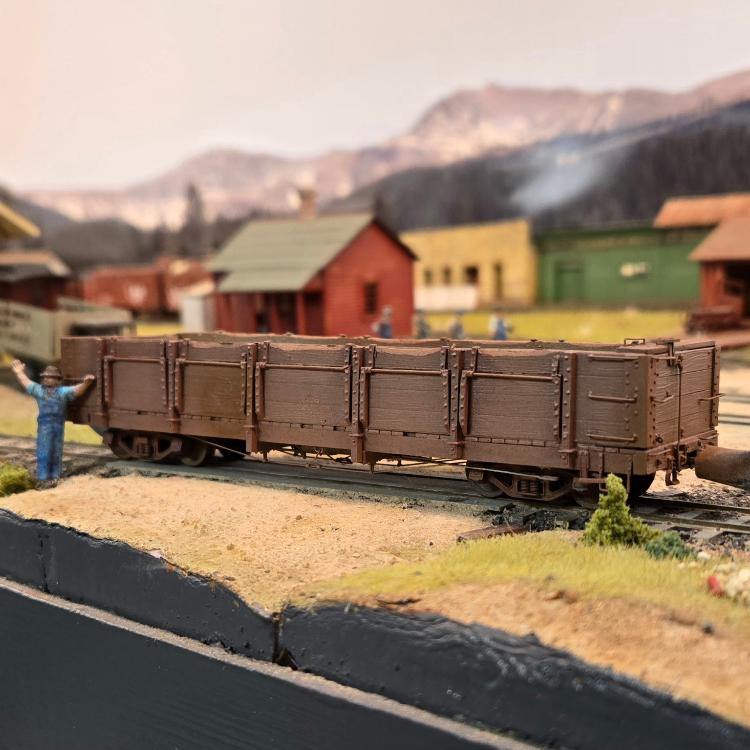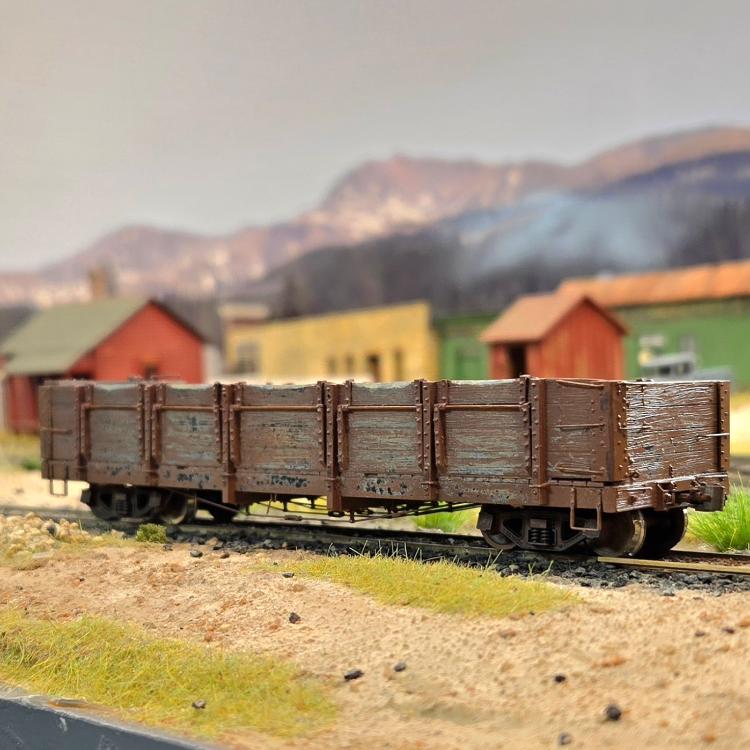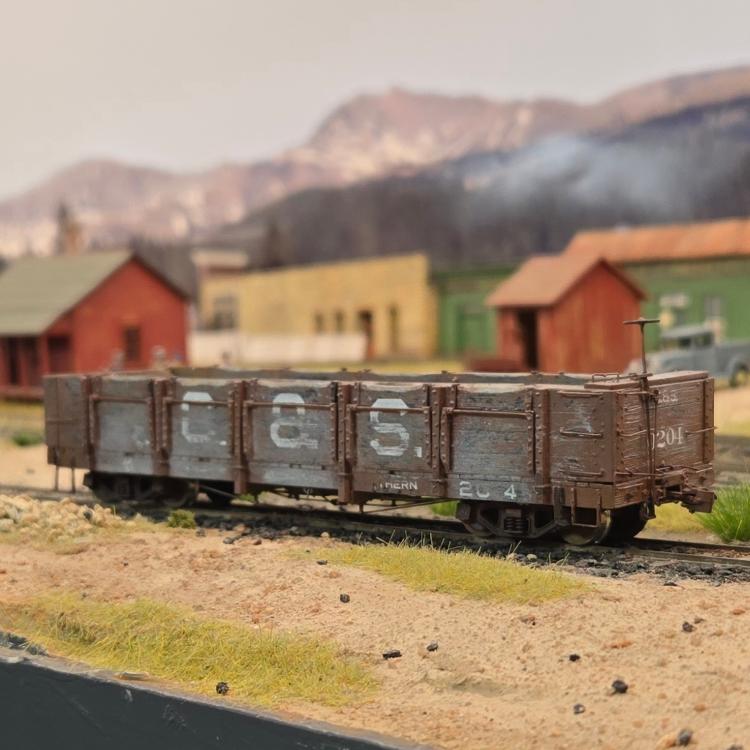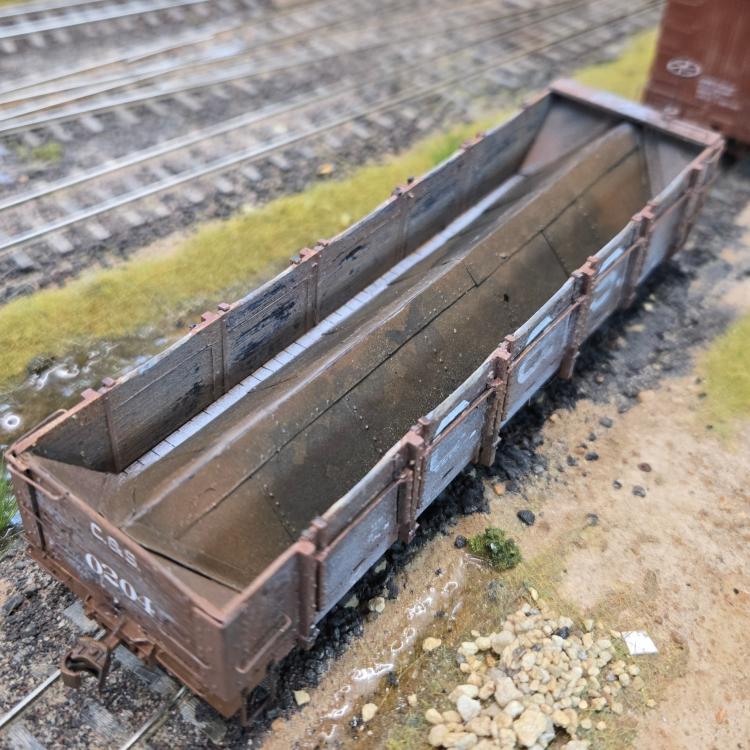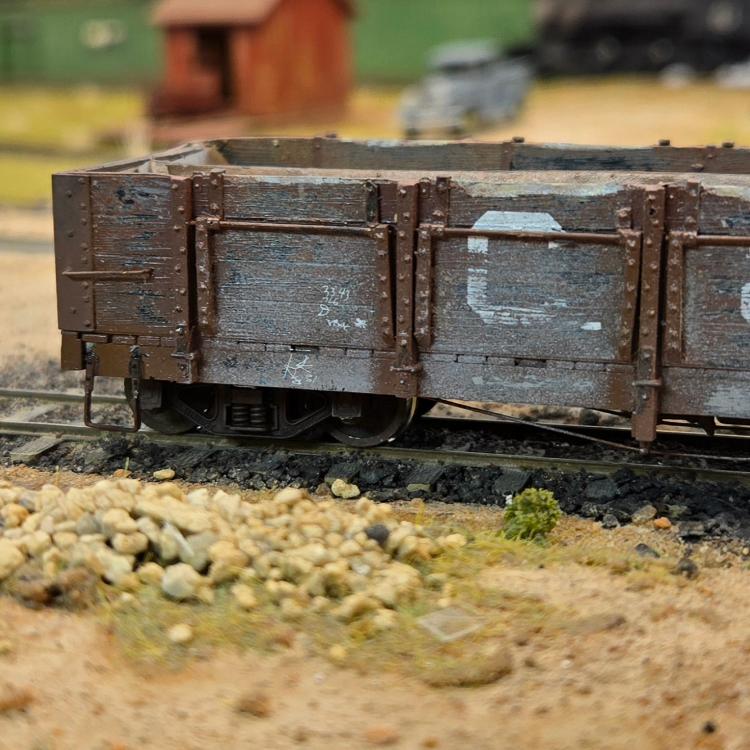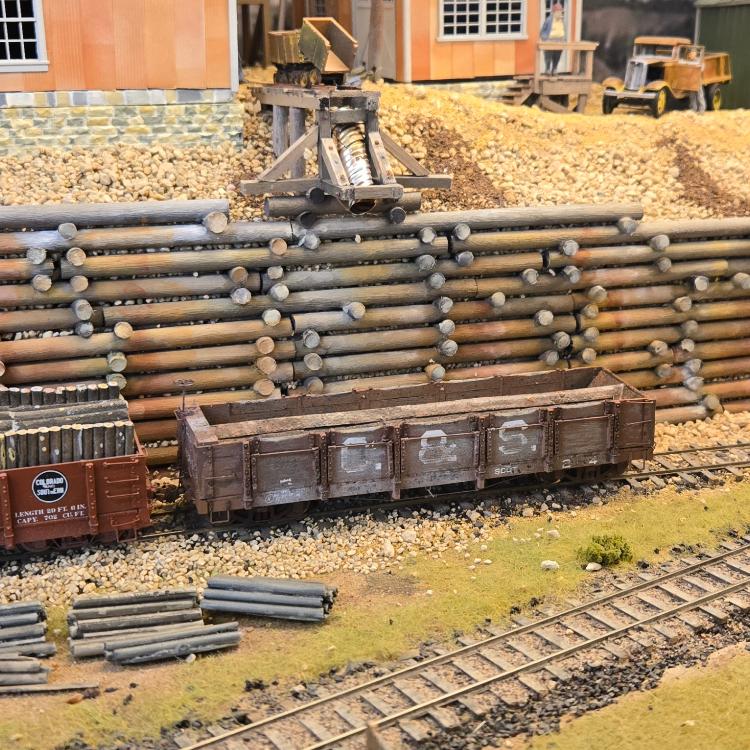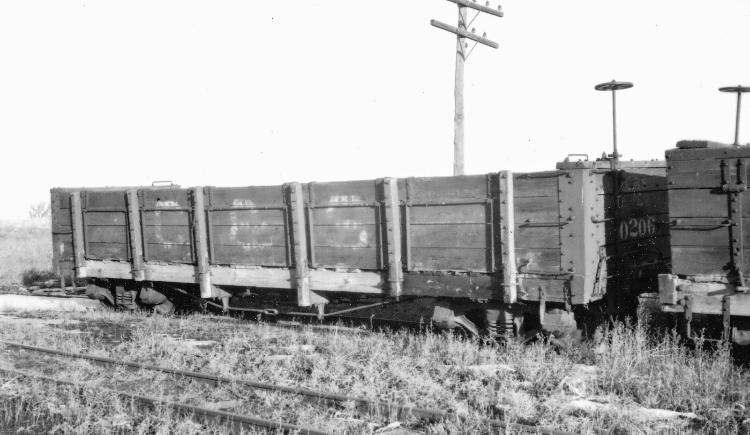
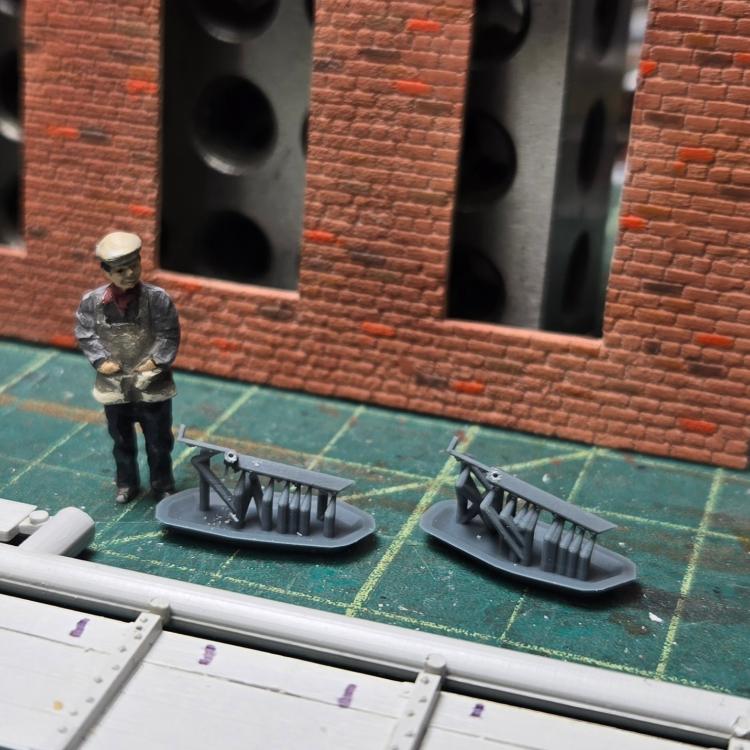
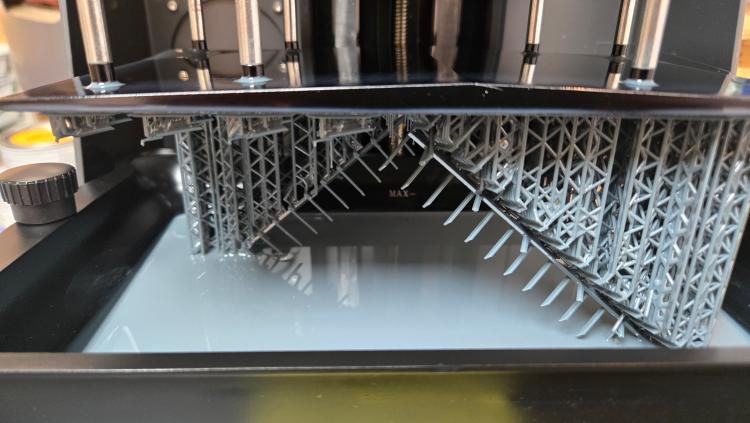
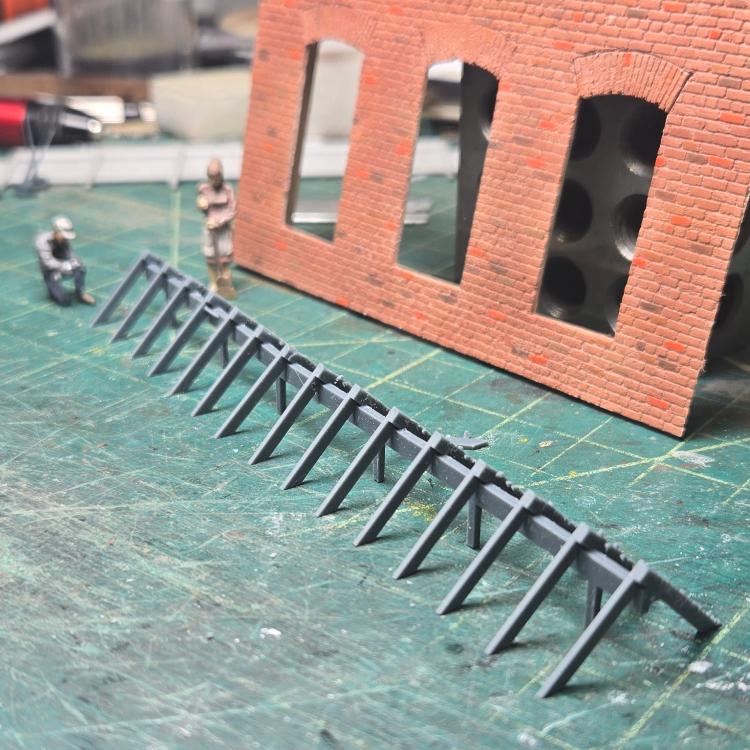
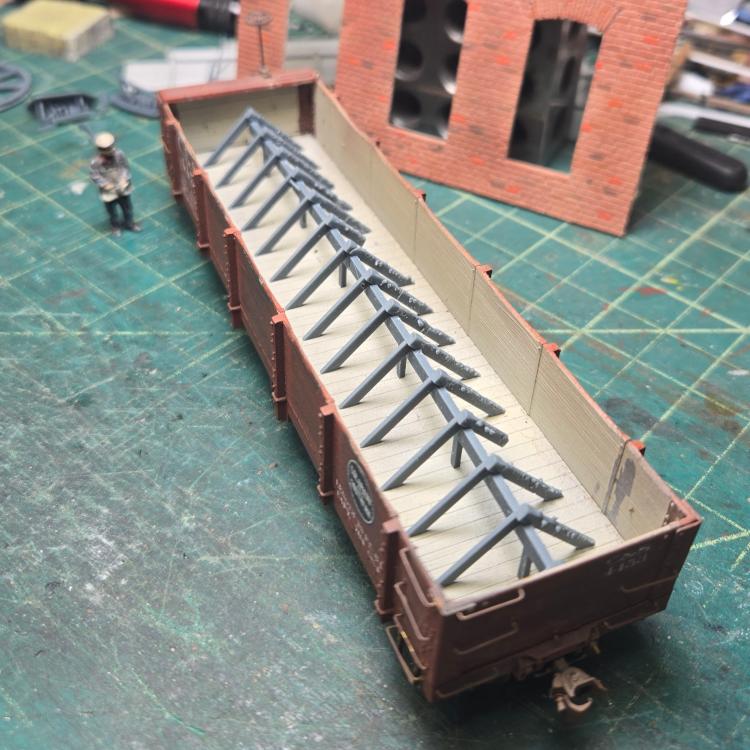
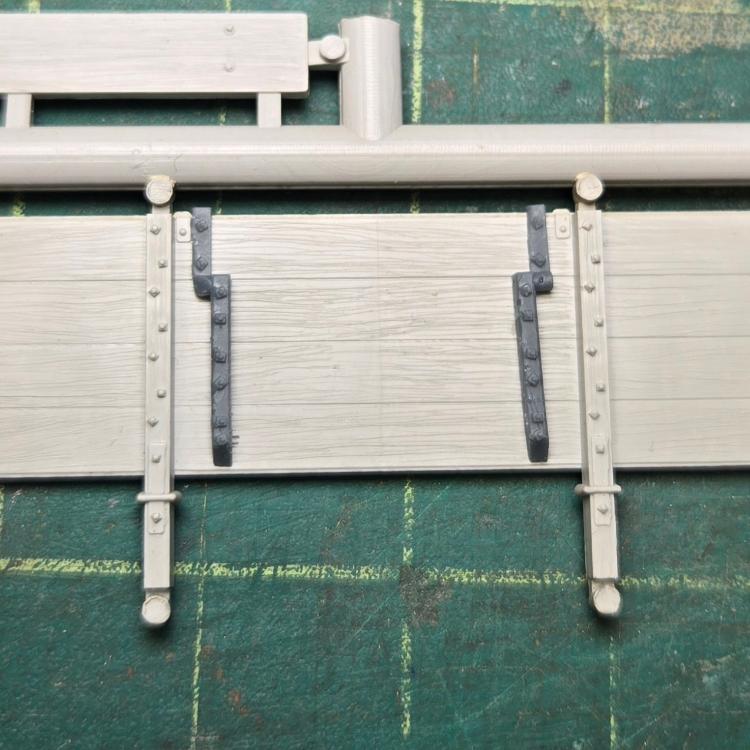
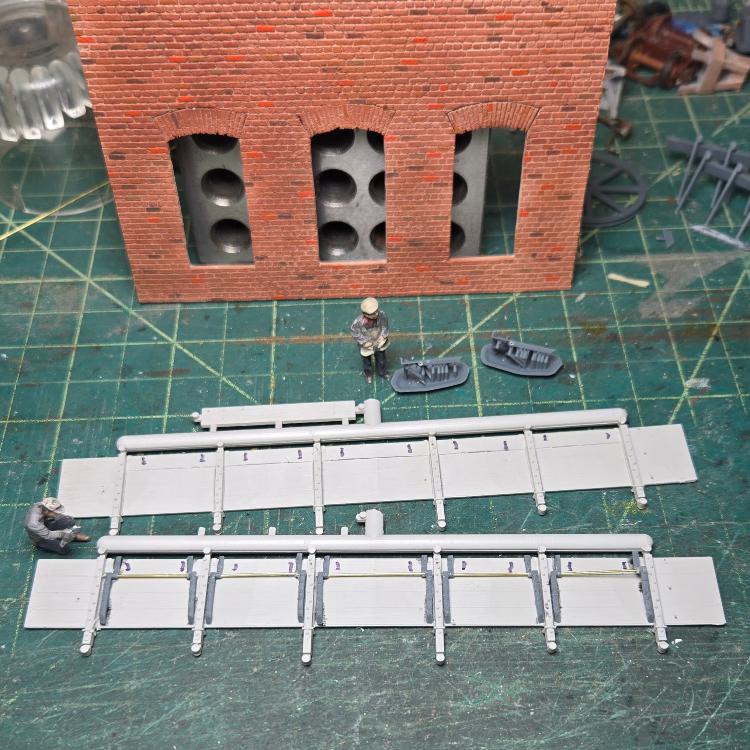
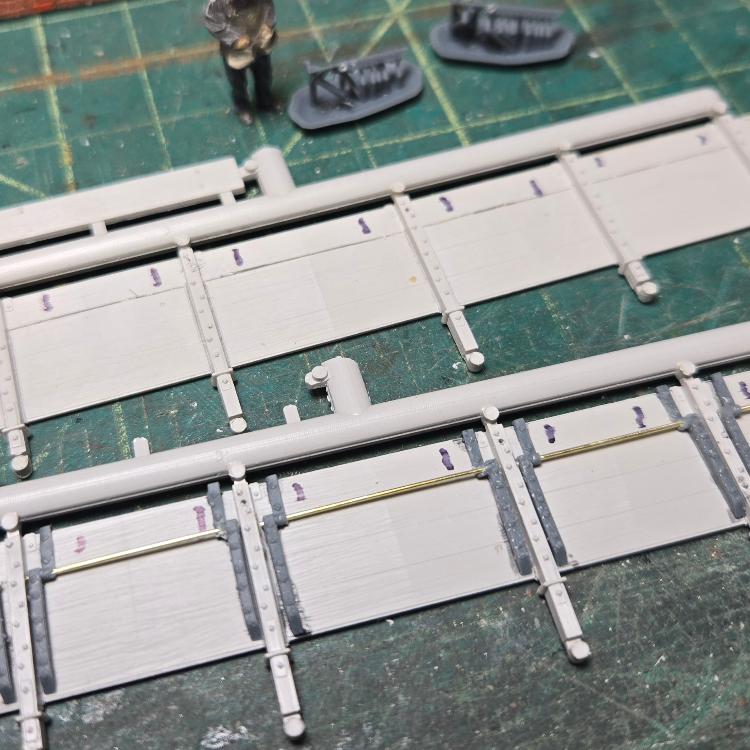
![]() In 1911 the C&S modified ten Phase II coals to non-revenue cinder service. These were wood frame-truss rod cars with Bettendorf cast steel bolsters and trucks. Modifications included an internal A-frame to encourage the materials to move, and adding hinges and cutting doors in the sides. The top board remained continuous. Where the doors actually are is a question, because of the stake locations and the vertical rod hold-downs. This should be an easy modification, because the base is a Phase II coal. In Sn3 Theo Berlwin introduced these models back in the 90s. Paul Vaughn picked up the kits at some point, and I understand Grandt/ San Juan now has the molds. I arranged with Paul to purchase a number of kit parts as part of my Phase I coal build. In retrospect, I should have just bought the frames--the part I really needed. Instead, I have an abundance of Phase II sides. The project has been in the rear of my mind for some time. Dr. Stears helped with plans in the March-April 2021 Gazette. After that, the hinges were the missing part. ![]() Getting a 3d Printer helped solve that issue. Studying the plans, the hinge seems to be a L-shaped bracket that laps over the top board and a sqare-section timber with a steel plate. Looking at the photo Chris Walker posted, the door hinge looks more to be a piece of angle. Perhaps this is a later mod reflecting 20-plus years of service. The plan also revealed the A-frame down the center of the car. I realized I could easily model this too--in fact it might be easier as a print. So, I did, and then I let the software create the supports, and it created waaay too many. ![]() Cleaning up the part, I ended up breaking the part in two, plus loosing some of the supports. ![]() This really is not an issue as the whole thing will be hidden anyway! ![]() Here it is in a P III coal. My idea was to hold the frame short and use wood on top. A close read of the plan shows the whole thing is covered in steel. I will give some more thought to how this gets modeled Using two of the surplus sides from the PI project I scribed the doors using a knife and razor saw. ![]() Some of the horizontal joints were cut through. ![]() The 3d parts have the hole in them, and these were drilled out to accommodate 0.020" wire. ![]() One side is done. Stand by as the project continues. I am anxious to implement some of the weathering techniques I have been developed, along with faded block lettering and patched Roman numbers. And yes, Chris, it may get, "EMTY RETURN TO PENROSE LEADVILLE " lettering.
Keith Hayes
Leadville in Sn3 |
|
I found a Phase II kit--the one I picked is from PVC. Of course I am deviating from the directions, but I did clean up the underframe and notched the ends of the floor boards and glued those pieces around the weight.
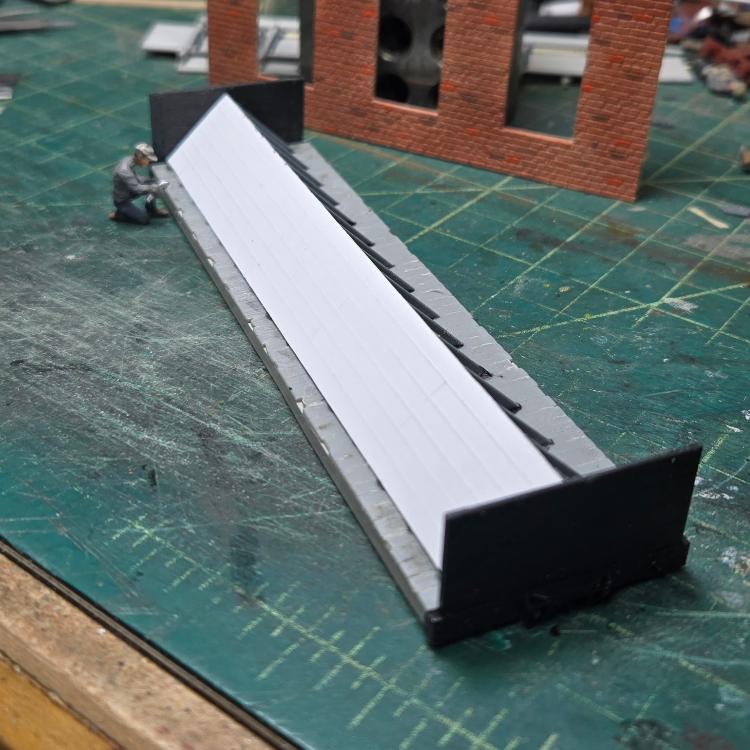
![]() Next, I drew a line down the center of the car and glued the A Frame to the deck with VMS Black Flexi CA. ![]() To establish the the length, the ends were cleaned up and cemented on. Always predrill holes before assembly. The starting idea was to build the A-Frame deck from wood 2x10s, the styrene material. In the end this will all be hidden, so I found scraps of 0.040 styrene sheet and cut it to fit. At the last moment, I scribed boards with a knife and glued it up.
Keith Hayes
Leadville in Sn3 |
|
Keith wrote: Where the doors actually are is a question, because of the stake locations and the vertical rod hold-downs.
Those round Tiedown rods shouldn't present much of an obstacle; there is a possibility that those were cut off; and the Doors just cut in(visible in the larger copy I posted) from the Sidestakes. You may notice that the upper section of the doorhinge folds over the top sideplank. I have often wondered if there were slope corners fitted to the Coalcar conversions; as the side doors are in a ways from the ends. They wouldn't want to hand clear the corners in Mine waste rock service everytime after dumping. Of course the earlier versions had full doors for sides.
UpSideDownC
in New Zealand |
|
In reply to this post by Keith Hayes
According to Derrell Poole and Joe Douda in 1911 the CB&Q leased 50 cars that were rebuilt as side dump cars for a smelter in Galena, SD which failed during WW I. In 1920 10 cars were returned to the C&S and became 0200-0209, 15 cars were sold to the CB&Q and became 12685-12699, the remaining 25 were sold to an unknown buyer.
Ken Martin |
|
In reply to this post by Keith Hayes
Wine bottle foil is one of my favorite modelling materials.
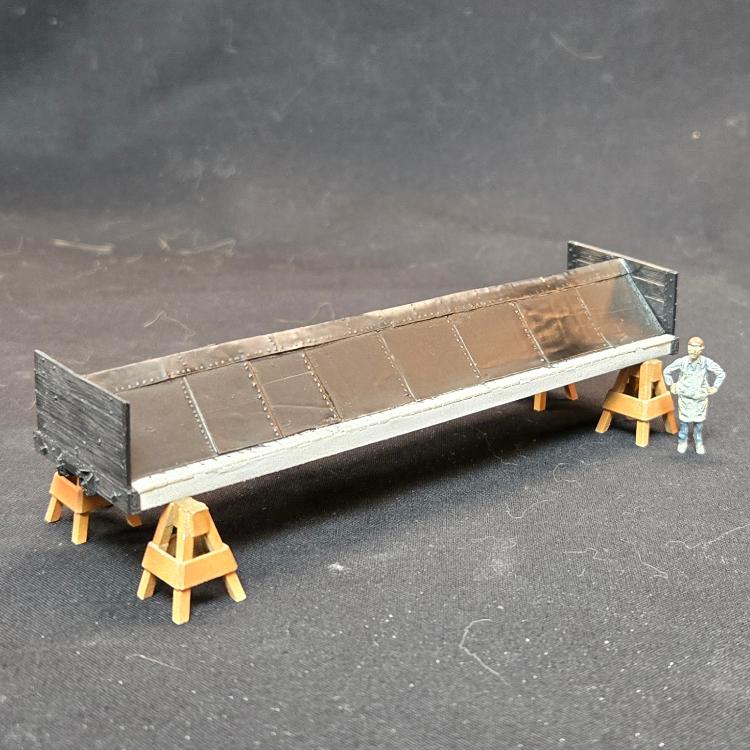
![]() The 3d printed part was entirely covered in styrene, and in turn the styrene is covered by steel plate-er foil. I flattened out the foil with the end of a hobby knife and cut it into 4' strips. These were cut to length, scribed at the ridge to fold sharply, and scuffed up with a sanding stick. Carriage bolt heads were created with a drill bit and a straight edge. I am looking forward to creating rust effects on this!
Keith Hayes
Leadville in Sn3 |
|
In reply to this post by Chris Walker
Chris wrote "I have often wondered if there were slope corners fitted to the Coal car conversions; as the side doors are in a ways from the ends."
The folio shows slope corners. Ken Martin
|
|
These cars hauled around a lot of air.
Keith Hayes
Leadville in Sn3 |
|
Thanks Ken; several newspaper reports of the time specifically mentioned the clean dumping unaided.
About 35 ore cars to fill....
UpSideDownC
in New Zealand |
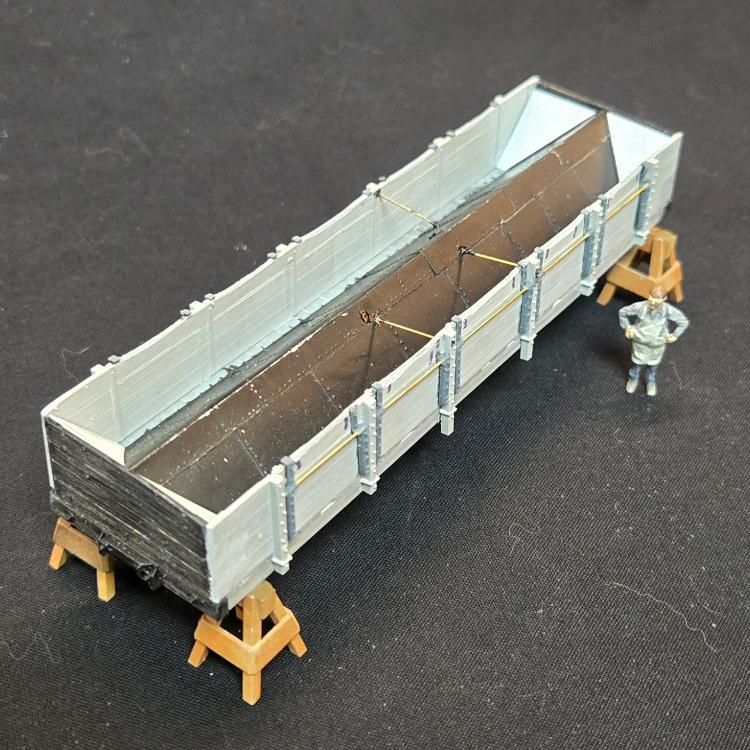
![]() Corner slope sheets installed. I guess it is time to install the jewelry.
Keith Hayes
Leadville in Sn3 |
|
Lots of projects are in the shop just now.
![]() Today was grab iron day, along with installation of the train line, brake cylinder, needle beams, queen posts, truss rods and turn buckles. I guess the boys actually got a lot done! Oh, and the trucks are in the shop being painted.
Keith Hayes
Leadville in Sn3 |
|
In reply to this post by Keith Hayes
I'd suggest WASTE ROCK LOADING LEADVILLE maybe more appropriate as the service wasn't just only for the Penrose. More on this to come soon.
UpSideDownC
in New Zealand |
|
In reply to this post by Keith Hayes
![]() Fresh out of the paint shop.
Keith Hayes
Leadville in Sn3 |
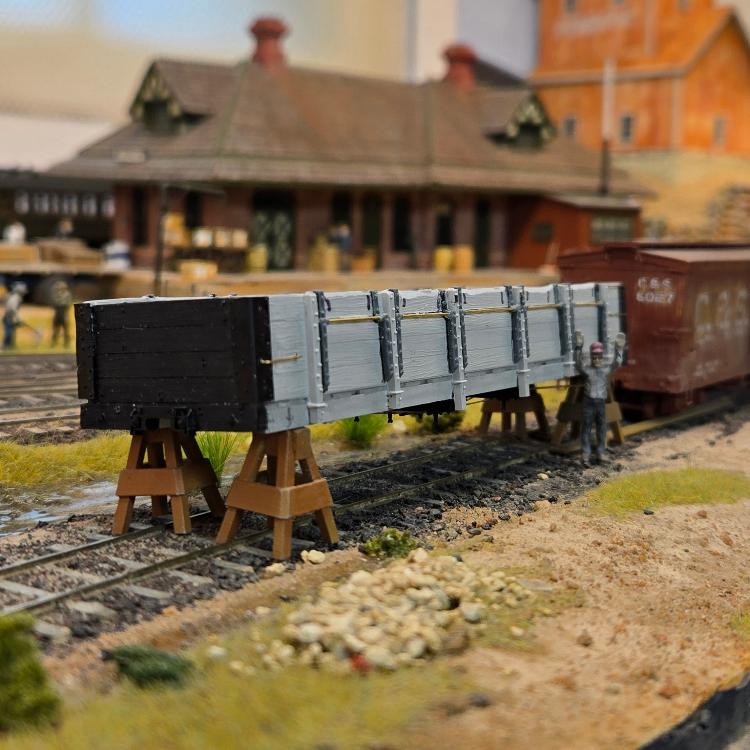
![]() Painting started with a coat of Mr Surfacer 1500 black. This was followed by a flood of AK chipping fluid, acrylic grey primer, more chipping fluid, a coat of sand, and then a thinned coat of C&S red (a 50:50 mix of Vallejo brown and rust). The C&S red was applied more heavily at the stakes. I let the car dry overnight and today applied some water to the sides and gently scraped the sides with a plastic orange stick. Honestly I was hoping the Grey would come through more than the black, but let's trust the process. While I let the water dry, the under car iron was touched up with rust, really a red brown color. The worn top boards were dry brushed with sand and primer grey. The underside and inside of the car have VMS flat; the sides and ends got a coat of gloss. Next weekend will see some decals. I am looking forward to some very distressed block lettering with fresher Roman numeral patches. PS: the wheelsets were masked with Tamiya 3mm tape and primed with Mr. Surfacer. They got an application of C&S red and the wheelsets received random sprays of rust, orange rust and brown. This was finished with a coat of VMS flat and Tamiya black panel liner.
Keith Hayes
Leadville in Sn3 |
|
I'm getting excited over this: are you?
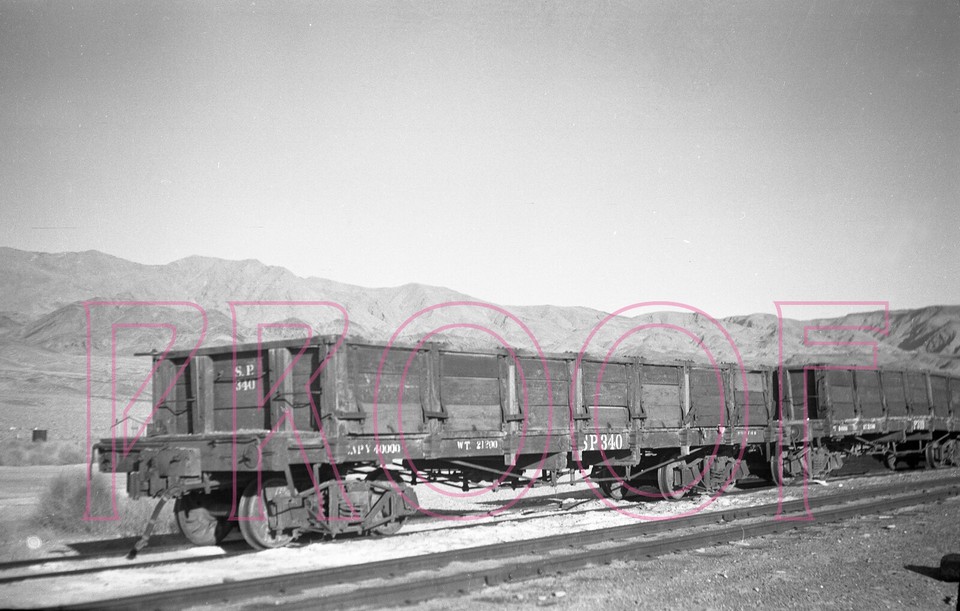
![]() The S.P. had obvious latches on theirs. Just how those Type2 Coal conversions had remains a mystery.
UpSideDownC
in New Zealand |
Keith Hayes
Leadville in Sn3 |
|
Now that looks like a well used car, top marks .
|
|
This post was updated on .
In reply to this post by Keith Hayes
Thank you, Paul!
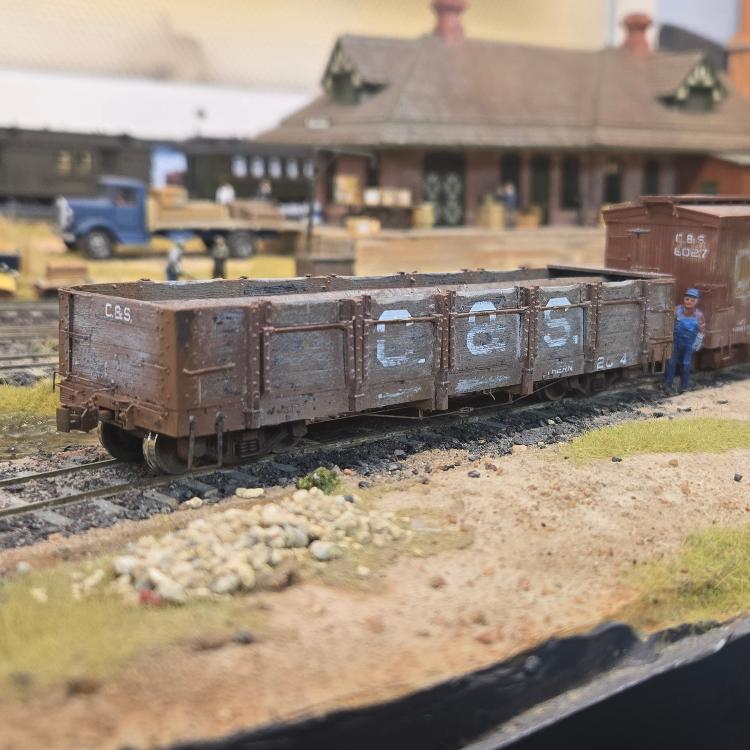
![]() I grew up on Floquil paint, and still miss them. They were a standard for colors that we still use and went on dependably. I was also an adherent of the scratch technique published in the Gazette years ago. I forget the exact order, but you would start with a layer of grey primer, followed by a coat of yellow, then black and finally your finish color of red or brown. Maybe it was the yellow first. Anyway, after a day you would take a fiberglass typewriter eraser and scratch the paint with it revealing the colors underneath. My goal with this car was to emulate this technique, except with acrylic paint. About 25 years ago--just prior to Floquil going out of business, I decided to switch to acrylic paints. It has taken a long time to get the hang of them, and I have watched a lot of videos. Two keys seem to be to thin the paint to a 'skim-milk' consistency, and use less air. There is also the advent of chipping fluid, which emulates the use of salt that aircraft modelers have used for years for chipping. The cinder car prototype probably did not get painted after the initial conversion, except for renumbering on the ends. The doors and side sills show a lot of wear. I also notice that the paints used stick pretty well to metal parts, but bleach in the sun. Paint also seems to stick around in corners, or maybe it is just shadows. So I started with the coat of Mr. Surfacer primier in black, followed by some chipping fluid, a coat of Vallejo primer grey, more chipping fluid, and a 50:50 mix of Vallejo rust and brown according to Mike Trent's C&S color mix. After drying overnight, the water came out to start the chipping process. The black seemed to come forward the most, which was not the intent--I really wanted the grey to come out on the sill and the lower doors. No mulligans, though. Once I was happy enough, I applied some VMS clear gloss for the decals. The prototype received the block style lettering, and in the photo at the top of the thread, this is most prominent in the main logo, and the C&S on the car ends. I want to show the car heritage, so I split 'SOUTHERN' diagonnally and applied it to both sides, along with fragments of the 2000- series number, just to confuse operators. I also cut the top off the large car logos as the tops were on the fixed top board and are less weathered. Lots of Micro Sol was applied, and the decals settled nicely into the styrene wood grain. ![]() Now I had some nice, fresh, bright white lettering on a weathered car. What to do? Well, I got out my fiberglass brush, and went to work. I was pleasantly surprised that not only did the brush gently scratch the decal and film, but it also worked away on the red acrylic paint and got the nice weathered grey tone you see above. I think I may still apply a think layer of grey over the sills and lower door boards, but I am pretty happy with the result. ![]() Next up, I sprayed air over the crevices to get any residual dust out and then applied another layer of clear over the car ends and side ends in anticipation of the roman renumbering and some chalk marks. You all may think I am a goof, but I think that chalk marks are one of the simplest details that really make a model from this era stand out. Study the prototype photos and the cars are filthy with them--even the waycars! I could not find any in S scale, but there is a great set from National Car Company (https://nationalscalecar.com/?s=chalk) that I have been using. They are admittedly more east coast than Colorado, but you cannot really tell.
Keith Hayes
Leadville in Sn3 |
|
It needs a clear coat to seal the decals, but I am going to call this cinder car done.
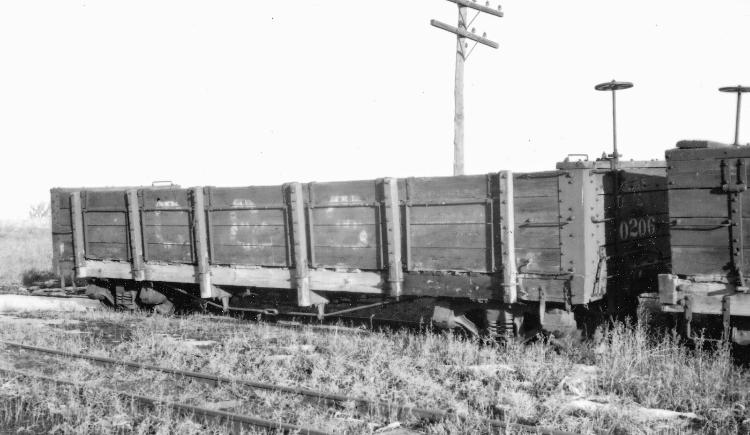
![]() Thank you for everyone that contributed to the dialog during the build, and thanks to Dr. Stears for the drawings! Here is the prototype photo, so you don't have to scroll to the top.
Keith Hayes
Leadville in Sn3 |
| Free forum by Nabble | Edit this page |