Workbench Tips & Tricks
|
I'd like to start a new thread on the subject so that we can share solutions to problems so that they aren't lost in the middle of a thread of an unrelated subject
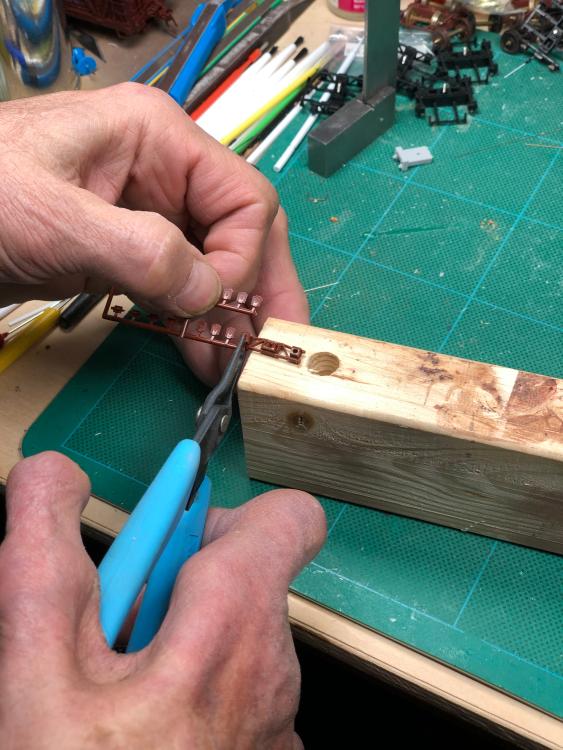
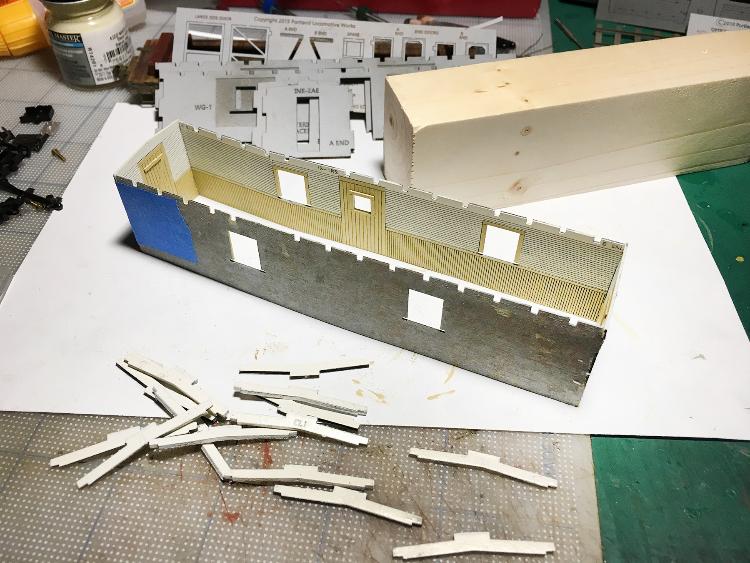
I'd call this specific post "Blocks on the Workbench". The blocks I use for Sn3 are 2 x 3's about 5 1/2" long that have been milled to about 1 5/16" thick.  I've used blocks to aid in car construction for quite a number of years. The principle benefit I find is holding the car body steady while detailing the under body. Also, putting the block in a portable vise allows the under body to be vertical, thereby making it easier to paint.  A block can be used as a support to cut or shape material that is easier than doing the same on the workbench surface. Further slots can be milled in a side to support small items such as gondola stakes to be worked on. With appropriate holes, etc., it can become a "third hand" for a number of tools.  Besides supporting the car body for under body detailing, the ability to hold truck side frames for application of journal box covers has reduced my assembly time for this aspect from something like a half hour plus, to about 5 minutes for a pair of PBL trucks, No secondary preparation like reaming the holes in the side frames has been needed. Also, the lids are almost always perfectly aligned.  Lets keep sharing. |
|
Hey Pat,
I use wood blocks like this, but I like how you've pushed their usefulness. I like the jig for PBL journal cover application, always tough to do without support, so I plan to do this myself. Wood blocks are great for supporting walls and ends. Plan to chop the resin body on the CW business car 910 kit to a shorter car, and the wood block will help to stabilize this effort. Mike  C&S 910  PLW kitchen car kit |
|
In reply to this post by Pat Student
I'm currently building a white metal flatbed truck kit.
https://wisemanmodelservices.com/HO-Scale-HOn3/HO-1926-WHITE-SHORT-WHEELBASE-FLATBED-TRUCK The (excellent) Jordan plastic kits include single-piece window mouldings which give a very nice result. But you're left to do your own windows on the white metal kits. Fitting plastic inside the window opening in HO-scale is a non-starter. And when you cut the material oversized and then glue it on from the inside, the oversized edges are visible through the other windows. I discovered that using a black sharpie to "paint" the edges of the plastic goes a long way toward getting rid of this. I happened to have painted this model black, so I don't know how well it would work with other colours. But if it's just that the ink kills the refraction/reflection inside the plastic (which accentuates the edges), then it should work for models painted other colours too.... |
|
They even paint around most modern car glass but I believe it is sandwiched in the layers of laminated glass. There is a How It’s Made on auto glass on YouTube I believe...
Todd |
|
A new tool in the shop, INCRA RULES Precision Tiny T-Rule. Maybe you already have one.
 Its holes and slots are sized for a 0.5mm pencil or equivalent every 1/32" around the periphery and has a 1/64" offset in the center. Sure will make marking hand hold locations on sides and end of scratch build cars easier. They also make a metric version with 1/3 mm capability. |
|
Yes, I have that one and a 12” as well as the 6” flat rule. They are handy but I consider a half mm (0.020”) line to be sort of wide for many woodworking tasks. I usually use a knife line, plus it is easier to put a chisel in to start a cut. I should get one of the 300mm Incra rules as I do a fair amount of work in metric measurements too. But I have a couple of longer Bridge City Tool Works rules with mm and 1/2 mm. So I get along OK. Both companies make tools I can highly recommend...
Todd
Sent from my iPhone On Feb 26, 2021, at 1:13 PM, Pat Student [via C&Sng Discussion Forum] <[hidden email]> wrote:
|
|
In reply to this post by Pat Student
Pat I believe the metric ones are 1/4mm or about 0.010”. I have their miter 5000 and several other metric fences. Their metric fence stops lock every mm. If I need fractions of a mm I used regular playing cards as shims. Most playing cards are about 0.010” too or about 1/4mm. I also have the Incra LSTS tablesaw fence system in imperial. But I also have metric scales on it too. It locks on 1/32” and has a micro adjustment too by 0.001” increments. I can get within about 3 or 4 tenths of a mm just with the 1/32” imperial screw. That’s close enough most of the time and the repeatability is always there. That is perhaps the best thing about the LSTS.
Todd
Sent from my iPhone On Feb 26, 2021, at 1:13 PM, Pat Student [via C&Sng Discussion Forum] <[hidden email]> wrote:
|
|
In reply to this post by Pat Student
Don't know why I hadn't't thought of this before. Is there a better way to illuminate while decal while on decal paper?
Just tried a UV flashlight. Note the difference between daylight florescent and UV LED "blacklight"'  
|
«
Return to C&Sng Discussion Forum
|
1 view|%1 views
| Free forum by Nabble | Edit this page |


