The Penrose Mine
12
12
|
Keith
4014 would be a 27' car, not a 30' like 4359. The decals are ready for you, once you build the car. Pat |
|
In reply to this post by Keith Hayes
I finished another of the Raggs mine buildings today in between cleaning track and wheels.
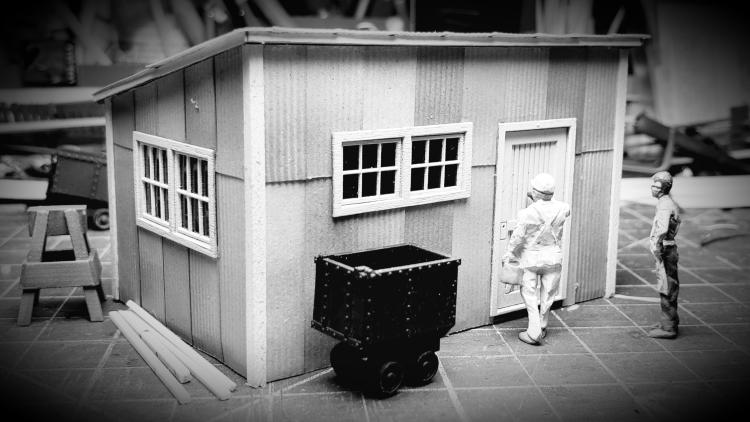 This will not be part of the Penrose, but will find a home somewhere on the layout. I don't know how many of these kit Joe made, or if they are still in production. They are an easy and fun build. Get a set if you find one.
Keith Hayes
Leadville in Sn3 |
|
I think he still sells those buildings...
Sent from my iPhone
|
|
In reply to this post by Keith Hayes
A small bit of progress at The Penrose. Some 24" mine track is laid to match the Wild West ore carts.
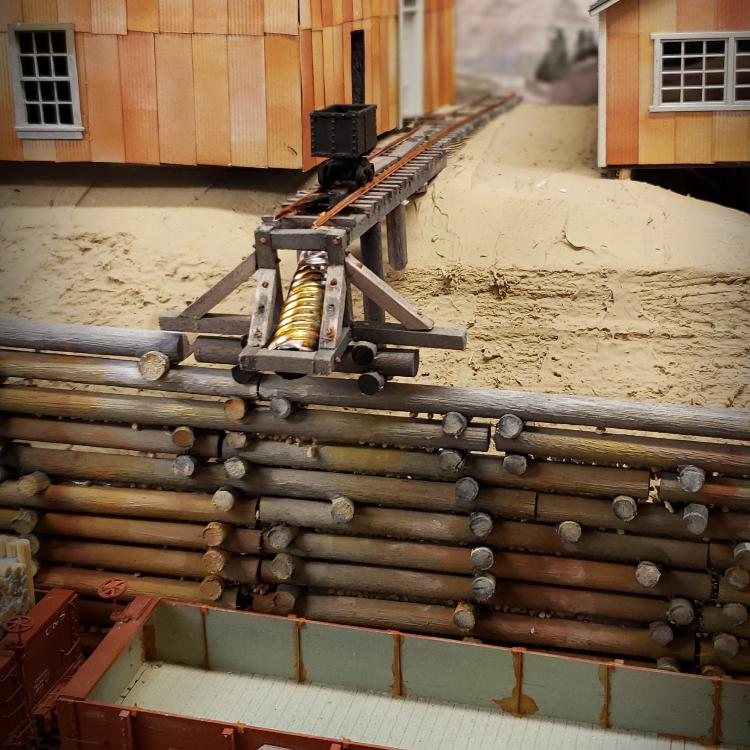 Looking at it, seems like 18" would be more appropriate, but it is easier to buy the parts.
Keith Hayes
Leadville in Sn3 |
|
Oh… I like the corrugated pipe chute. Are there any prototype pictures of that, or is it imagineered?
|
|
In reply to this post by Keith Hayes
I don't know where I left you all with respect to the Penrose. I have constructed the shaft house out of foam core and covered it with Raggs corrugated metal. At least till I ran out. I got some more at the Sn3 Symposium. The Symposium also inspired me to get back on this project. The last two weekends I have been installing foundation walls. These are Chooch Flexible Srone Walls (now available from Walthers). The stone is probably too deluxe for a mine, but I figured they had ton of waste rock, so what the heck.
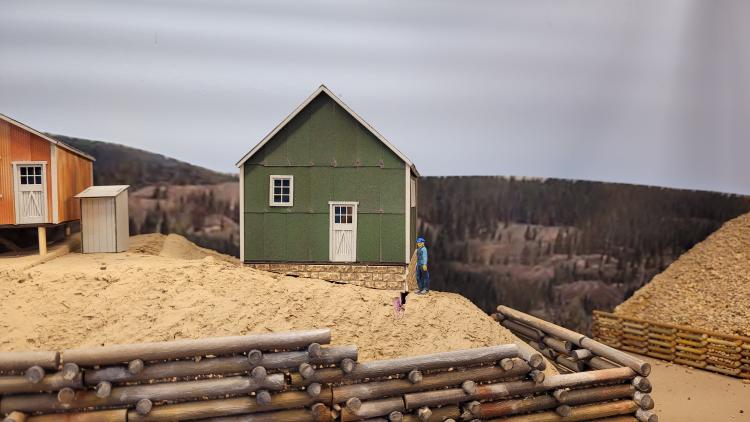 Here is the locker room with th stone cut into the foam base. 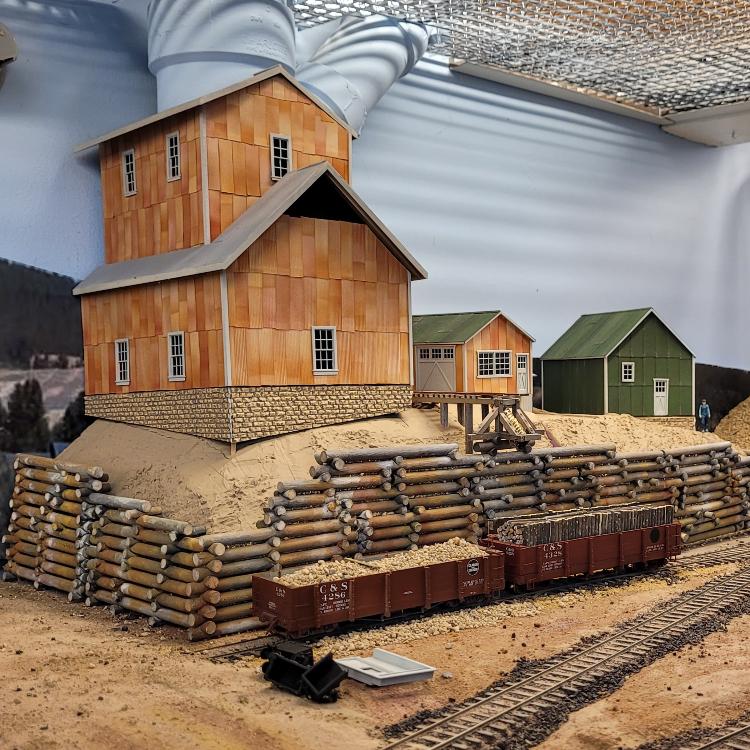 Today I made the wall for the shaft house. There is a 0.060" styrene backing painted black and the stone material is glued to this with CA. The corners overlap and are keyed together. The shaft house still needs to be cut into the foam. 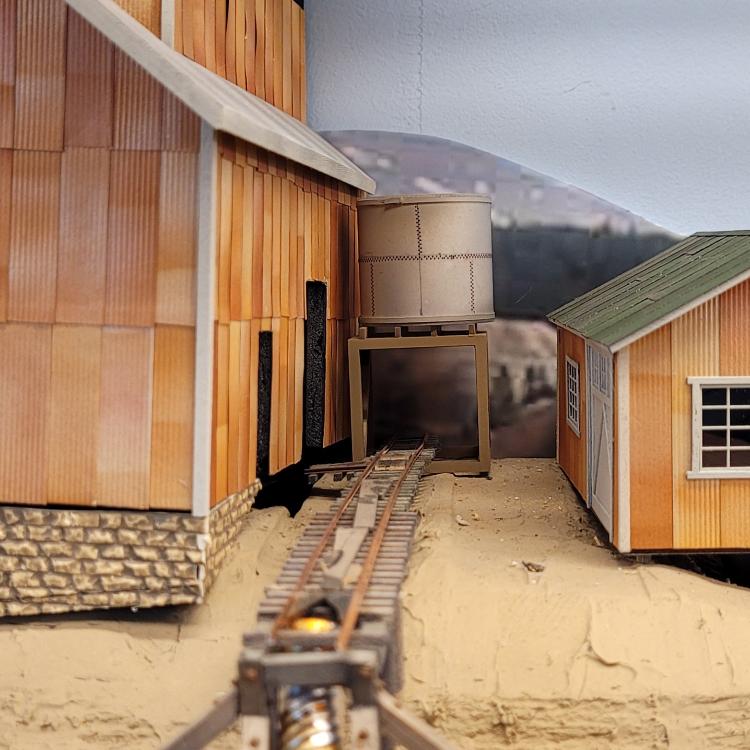 The Raggs kit also included a raised water tank. This set on the bench for a while until I realized it would make a great view block. I added some straps and Archer rivets. I have some Wild West elbows and tees and will route a water line from the tank down into the shaft house. I will also make a couple air lines. And Jeff, the corrugated metal pipe is entirely my own creation. I need to add another bit to get the rock closer to the car floor. I bet a bunch the Penrose waste rock will end up as fill up at Indiana Gulch.
Keith Hayes
Leadville in Sn3 |
|
We made a ton of progress on the Penrose this weekend.
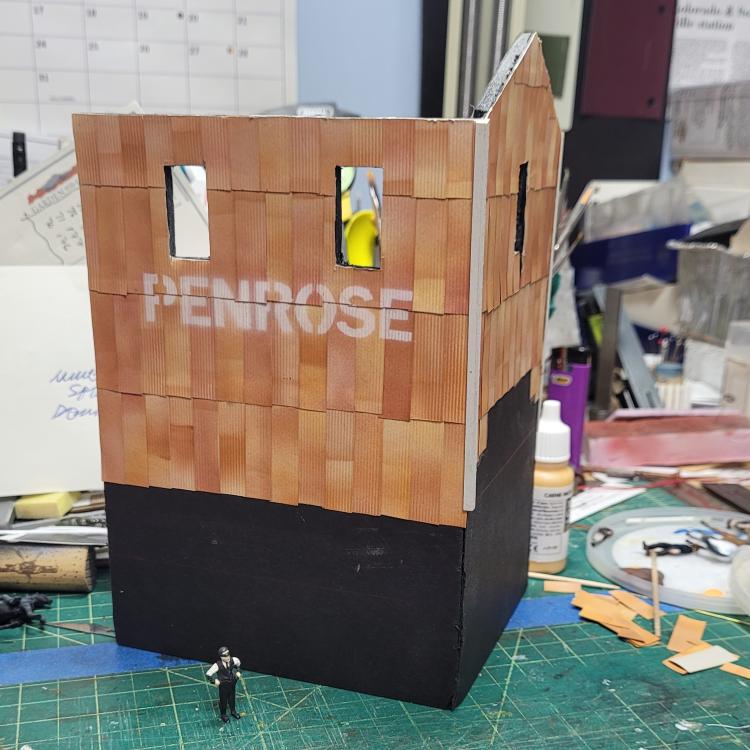 After running out of crinkle metal a while back, I secured some additional material and was able to paint it with the same colors, more or less. I still have a few sheets to install, but we are really close. It is also common to see the name of the operation on the hoist house, and it can be helpful for operators too.I spent a few minutes at the computer trying out different fonts, and found one I liked. A couple prints later, I had the size right and happened to print it on a stash of card stock my wife has for reasons unknown. Some careful work with a fresh X-Acto blade and we had a stencil! 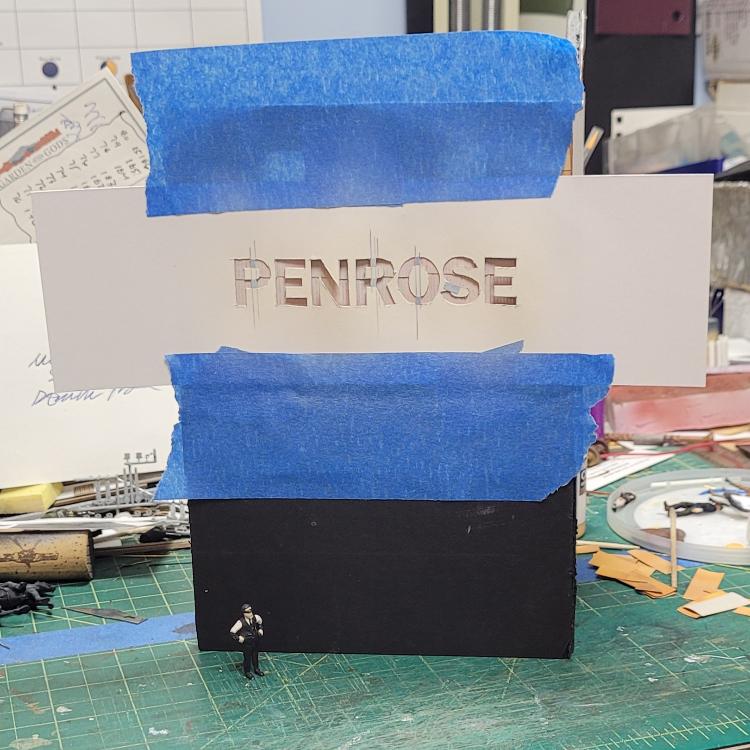 Now in between applying more sheets of siding, I mixed some paint on my wet pallet and filled in the gaps and sharpened some edges. I have also been busy applying the stone to the foundation walls, and these have been primed with black and painted with sand and a touch of yellow. 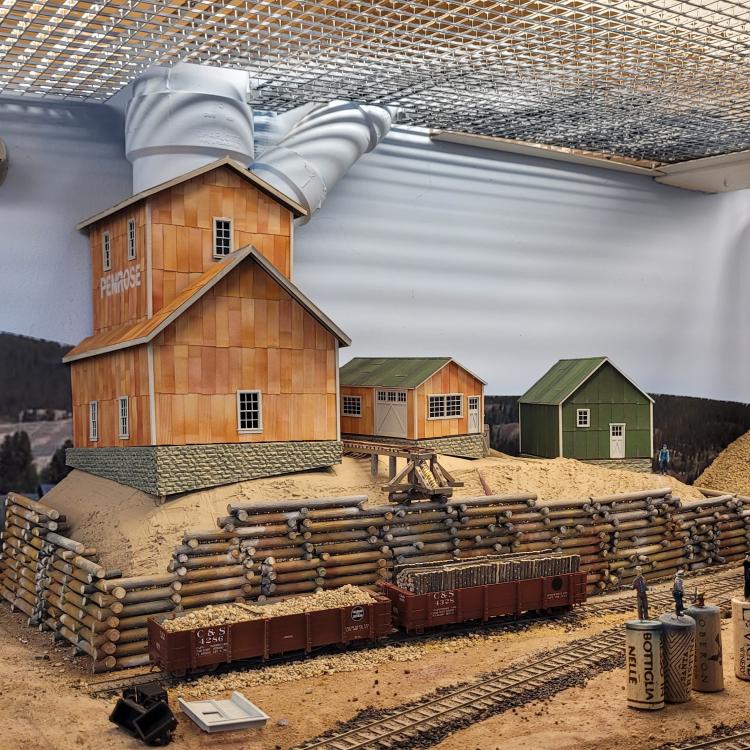 The stones will get individual treatment with craft paint and some panel liner. 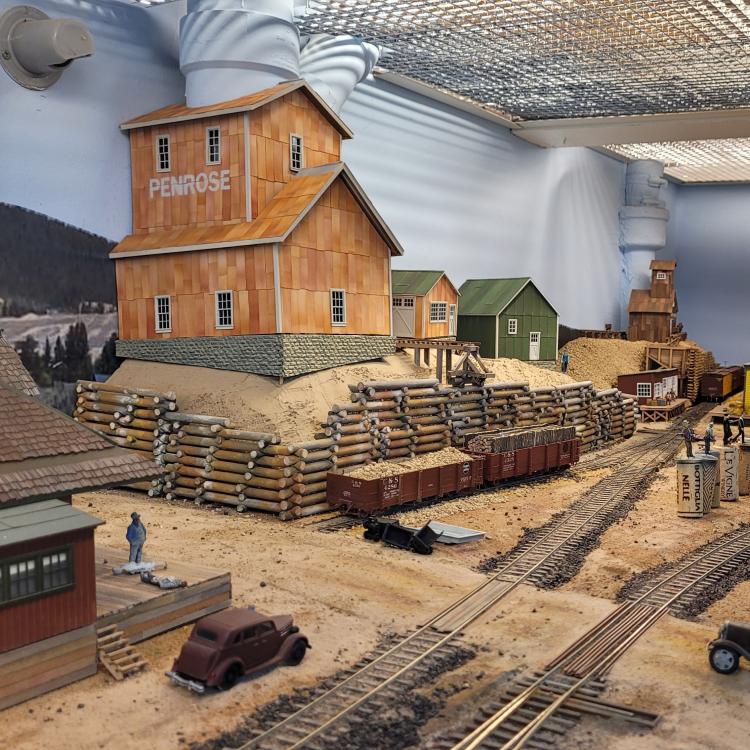 The mine is coming together and I am very happy with the results!
Keith Hayes
Leadville in Sn3 |
|
Excellent work, as always, Keith!
I think it is clever how you installed a smaller diameter drain pipe in the back corner, so's you could force the perspective of the mine hoist house that hides it . . . 
Jim Courtney
Poulsbo, WA |
|
Hardy, har, har.
(I guess I never thought of it that way).
Keith Hayes
Leadville in Sn3 |
|
Just a thought, Keith,
When you finish the Penrose and the supporting scenery, a nice final detail might be to add some era-appropriate advertising posters to the cribbing, at street level: https://digital.denverlibrary.org/digital/collection/p15330coll21/id/3498   This photo is probably c.1900-1905. Not sure if "Cheroots" were still around in the mid to late 1930s. 
Jim Courtney
Poulsbo, WA |
|
Thanks for the tip, Jim! Those posters would be pretty tattered by 193x. But it is a cool idea.
I am gluing the foam base together and cutting the stone foundation walls. Landings for the stairs are also under construction. 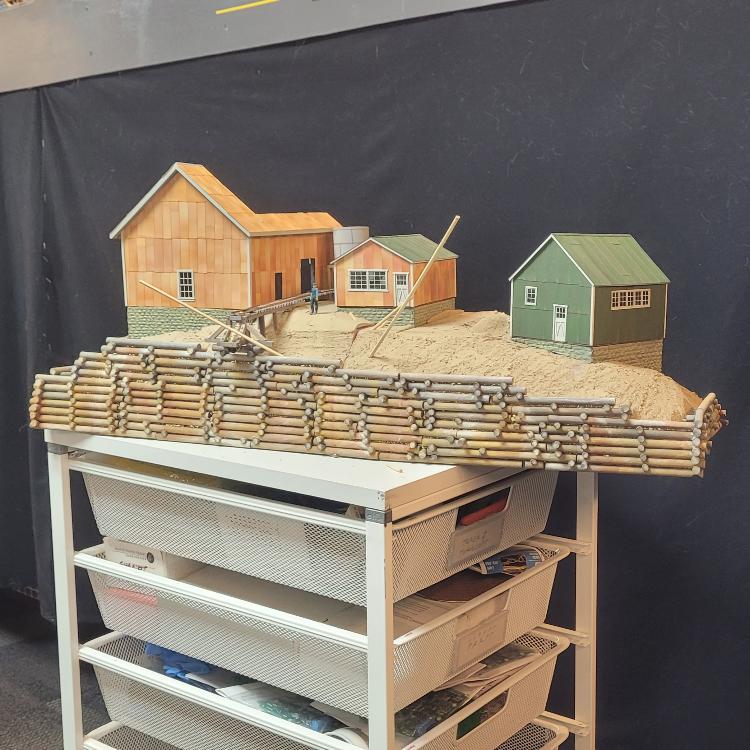
Keith Hayes
Leadville in Sn3 |
|
More progress.
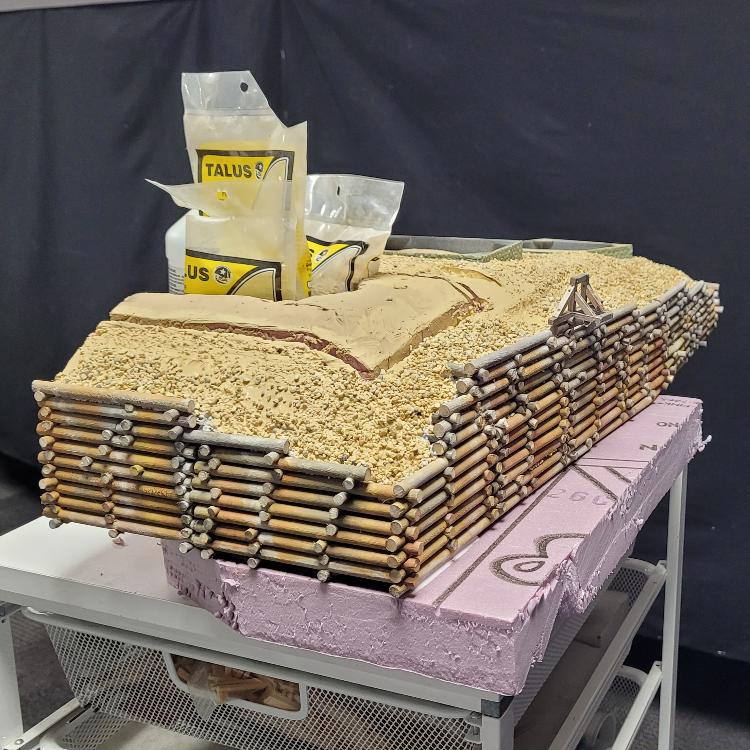 Last week, I cut thin strips of foam to bridge between the hill and the retaining wall and glued everything in place. Textured medium was added to smooth the joints and edges. Today a thick coat of latex paint wad applied and I sprinkled Woodland Scenics talus into it. Next up, some washes with craft paint.
Keith Hayes
Leadville in Sn3 |
|
Excellent modelling. Paul R.
|
|
Thanks, Paul. Today I returned my focus to the stone walls. These are Chooch urethane walls and are a great product if you have not tried them. The material takes paint...indifferently. Based on past experience, I painted the walls with black Testor's enamel and some sand color paint from above, to create the shadows. This looked okay, but I could tell I needed to wash each individual stone using a pallet of 3-5 colors.
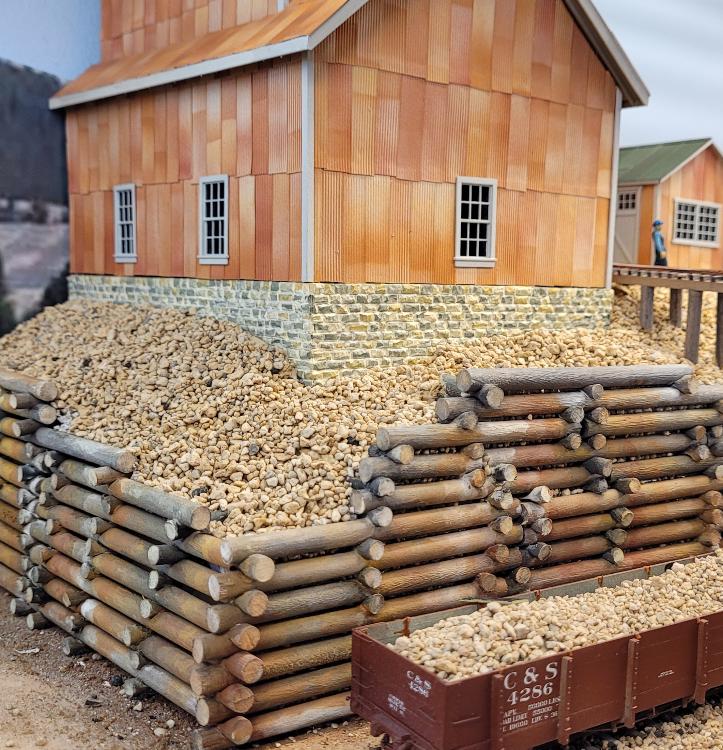 I started with yellow ochre, then added some white to the next batch, then some black. The color range was good but I used too large a brush and the edges were not as crisp as I would have liked. Finishing the last color my mind turned to solutions and I recalled walls from this era would have a wide mortar joint, which would cover a lot of sins. I wasn't eager to paint each joint, but then I am trying to relax! So I looked in he paint drawer and selected buttermilk for my mortar and picked out a nicer 5-ought brush. About 40 minutes later, this is the result and I am very happy. I thinned the paint with water and as the craft paint dries, the pigment solids collect at the bottom of the joint and the capillary action draws a film of paint up the stone creating a satisfying unifying effect. The darker stones are now nicely muted and the wall works nicely with the talus.
Keith Hayes
Leadville in Sn3 |
|
One of the better handled stone wall finishes I've seen, Keith. Just wonderful. And sitting in the varied stones it really pops.
Dave Eggleston
Seattle, WA |
|
Between working on the water service cars, I added stairs and details to the Penrose complex. The pipe elbows and tees are available from Wild West.
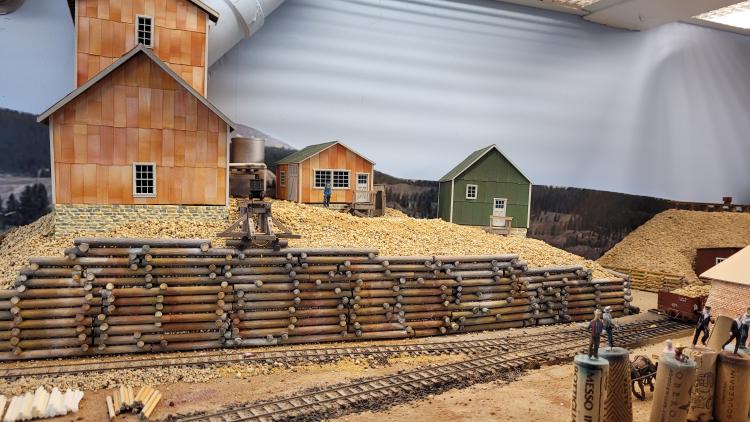 This scene is coming together, yes it is! 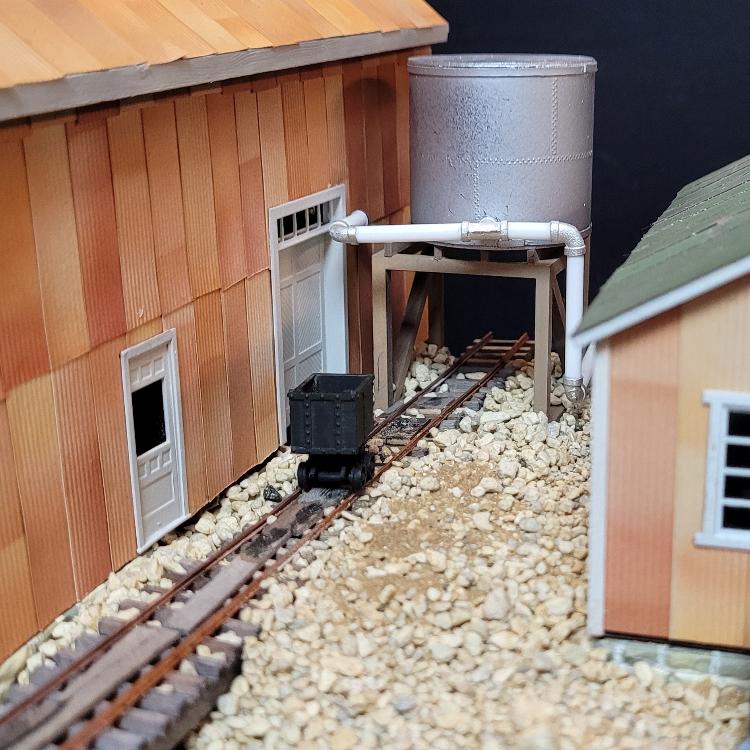
Keith Hayes
Leadville in Sn3 |
|
Keith,
your waste rock sure could use a lot more fines, workmen walking around there would get twisted ankles in no time.  Enough hazards on that job as it were. Enough hazards on that job as it were.
note: due to weathering over time, oxidization etc; freshly dumped wasterock would be a different colour to what we see today. At least these were taken at Leadville.  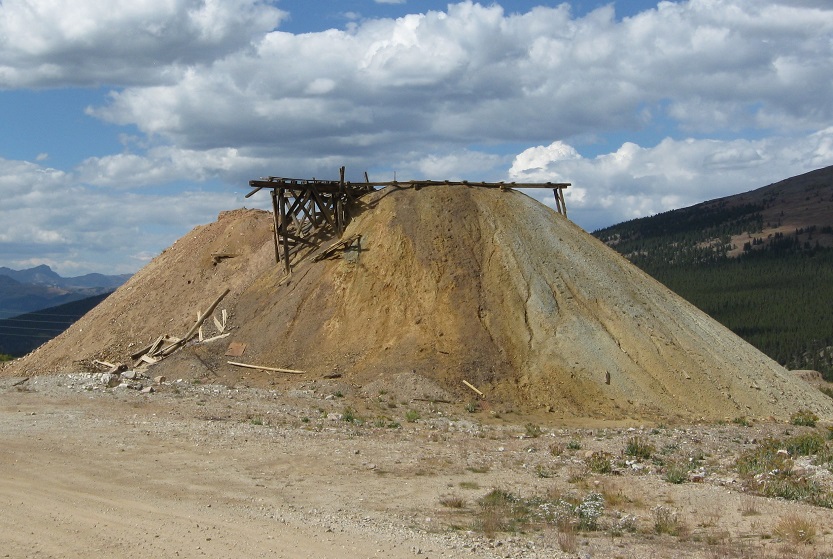 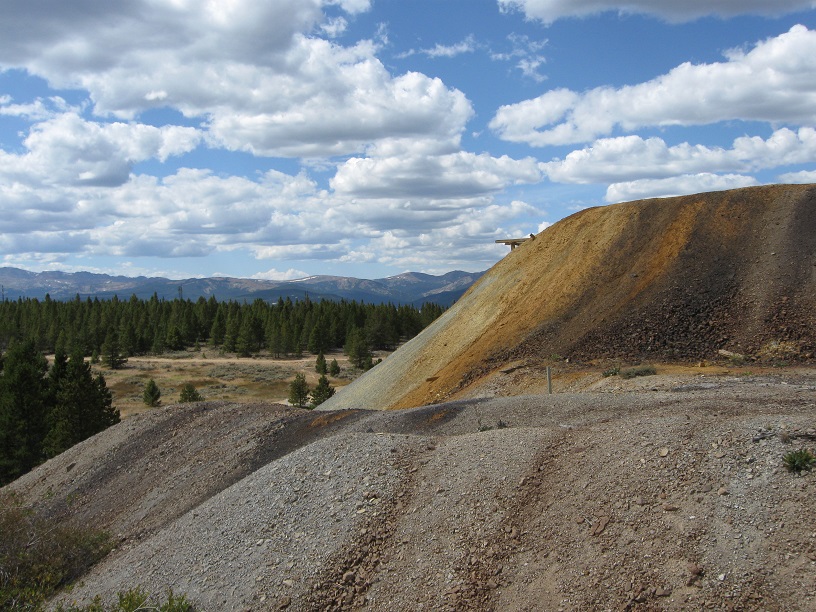 Not Leadville, Trail Creek near Fall River. Broken(blasted) rock texture remains the same even if the rock is differing in composition. 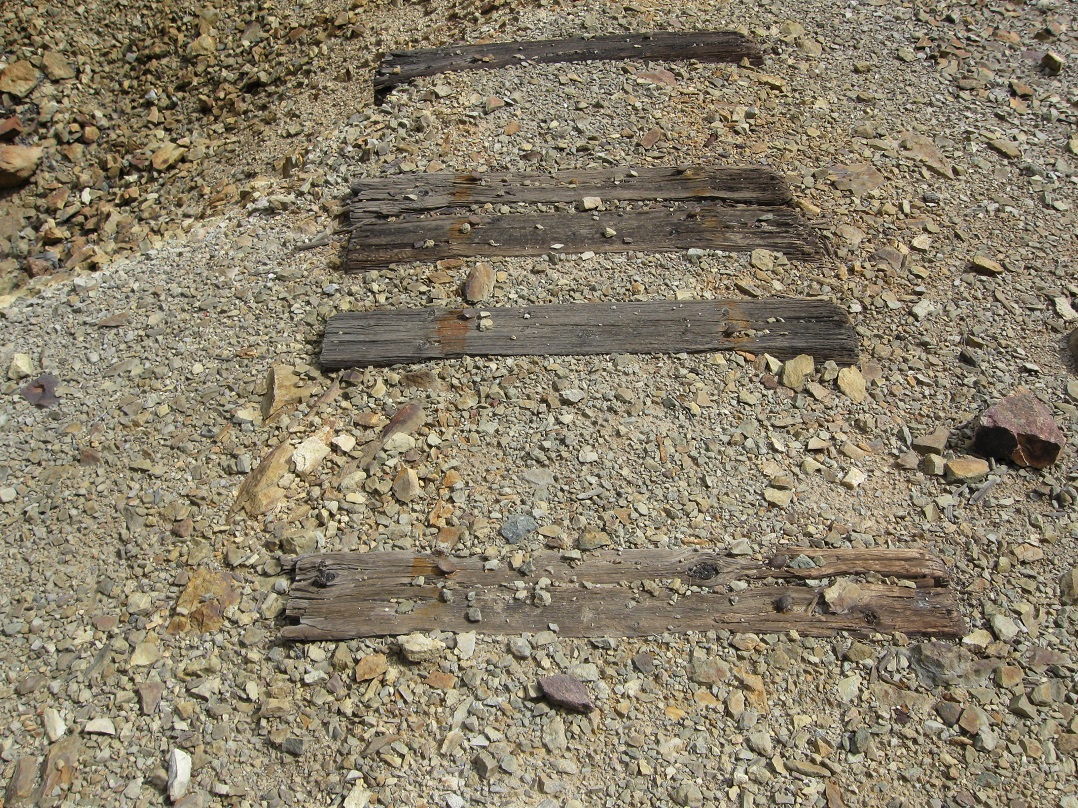 Joe Crea's Gunnison Mine diorama in the May/June-Jul/Aug 1993 issues of the Gazette comes to mind, along with Bob Christopherson's Pioche & Western which had some of the best Dump renditions I've seen in freelanced modelling. Maybe Dr Courtney might visit Bob to get some close-up photos for you, since my camera skills were limited to auto mode.  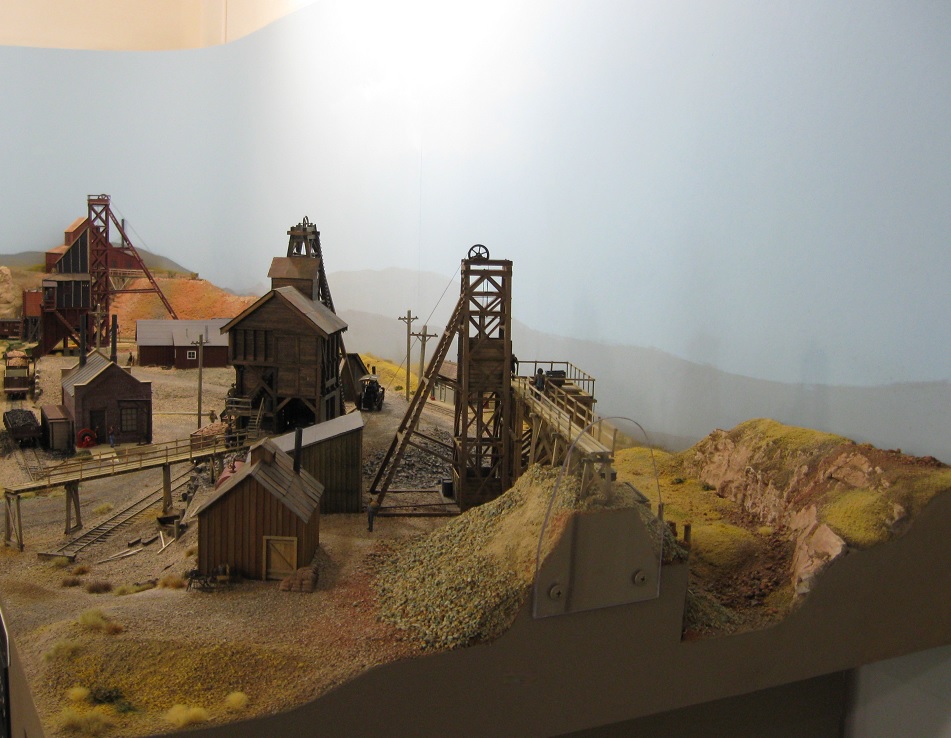 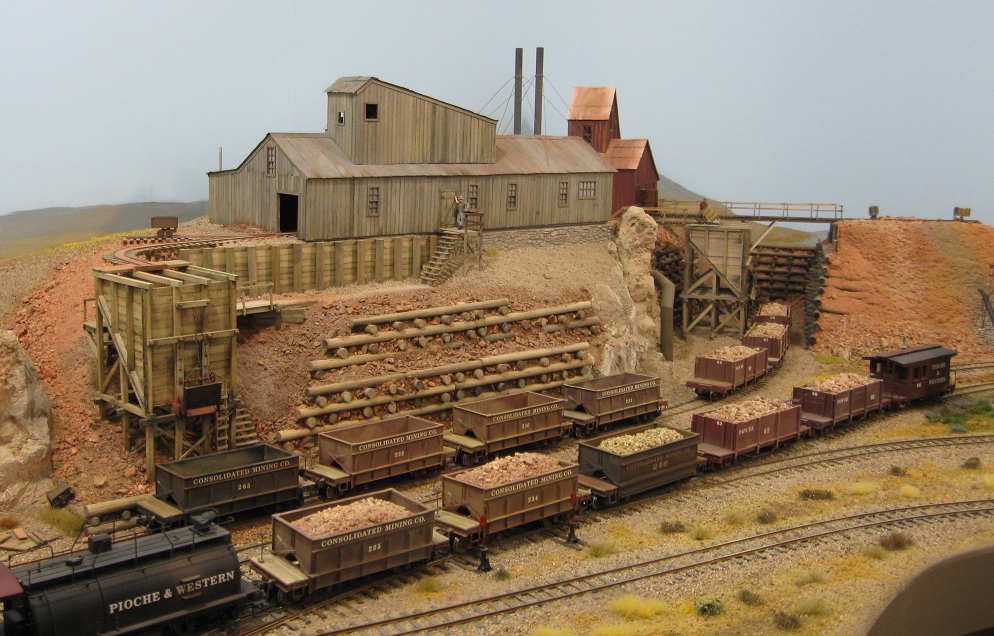
UpSideDownC
in New Zealand |
|
This post was updated on .
Chris, the thought had crossed my mind that the talus is rather coarse.
As it happens, I harvested some fines from a tailings pile many, many years ago and graded it from very coarse to very fine. The very fine stuff was sprinkled on the waste rock pile this afternoon and is currently drying. You mention the Pioche and Western. In fact Bob was in Denver last spring for the Sn3 Symposium and I got to spend some time with him. He has relocated to Texas and embarked on another modeling project using parts of the Pioche, though other pieces remain in the Seattle area. I too enjoyed the layout, the desert setting, the simple track plan and nicely modeled mines. 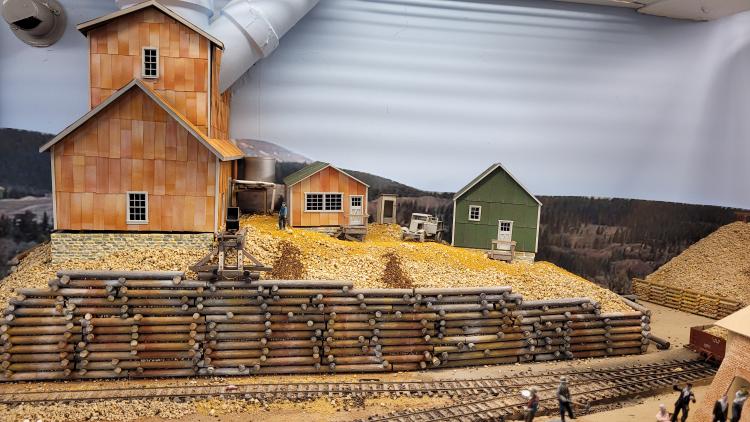 Better?
Keith Hayes
Leadville in Sn3 |
«
Return to C&Sng Discussion Forum
|
1 view|%1 views
| Free forum by Nabble | Edit this page |


