Phase II Flatcar
12
12
|
The NMRA MMR program places an emphasis on scratchbuilding, even in this era of very fine pre-built models and in the case of Sn3 darn fine kits that still require a bit of skill to assemble. Try as I might to justify either the Phase I coal project or RPO 11 as scratch built projects, my Spidey Sense tells me they won't fly as such with the MMR Brass.
Thoughts turned to other options. CONX 13 is a possibility and is stuck in the drafting process just now. Another modeler has suggested a flat car. Leadville--er Climax-- needs flat cars so why not? 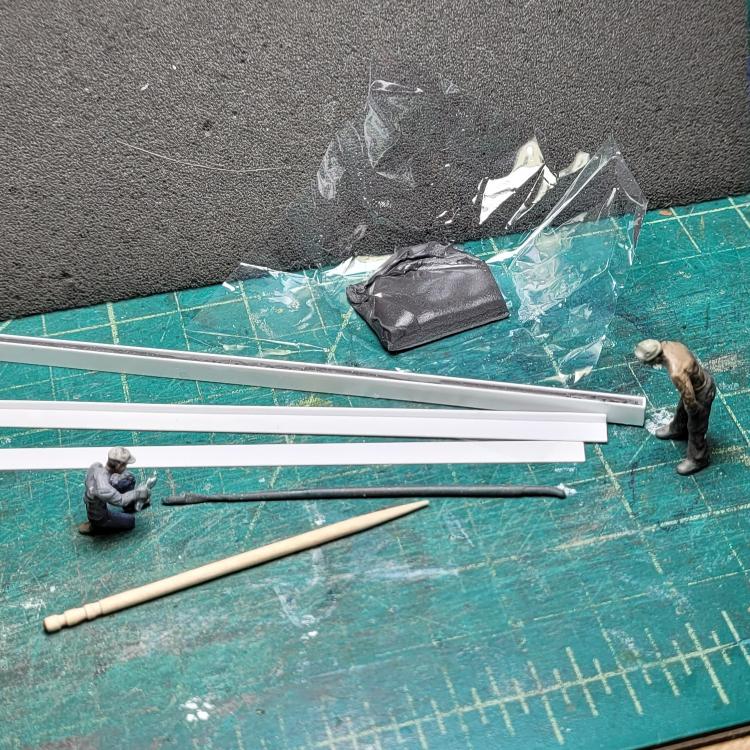 Strategizing quickly turned to the issue of weight. Flat cars don't have much to them, so hiding weight in the model is an issue. Especially if a wood deck is attempted. What about hollow beams filled with tungsten putty? Let's try to build one and see. So far, so good. Stay tuned.
Keith Hayes
Leadville in Sn3 |
|
Interesting idea, Keith.
Do you have a link as to a source of "tungsten putty"?
Jim Courtney
Poulsbo, WA |
|
Woodland Scenics: it is made for the Pinewood Derby crowd.
Keith Hayes
Leadville in Sn3 |
|
This post was updated on .
In reply to this post by Keith Hayes
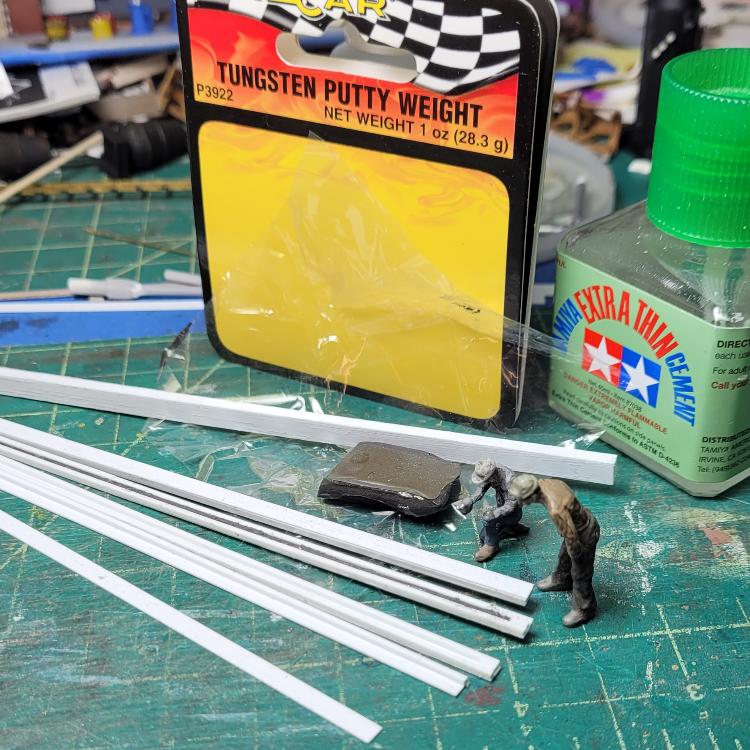 More progress constructing tungsten-filled car sills. These parts are the 4x9 intermediate sills and 5x9 center sills. The center sills would be made of 3 pieces spliced in about thirds: oak is used at the car ends where all the abuse occurs; and fir in the middle, which is primarily under tension during normal train motion. The intermediate and side sills would be fir. 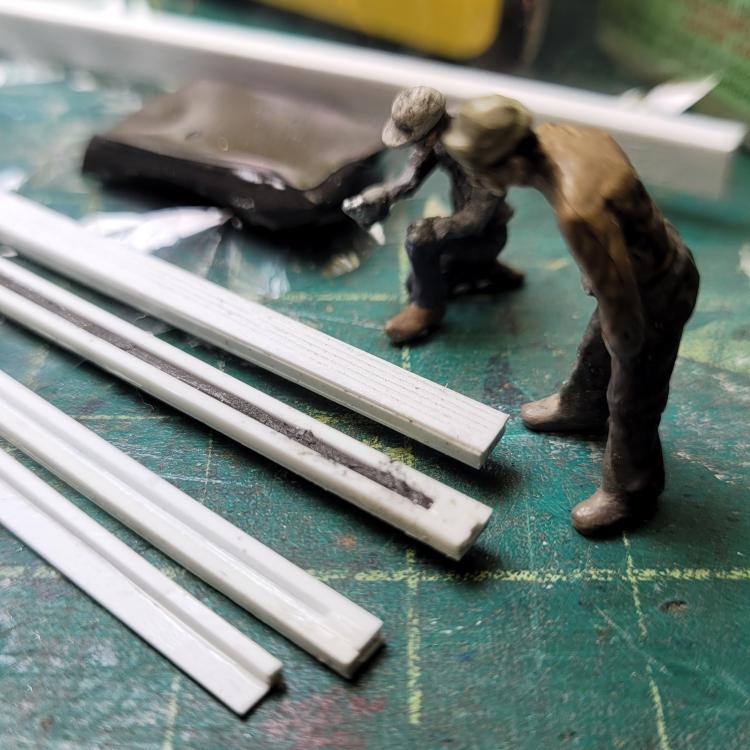 Fiddly work, but the results are heavier than the plain styrene parts.
Keith Hayes
Leadville in Sn3 |
|
End beams are almost both complete.
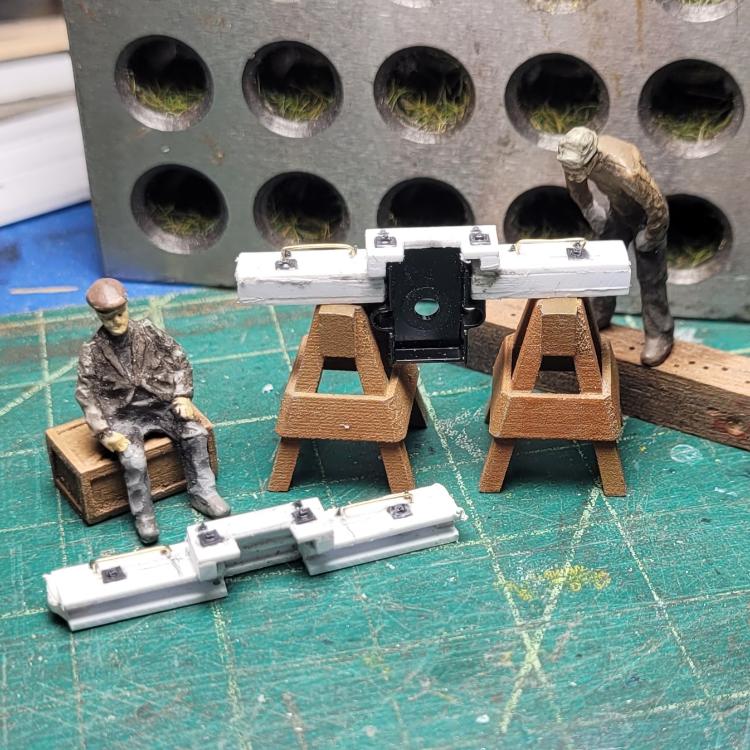 Fiddly work, but somehow very relaxing.
Keith Hayes
Leadville in Sn3 |
|
Keith, and other Car builders....
Dare I suggest a pair of tapered flatnose pliers be used for the finishing of Grab-irons. After bending the wire in whatever jig is used, then use the pliers to squeeze down on the grab, so as to take out the arch. Just a minor addition to the work schedule, but a 100% improvement in the look of the finished Grab-iron.  The posing of the figures sure adds interest to these little advances.
UpSideDownC
in New Zealand |
|
Chris, when I worked on restoring the end platforms of D&RGW RPO 53/MOW 053, I observed the end beam starts out as a really nice large, heavy piece of oak that is steadily diminished in volume and weight with multiple mortises, holes and various cutouts, depending upon the fashion of the time.
Typically in Sn3, the end beam hardware is cast in place and the grabs are located. This is perhaps the first time I have had the pleasant time of locating everything almost in the prototype manner per drawings my Mr. Poole. One struggle with grab irons--on the model and the prototype, is fitting them in among all the other doo-dads that are there too. For starters there are the four nuts and washers securing the truss rods. Gotta have those. Then there is the air hose on both ends, rather important. On the "B" end, there is the brake staff chain bracket and the retainer, two items invariably left to the end using square headed screws that are #12 or some-such in size, as folks generally don't hang off these. Even Mr. Poole questions where the retainer is located on the flat car as there is not much area to work with. Grab irons--as I believe you are well aware--are through bolted with carriage bolts threaded from the interior to the exterior of the car and secured with (in the day) square nuts on a circular washer. Because of this, they are located and the holes drilled early in the process. Also, because humans hang off the things, for safety purposes, they also go through a structural member, not just car siding. All this is a long way of saying that the fiddly short grabs on the end seem inelegant to me and when I bent the one, I think it was too short, hence the crimp. Pliers will be used at a later date to straighten things out, rest assured. I appreciate the comment about the figures. It is not hard to do and most of my favorite people are pre-painted.  Also, all my pictures are created with my handy cell phone, so no excuses from everyone who claims they cannot post progress pics for lack of a fancy camera. Also, all my pictures are created with my handy cell phone, so no excuses from everyone who claims they cannot post progress pics for lack of a fancy camera.
Keith Hayes
Leadville in Sn3 |
|
In reply to this post by Keith Hayes
The frame is taking shape.
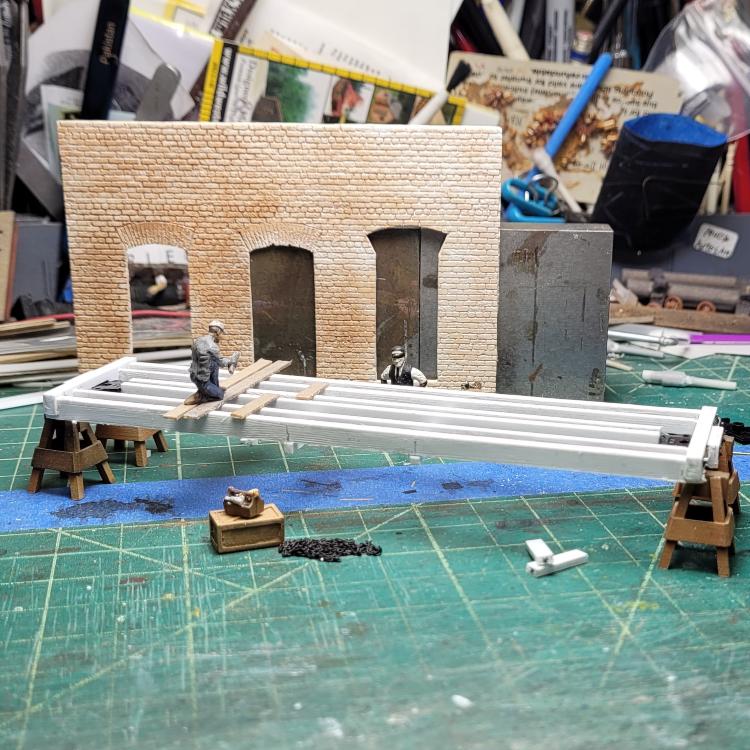 Happy New Year!
Keith Hayes
Leadville in Sn3 |
|
In reply to this post by Keith Hayes
On the "B" end, there is the brake staff chain bracket and the retainer, two items invariably left to the end using square headed screws that are #12 or some-such in size, as folks generally don't hang off these. Even Mr. Poole questions where the retainer is located on the flat car as there is not much area to work with.
I'd put the retainer right here: 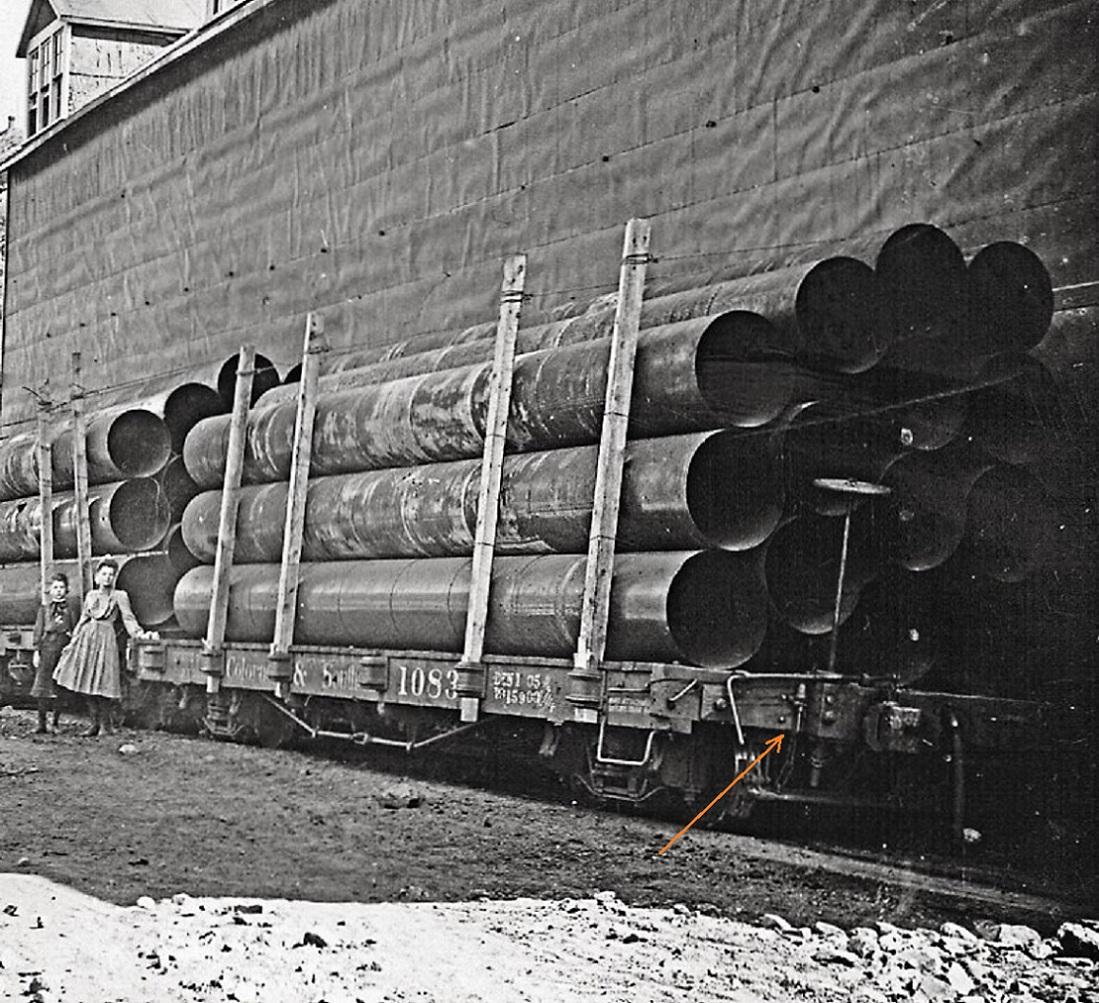 Doug Heitkamp collection. Note that the brake staff goes thru the left edge of the coupler draft gear buffer block--same as on the 1902 coal cars. BTW, Keith, what's the story of the brick building under construction?? Looks like Monster laser cut brick sheets. How did you do the brick inset arches above the window / doors ?? (they don't list them for sale in S scale). And Happy New Year to you, too, Keith, and all who visit here. 2023 has got to be better than this past year . . . doesn't it?? 
Jim Courtney
Poulsbo, WA |
|
Jim, (and Doug), thanks for the pic. I note that this seems to be a pre-safety appliance photo as there is a small (6"?) diagonal grab on the end of the end beam, but no horizontal grab as came later. I am drawn to the two kiddos posing with the loads of water conduit.
Speaking of which, those appear to be about 24" diameter and constructed of (9) sections about 3'-0" long riveted together both along the axis of the cylinder and circumferencally. How might one model this--really large straws? Too bad Archer is now out of business, as this would use up a couple sheets of rivets and weld beads (for the seam shadows). Do you suppose these are black steel? What color are these? If they are steel, they would start out a dark grey, with maybe some spots of oxidation, some silver scratches where the pipe was handled in the middle and perhaps primer (black or red?) on the ends? The brick wall is a long-ago experiment when I was constructing the Leadville passenger depot. It is Monster product, though a thinner sheet than I ultimately used. The work mat backdrop is unusually junky just now, and the wall seemed to class the picture up some. Maybe I should make a small stage set? During a visit to Salzburg this year, we encountered Mozart's birthplace which included a number of models for opera stage sets: 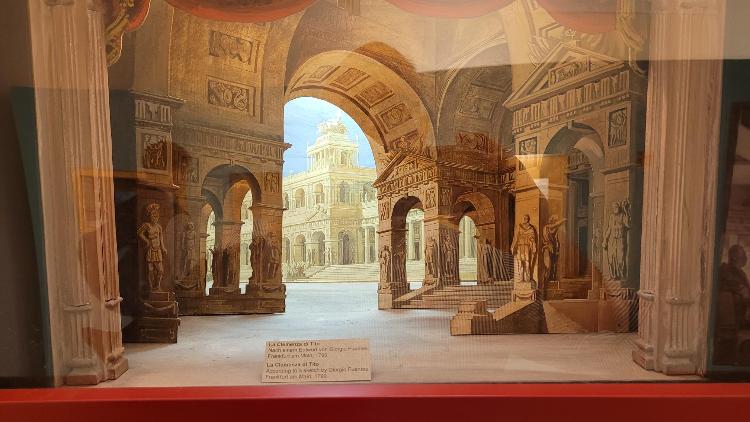 This seems a bit over the top as a backdrop for my humble builds, but you get the idea. Maybe a brick wall and a workbench, some posh clutter as Bob Brown calls it. Onward!
Keith Hayes
Leadville in Sn3 |
|
In reply to this post by Keith Hayes
Shiplaping the decking.
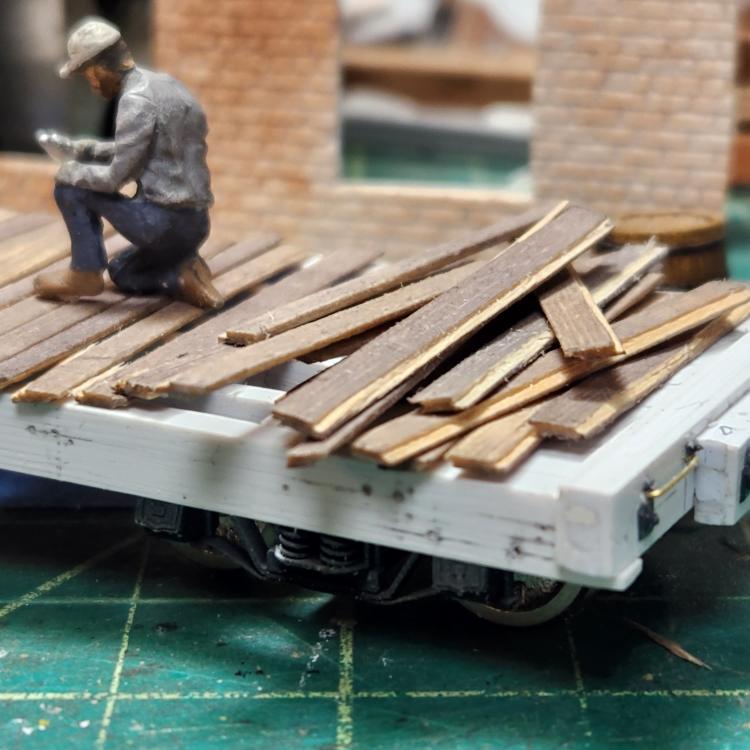
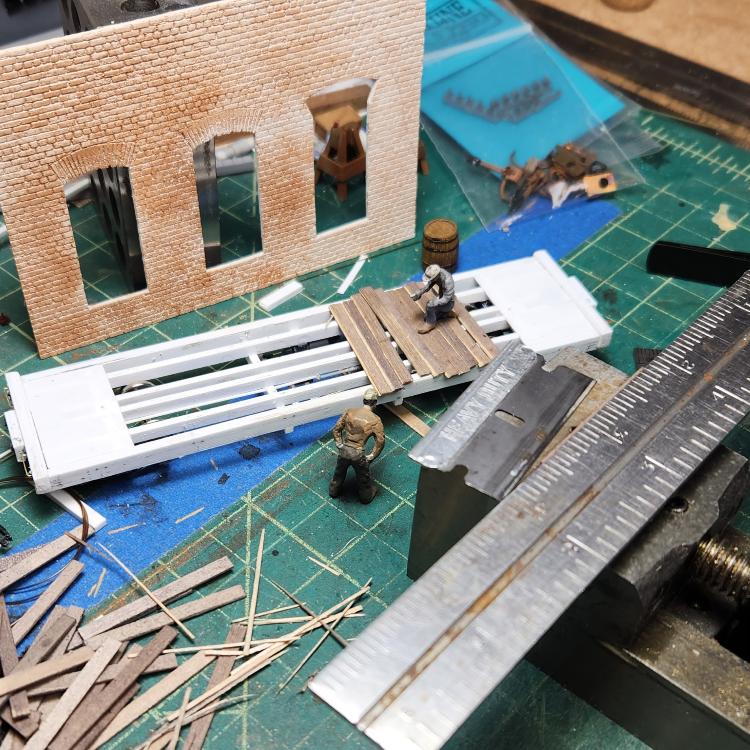 A painstaking process. Using my vise, the boards are clamped in and a sliver removed from each side. About 1/6th done.
Keith Hayes
Leadville in Sn3 |
|
That's ambitious, Keith.
 I made Shiplap decking years ago in 1/2" scale for some models using my 3" Unimat lathe tablesaw attachment: a most excruciatingly attentive process. I wonder if is it possible to render the lap notch in S ?
UpSideDownC
in New Zealand |
|
Like this?
Keith Hayes
Leadville in Sn3 |
|
Way to go, Mate.

UpSideDownC
in New Zealand |
|
Keith,
Nice job on the flooring. I also did it in 1/2" scale. I set up my Sherline mill like a router table and buzzed the floorboards adding the lap. Flip over and repeat! Since we like pictures, here is the car: 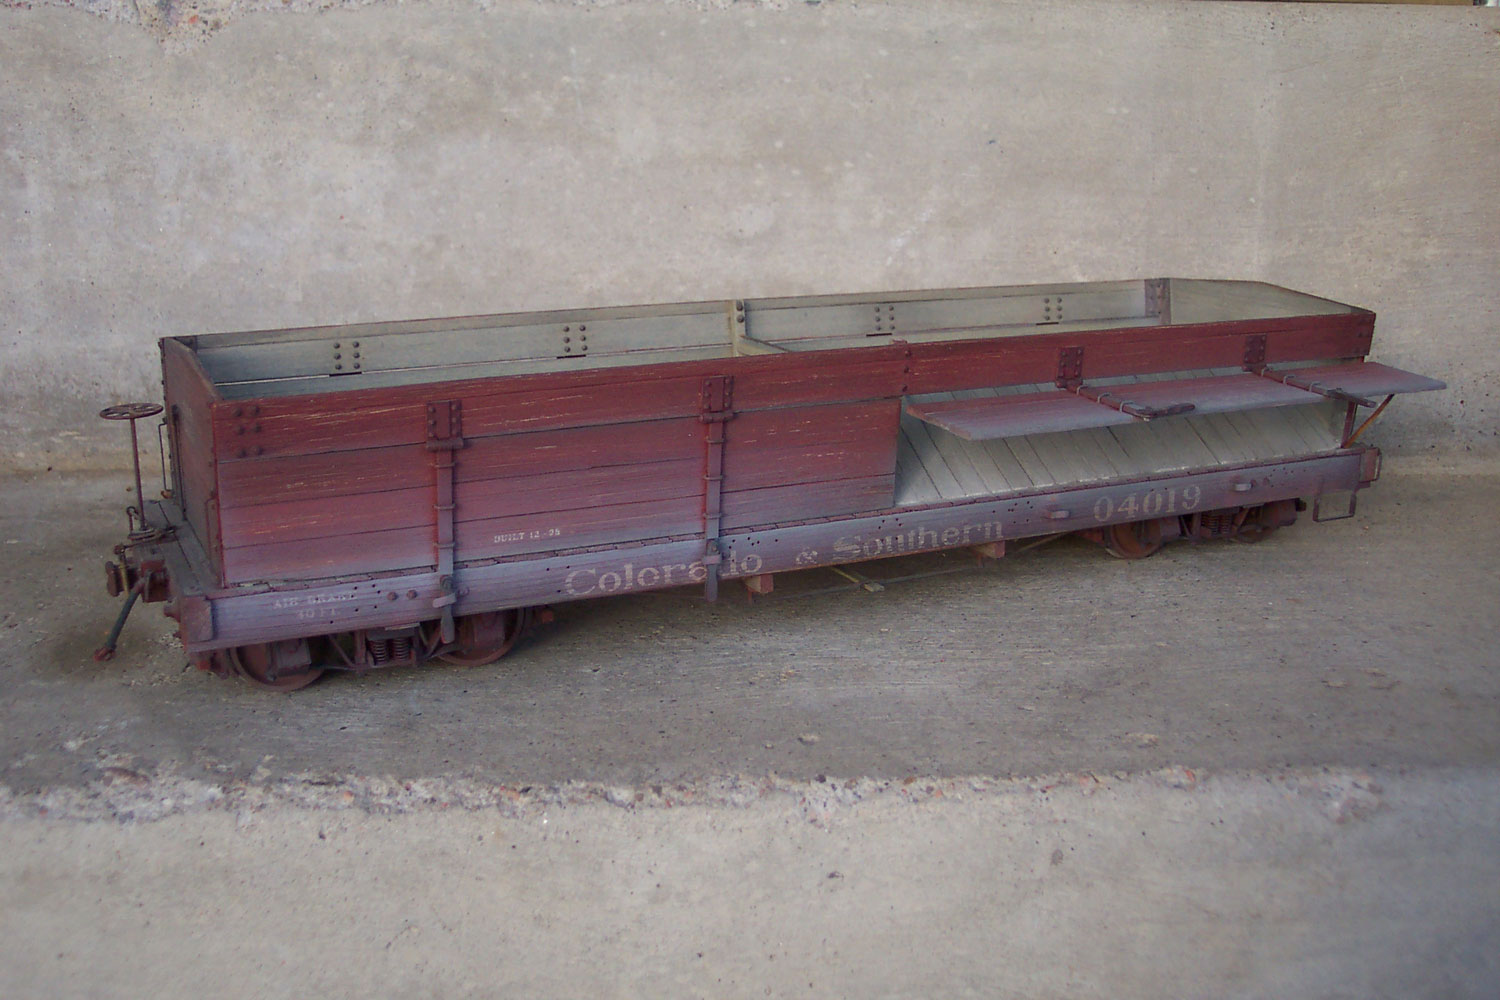 Thanks for sharing and nice work!
Doug Heitkamp
Centennial, CO |
|
Doug,
Scorching work! But just what year was that now? I seem to remember that in a Contest room, but Derrell did one as well, or am I mis-remembering that too?
UpSideDownC
in New Zealand |
|
Don't want to hijack Keith's excellent thread...the Cinder Cars were briefly discussed in this thread:
http://c-sng-discussion-forum.254.s1.nabble.com/Doings-in-Billings-td143.html#a191 Back to the regularly scheduled Phase II Flatcar postings....take it away Keith!
Doug Heitkamp
Centennial, CO |
|
In reply to this post by Chris Walker
I would suggest the easiest way to make the shiplap boards in most scales is to face glue two strips of wood. A jig can be easily made out of plastic to get the offset, shiplap, the right size. Now I may have to do it myself.
|
|
In reply to this post by Keith Hayes
Progress on the flat car has been slow.
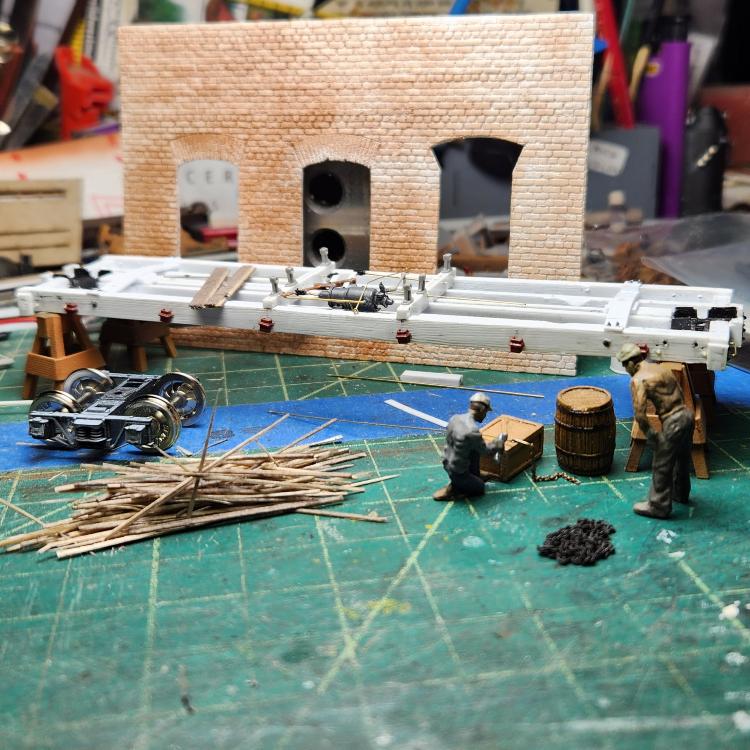 I have been staining the deck boards and got distracted painting a refer. The brake gear is nearly complete. The bolsters are fabricated and bolted in. I observe that these are solid wood cars with lots of holes to connect everything together. The stake pockets are in. The remaining details include the grab irons and stirrup steps. There is also the matter of adding some side bearing blocks to make the car less tipsy. Then off to paint!
Keith Hayes
Leadville in Sn3 |
|
The last bolts have been applied, along with the retainer, brake ratchet and pawl, and coupler pin lift bars.
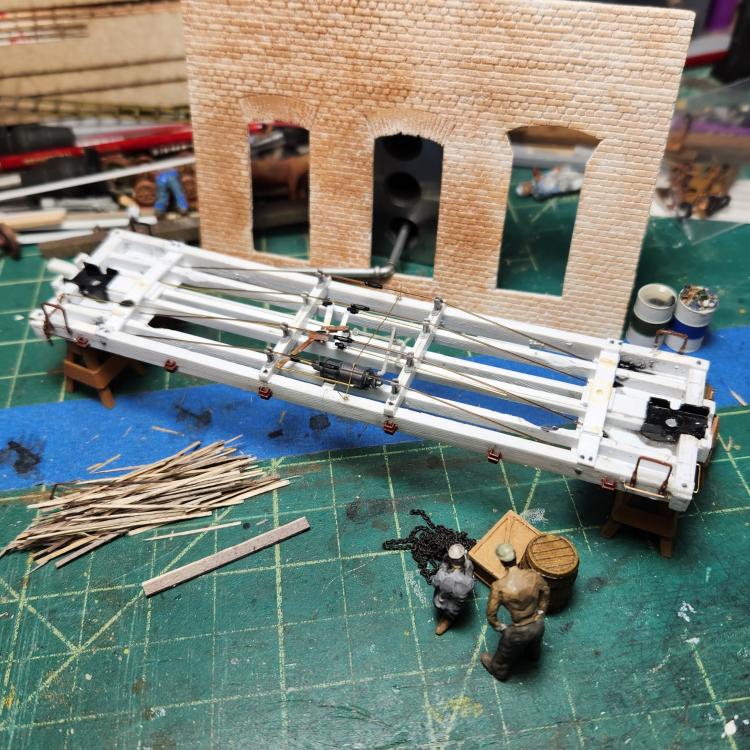 The whole works was washed and left to air dry. I also gave it a spray with alcohol to remove any last oil before priming with Mr. Hobby Primer. 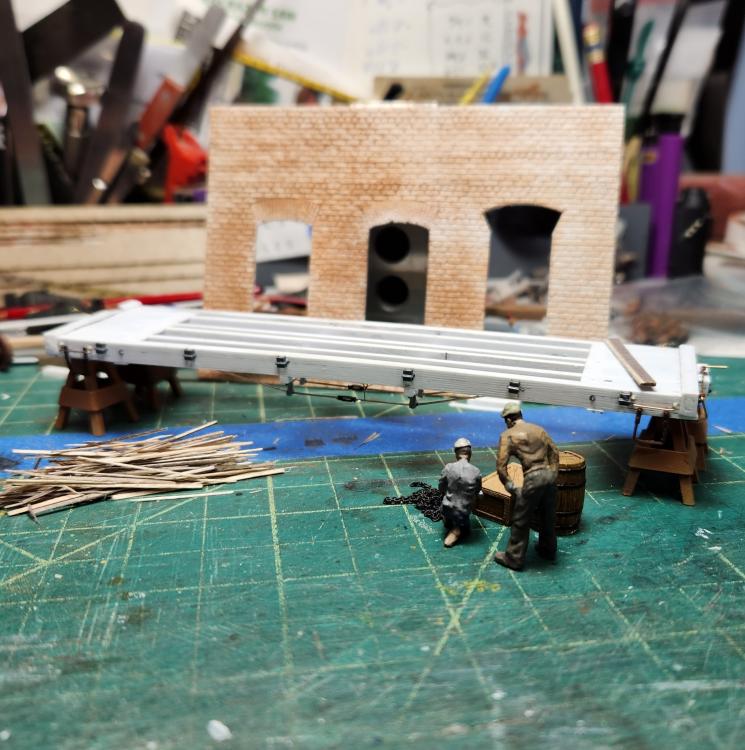 I was concerned the frame by itself would "parallelogram" as all the joints at the end beam are butt joints. I used some 0.01" styrene to stiffen the fram some from the end beam to the bolster. Now, off to paint!
Keith Hayes
Leadville in Sn3 |
«
Return to C&Sng Discussion Forum
|
1 view|%1 views
| Free forum by Nabble | Edit this page |

