Building a backdated C&S Refrigerator Car in Sn3

Previous Topic Next Topic
 
classic Classic list List threaded Threaded
21 messages Options
12
Reply | Threaded
Open this post in threaded view
|

Building a backdated C&S Refrigerator Car in Sn3

Doug Heitkamp
Hi Folks,

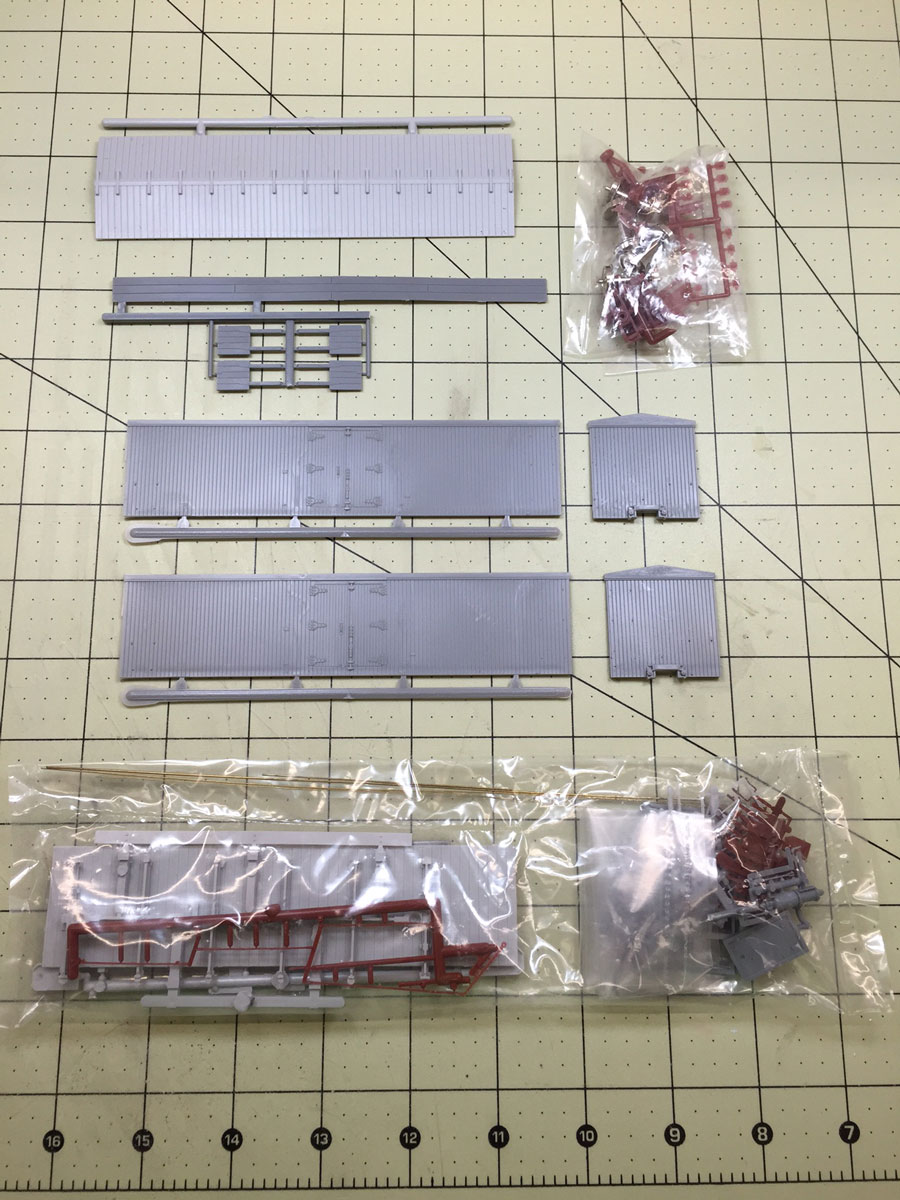
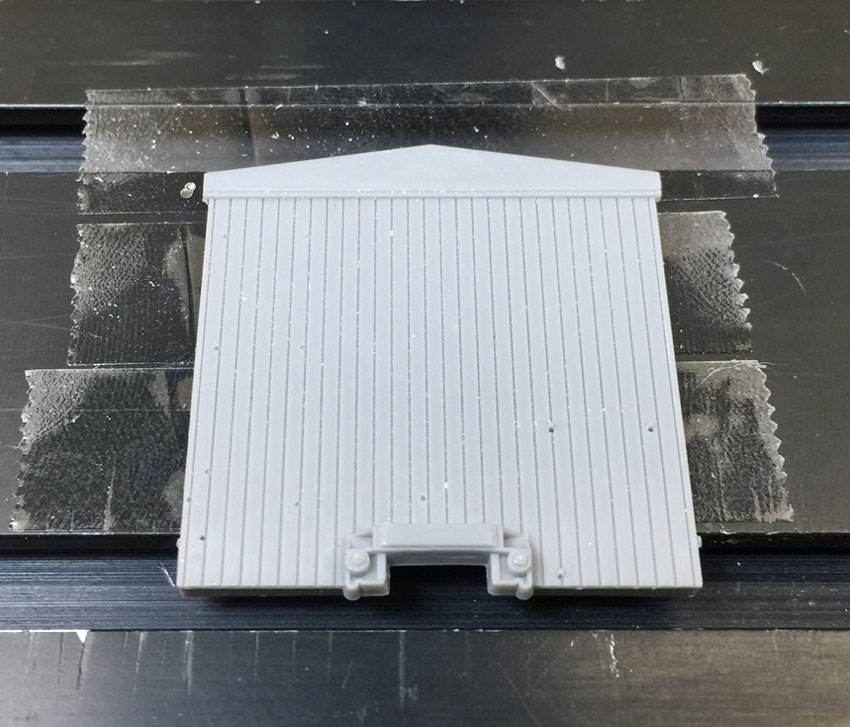
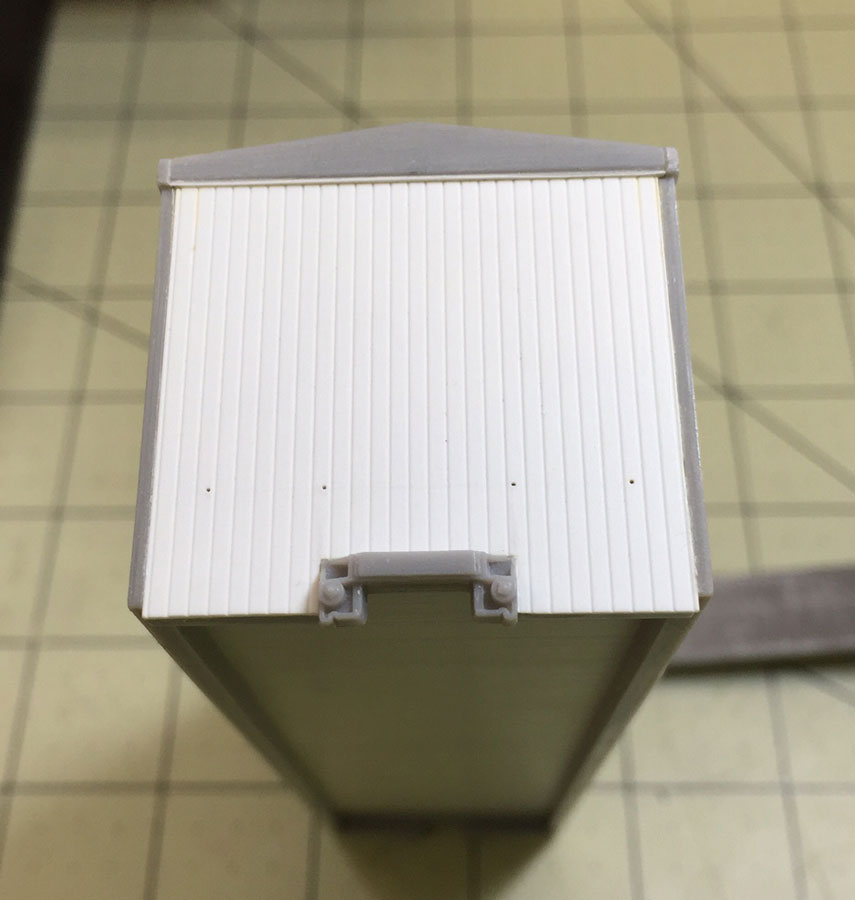
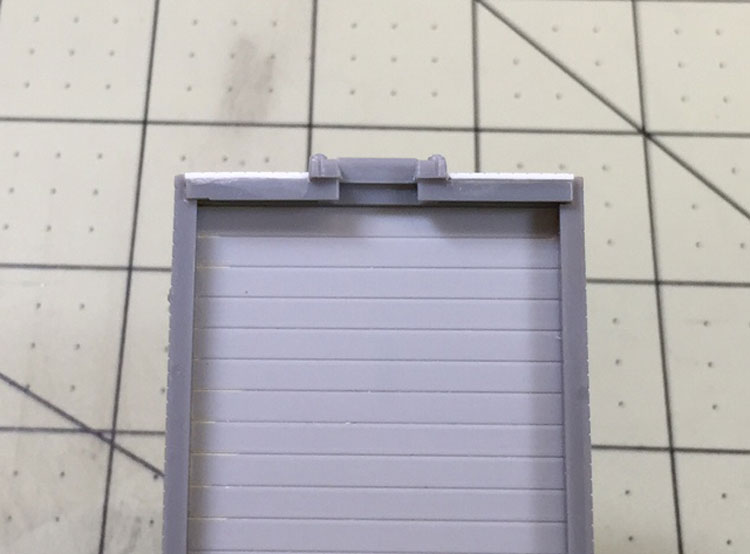
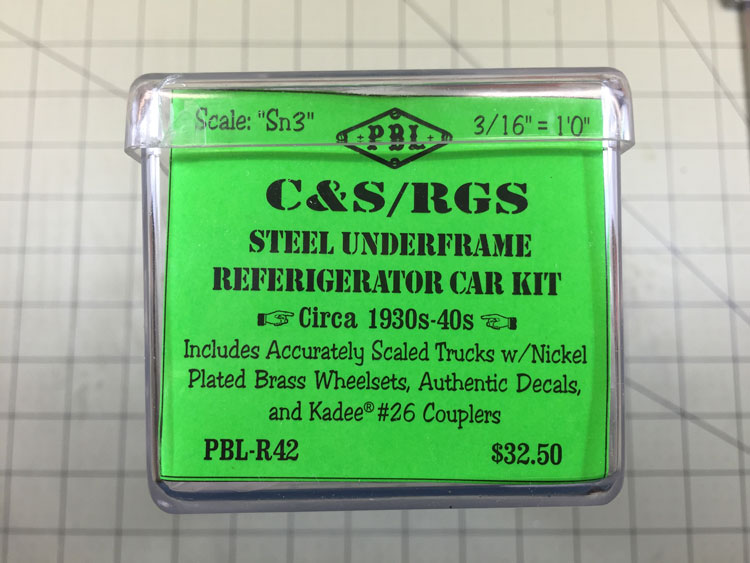
I recently started assembly of a Sn3 Overland/PBL C&S Steel Underframe Reefer kit. I was describing the project, and my plans to build the model as it would have looked when first built by the C&S (grab irons instead of ladders, block lettering, etc.) with Darel, and he suggested that I start thread on the site. Well, that sounds like a good way to keep me motivated and finish the project. Nothing like possible public humiliation to keep me moving forward! So, here we go….


I have not been to the workbench or finished a model in the last 4 years. Life and real work seem to have a habit of disrupting my leisure time. I got re-married 4 years ago and my wife Michelle has been pushing me to get to some modeling done and to get Design-Tech fired back up and get into the hobby again. More on Design-Tech later, for now I'll concentrate on building a freight car.

So, where to start? How about a little blab about my philosophy on building - I feel it's tough to be creative when surrounded by chaos. What this means to me is that I need to start a project with a clean and organized workspace, even though it may not look that way at the end of the project! I present to you a couple of pics of my work area -


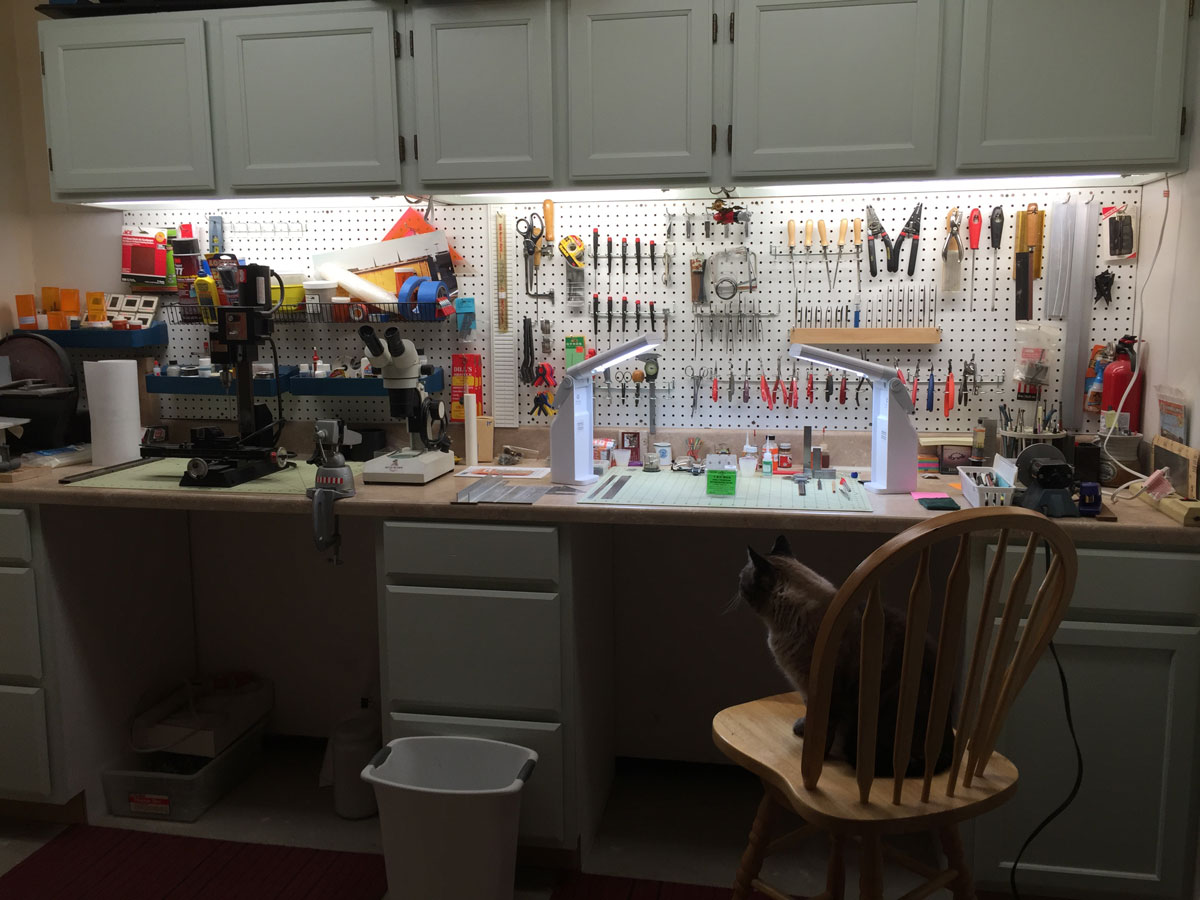
Ok, ok, I can hear you now. Believe me, I have done some of my best work in a 10" x 10" space with everything else piled around.

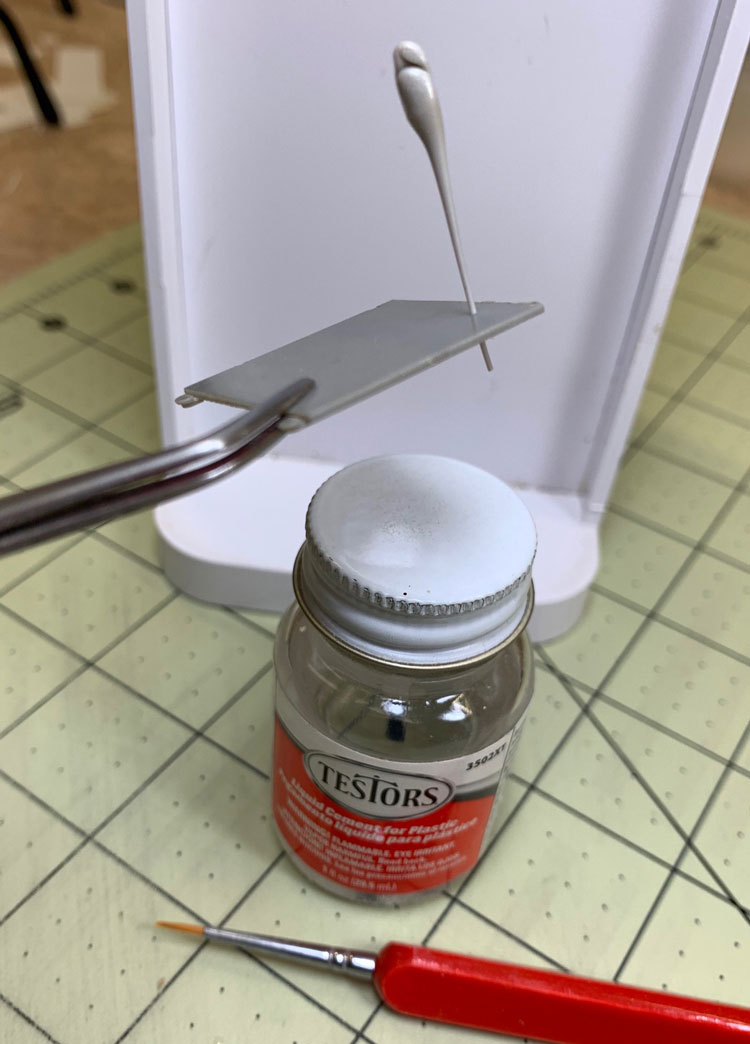
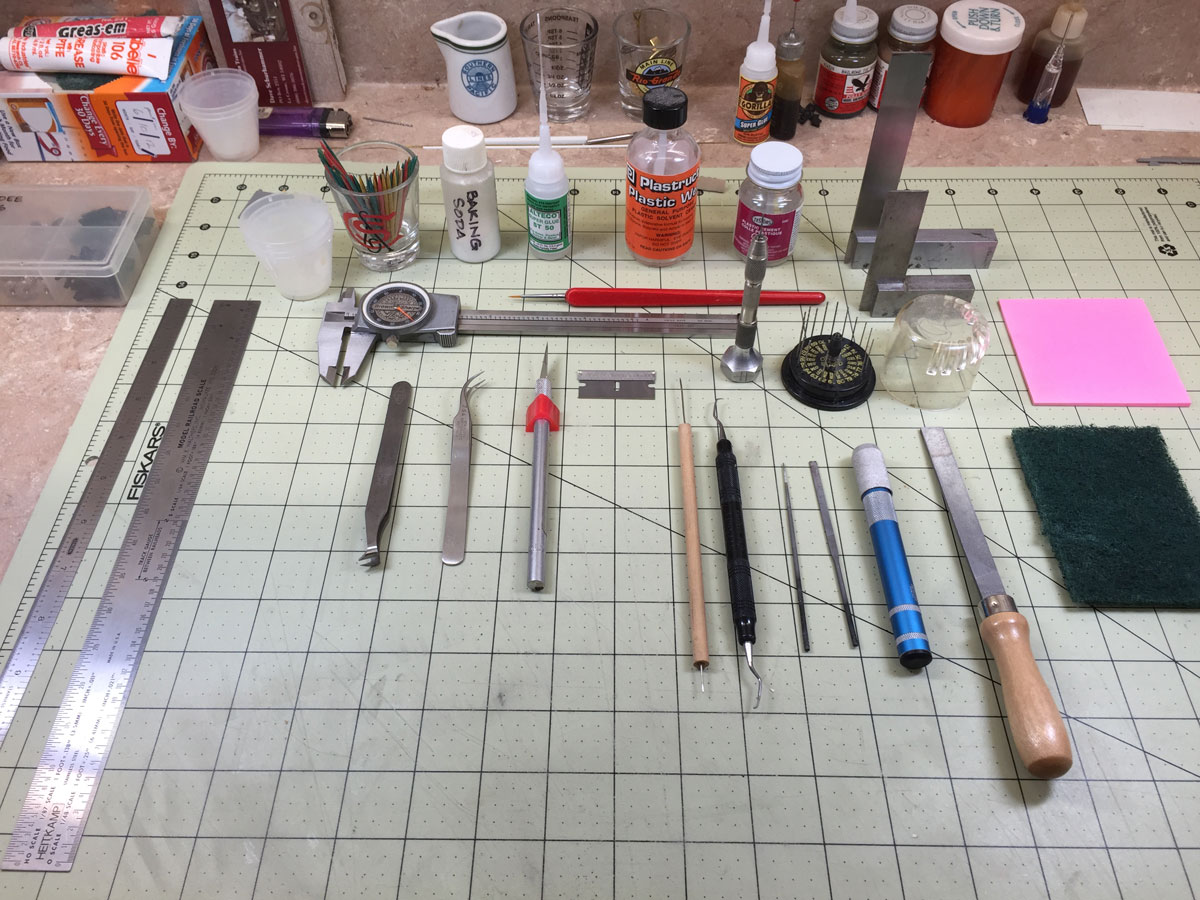
Tools - Below is a shot of what I would consider essential tools for assembling a kit of this type. Various cutting tools, drills, files, adhesives, rules, squares, and a good set of calipers.


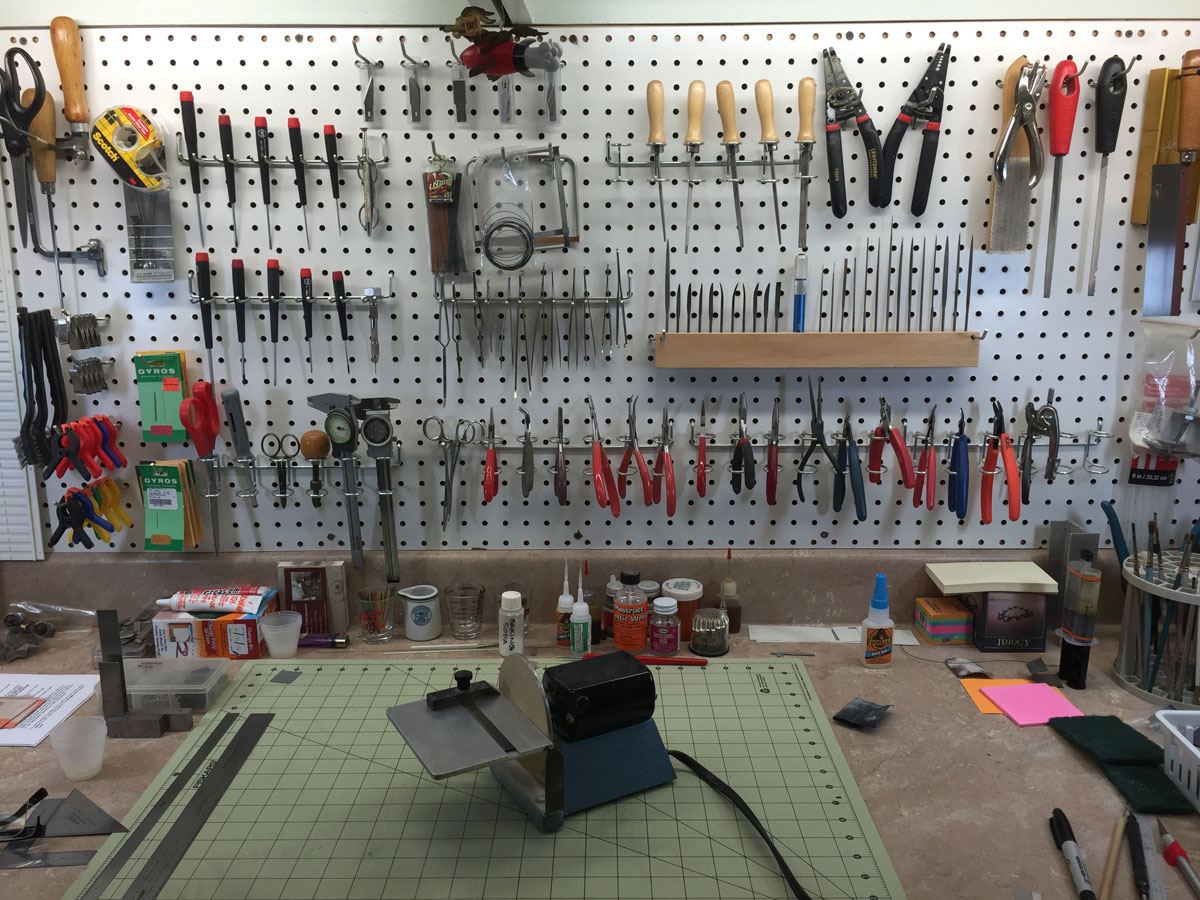
I also need light and the ability to see these tiny parts. The Ott Lights are rechargeable and were purchased at Lowes. They give me enough extra light and with no cords, can be moved easily around the workbench or taken to the layout! Also pictured are various visual aids. I find I use the flip up/down clip on magnifiers the most. I picked them up at Michaels for $7.00. The Opti-Visor gets less and less use once I found the clip on's. The binocular microscope was a $60 Craigslist purchase. It was being sold by a retired watchmaker and has 10X or 20X magnification. Perfect for some really upclose work I'll cover later.


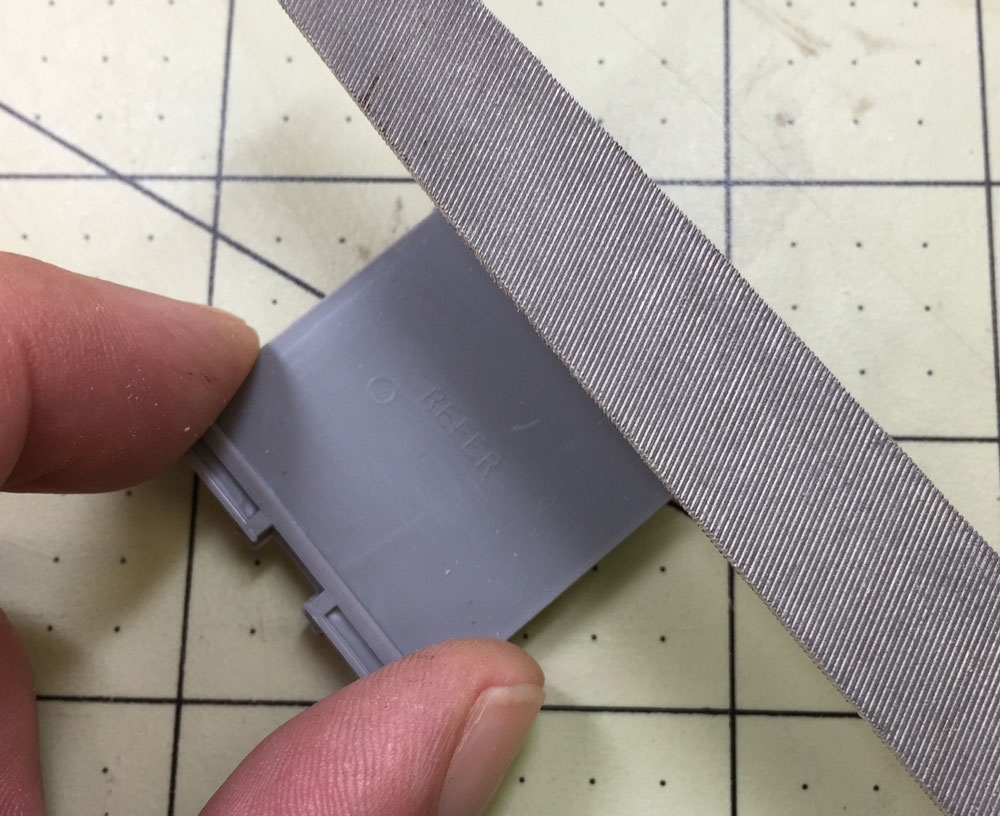
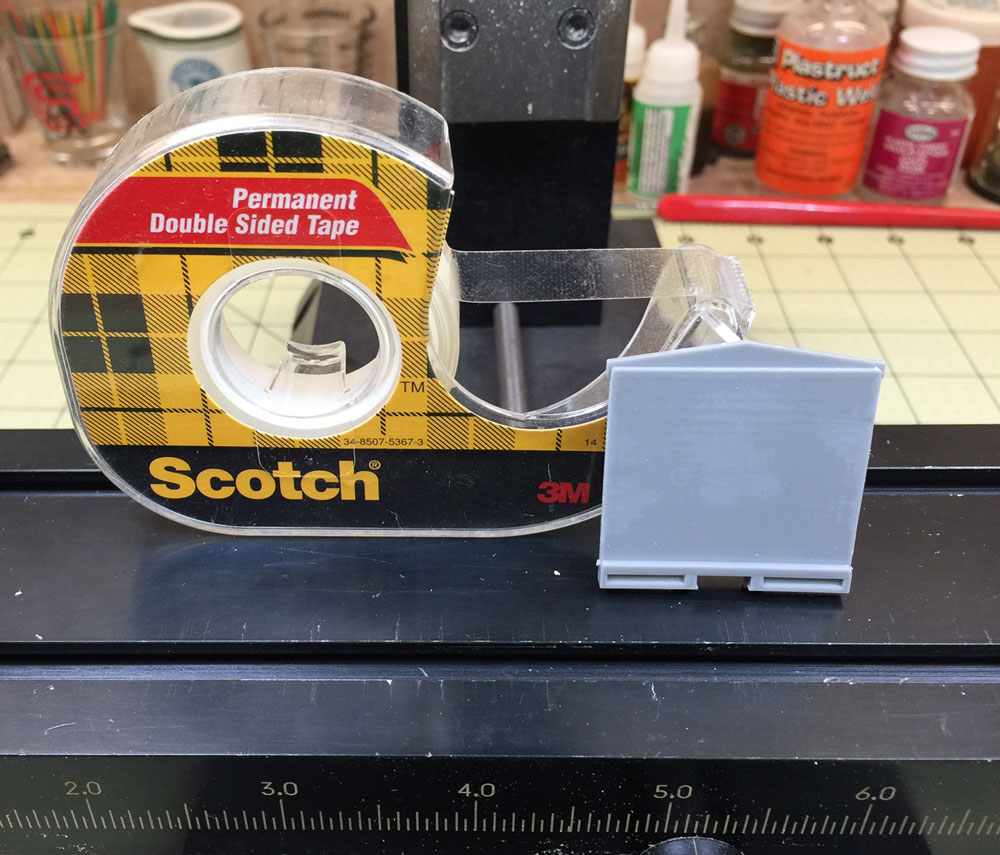
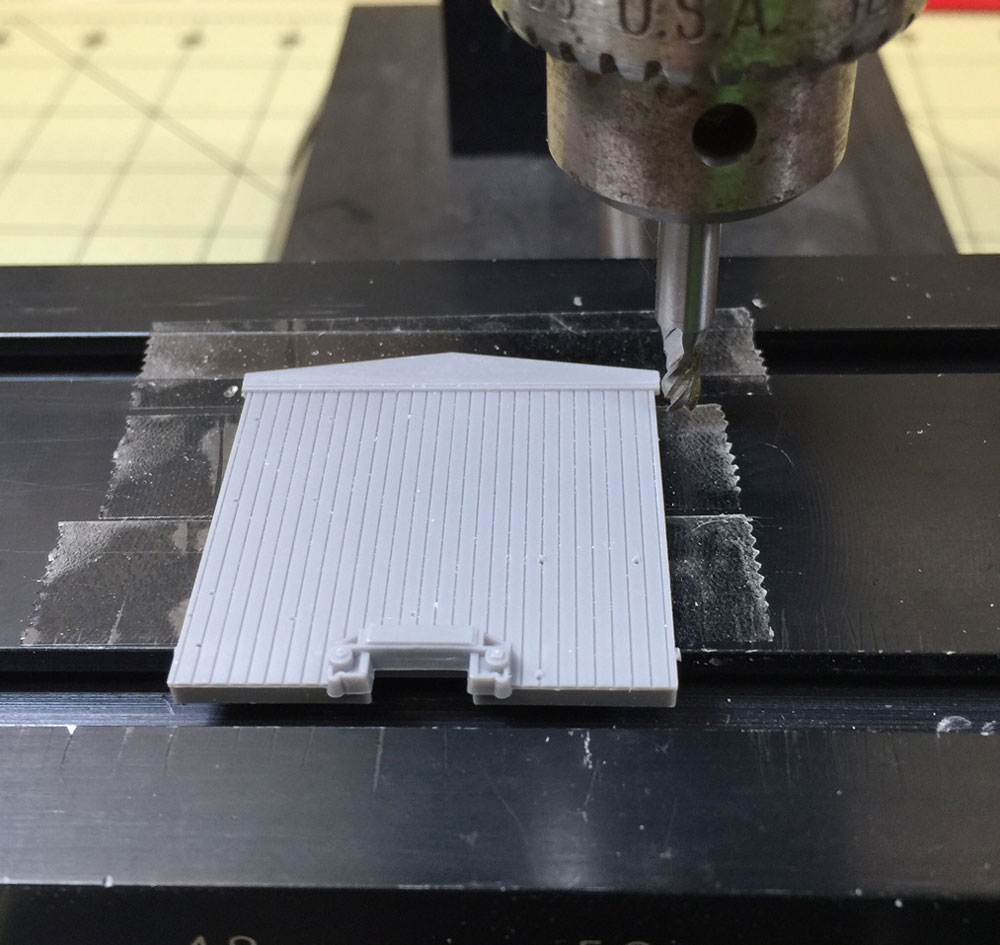
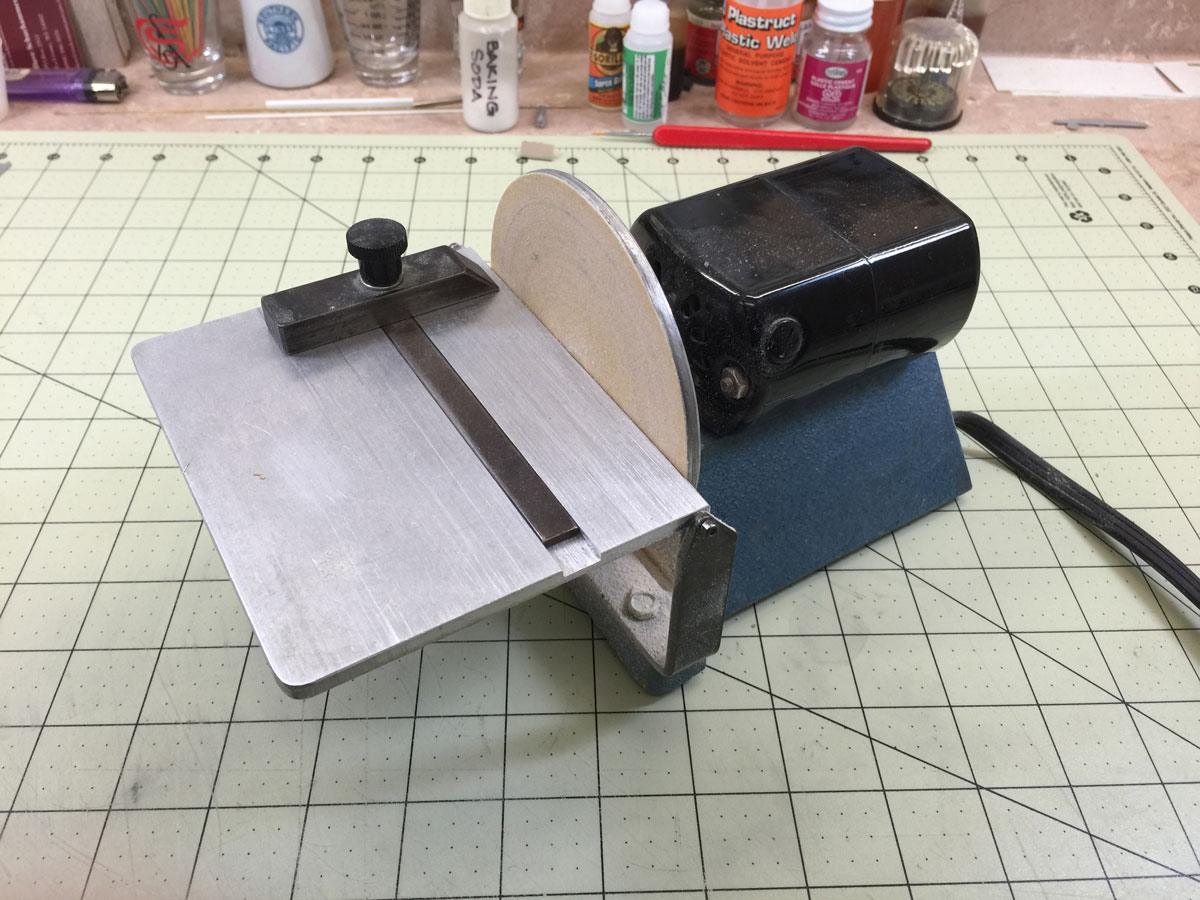
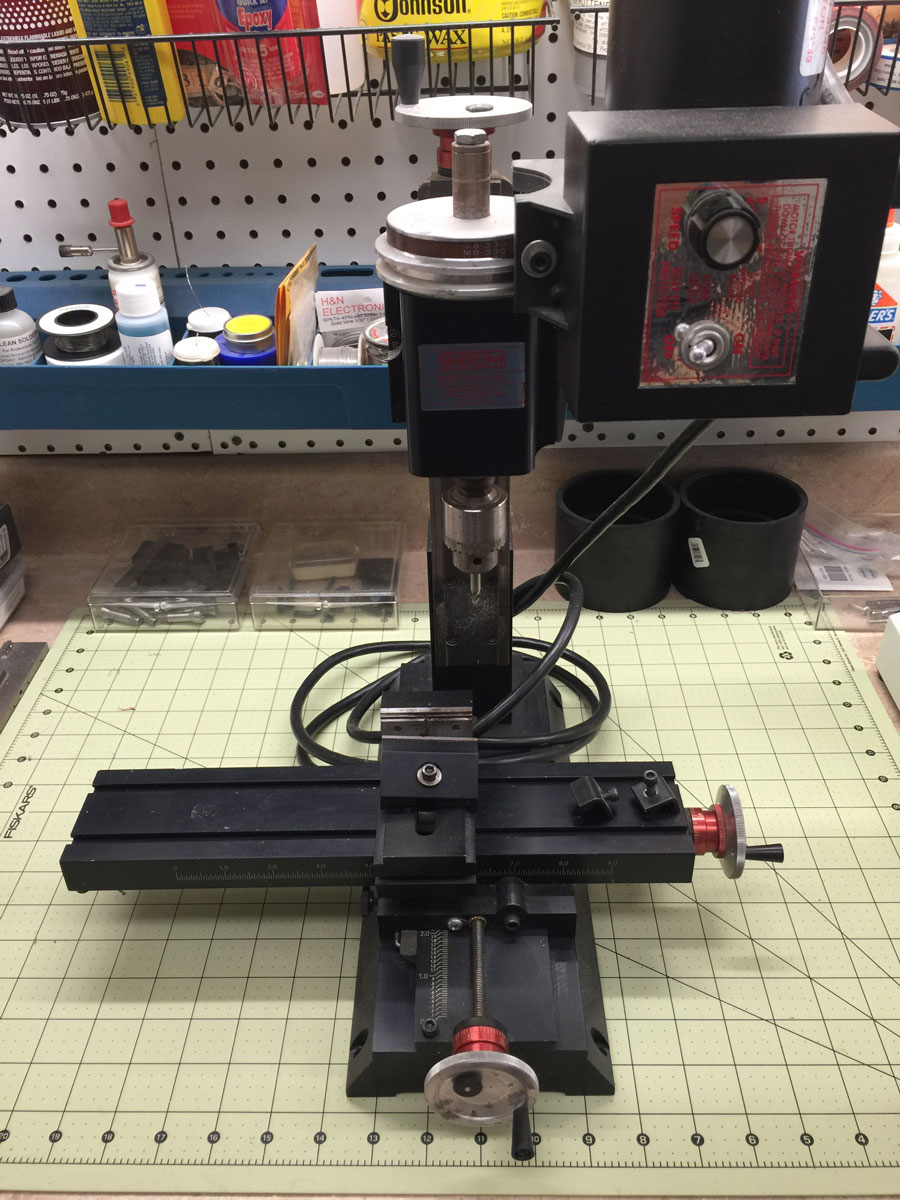
Now for a couple of luxury items. I don't know how I got along without these in the past. The small 3" sander is one of my most used tools next to a single edge razor blade. Invest in one, you won't regret it. The other item is the Sherline Mill. If you have ever debated buying a Mill or a Lathe, go with the Mill first. This tool revolutionized my modeling years ago. Yes, I will be using it for this project. Treat yourself to a quality small mill if you really want to get serious about your modeling. You'll be amazed how often you find yourself using it.


Before anybody has a melt down and says that they cannot do any modeling because they don't have all the tools mentioned, don't fret. Start with the basic hand-tools and build your collection as time and budget allow. A lot of great modeling has been done on the dining room table with just the basics. You have to remember that Design-Tech and custom model building was my full time job from 1993 to 2000.

As I mentioned at the beginning, I've actually started already and will catch you up on progress in the next installment.

Feel free to comment and ask questions. The goal of this thread is to inspire others to get some C&S models built. I'm more than happy to share tips and techniques that have worked for me.

Stay tuned for more…
Doug Heitkamp
Centennial, CO
Reply | Threaded
Open this post in threaded view
|

Re: Building a backdated C&S Refrigerator Car in Sn3

Jim Courtney
If the purpose of this thread is to inspire model building, I'm already inspired by your shop area!

So, yet another first decade C&S model builder.

I look forward to your progress, as I have a couple of these kits to build c1909.

Jim

Jim Courtney
Poulsbo, WA
Reply | Threaded
Open this post in threaded view
|

Re: Building a backdated C&S Refrigerator Car in Sn3

Doug Heitkamp
Jim,

Awww, now my secret is out. The real goal of this exercise was to get my workbench cleaned off!

Thanks,

Doug
Doug Heitkamp
Centennial, CO
Reply | Threaded
Open this post in threaded view
|

Re: Building a backdated C&S Refrigerator Car in Sn3

Doug Heitkamp
Folks,

If you are interested in the history of the C&S Refrigerator cars, here is some recommended reading. Derrell Poole did an excellent series of blog posts about the cars and modeling them. Just follow the links....

http://coloradosouthern.blogspot.ie/2014/02/1927-reefers-not-what-you-expected.html

http://coloradosouthern.blogspot.ie/2014/01/c-refrigerator-cars-part-two.html

http://coloradosouthern.blogspot.ie/2014/02/c-refrigerator-cars-part-three.html

http://coloradosouthern.blogspot.com/2014/02/c-refrigerator-cars-part-four.html


I'll be posting an update on my modeling progress very soon.

Thanks again!

Doug
Doug Heitkamp
Centennial, CO
Reply | Threaded
Open this post in threaded view
|

Re: Building a backdated C&S Refrigerator Car in Sn3

Chris Walker
In reply to this post by Doug Heitkamp
Doug,

great to see you getting back into this, impressive workbench organisational skills.  Work area looks good but I don't see an overhead travelling hoist.
UpSideDownC
in New Zealand
Reply | Threaded
Open this post in threaded view
|

Re: Building a backdated C&S Refrigerator Car in Sn3

Don Peterson
In reply to this post by Doug Heitkamp
Doug,
Welcome back!Its good to hear you are modeling again. Your work is always inspiring. I could use some inspiration. Haven't put a knife to styrene in months.

Can't wait to hear more about Design-Tech

Don Peterson
Reply | Threaded
Open this post in threaded view
|

Re: Building a backdated C&S Refrigerator Car in Sn3

Robert Stears
Keep up the great work Doug.


Sent from my iPhone

On Sep 9, 2016, at 7:21 PM, Don Peterson [via C&Sng Discussion Forum] <[hidden email]> wrote:

Doug,
Welcome back!Its good to hear you are modeling again. Your work is always inspiring. I could use some inspiration. Haven't put a knife to styrene in months.

Can't wait to hear more about Design-Tech

Don Peterson


If you reply to this email, your message will be added to the discussion below:
http://c-sng-discussion-forum.41377.n7.nabble.com/Building-a-backdated-C-S-Refrigerator-Car-in-Sn3-tp6066p6077.html
To start a new topic under C&Sng Discussion Forum, email [hidden email]
To unsubscribe from C&Sng Discussion Forum, click here.
NAML
Reply | Threaded
Open this post in threaded view
|

Re: Building a backdated C&S Refrigerator Car in Sn3

Doug Heitkamp
Ok, time to get started!

Below is a picture of what the basic kit looks like. There are a couple of differences between the Overland vs. PBL versions of the kit. When PBL took over the line of kits, they did have to make some changes for various reasons, mainly to the brake rigging and trucks.


The first step I take is to get rid of the dimples where you are supposed to drill holes. These locations represent the locations where the Safety Appliance Act upgraded hardware went. They need to be removed or filled. The sides of the cars can be drilled and plugged (more on that later). I take a different approach for the ends of the car. I mill off the "boards" and re-skin the ends with Evergreen siding.


First step is to smooth the back side of the car ends. There is some raised lettering that I file off.


To mill the ends, you need to secure the car end to the mill table. Double sided tape to the rescue! I find I use this technique a lot. Wood, plastic, and metal can be held this way as long as the back side is smooth.


Car end securely in place. The top of the end bolster is lined up (pressed against) the slot in the mill table. This squares it up nicely.


Time to start cutting. I'm using a 4 flute end mill and will cut .020 inch deep. Back and forth, back and forth, back and forth, then cut carefully around the striker plate.


Once the "boards" have been milled away, I re-skin the end of the car with .050 V-Groove x .020 inch thick sheet styrene. It's a virtual match for the board width on the sides and ends of the car (allowing for camera distortion). It may take a bit of careful cutting, but I feel the effort is worth it. No holes to fill or board grooves to re-scribe.


To get a great fit with the styrene skin, make it wider than the edges of the car end. Get a good fit between the bottom of the upper facia and the striker plate. Once that fits, and is glued in place, then trim the sides to fit. I do one end at a time so I can reference the unaltered end for dimensions. Here is the completed part in place. The Evergreen styrene is white, the stock kit parts are gray.


As I mentioned earlier, having a mill is a luxury, but it will allow you to do things that you just can't do by hand. In this case, it saves me hours of filling holes and scribing board lines.

In the next episode, I'll show you how I fill the holes on the car sides. One tip - Don't throw away the sprues/runners that the parts are attached to. We need those!
Doug Heitkamp
Centennial, CO
Reply | Threaded
Open this post in threaded view
|

Re: Building a backdated C&S Refrigerator Car in Sn3

Jeff Young
Nice write-up, Doug.

Somewhat surprisingly, the double-sided tape trick even works on a full-sized mill as long as you don't try to take out too much metal at one time.

Cheers,
Jeff.
Reply | Threaded
Open this post in threaded view
|

Re: Building a backdated C&S Refrigerator Car in Sn3

usairman737
A microscope, the ultimate rivet-counter's tool!

I just wonder how your workplace looks after a couple hours of model work.  My "free space" at the center shrinks to the size of the current project, and stays there until the project is complete.

Gerry
Reply | Threaded
Open this post in threaded view
|

Re: Building a backdated C&S Refrigerator Car in Sn3

Doug Heitkamp
Jeff - Yes, it was my friend Jerry Kitts that taught me to use the double sided tape. It's amazing how much gripping power the stuff has even when a little is used.

Gerry - That microscope is getting used more and more as I get older and the eyesight changes. Having the dual eyepieces and the "stereo" view helps a lot. I now find myself making modified tools that will fit under it and in the field of view. Also, at the end of a building session, my eyes are not as tired.

Like everybody else, my workspace does become quite cluttered by the end of a project. Having the set-up that I do is actually a curse - Just more space to clutter up!

D
Doug Heitkamp
Centennial, CO
Reply | Threaded
Open this post in threaded view
|

Re: Building a backdated C&S Refrigerator Car in Sn3

Mike McKenzie
Great tip on the double sided. I got a slightly used Sherline mill and haven't plugged it in yet much less used it, still looking for the best place to set it up. While someday I'd like to produce lots of metal shavings, I figure the best way to gain experience on the thing is milling wood and plastic. The tape would simplify set-up, especially with plastic, would have to be a little careful with wood.

As for workspaces, I enjoy checking out the shop area when I'm on a layout visit almost as much as the layout itself.

Mike
Reply | Threaded
Open this post in threaded view
|

Re: Building a backdated C&S Refrigerator Car in Sn3

Fred H.
How did this project turn out, Doug?
Fred H. Hutchison
Black Hawk in 1:24
Reply | Threaded
Open this post in threaded view
|

Re: Building a backdated C&S Refrigerator Car in Sn3

Doug Heitkamp
I'm back......
Doug Heitkamp
Centennial, CO
Reply | Threaded
Open this post in threaded view
|

Re: Building a backdated C&S Refrigerator Car in Sn3

Doug Heitkamp
Folks,

It's only been 3 years since my previous post, so I figure its a good time to get this project finished.

Filling holes. When I decided to back date this car, I knew there were going to be holes that need to be filled. There are many methods to filling holes in styrene, but this is what I do.

The first step is to drill the hole all the way through the part. Many of the current kits have dimples where the hole is to be located.

Don't throw away the runners and spues. That is your free filler material. Using a heat source, (like a small candle) heat the sprue and stretch it when it becomes soft enough to pull apart.


Then, cut the stretched sprue apart and insert it into the hole that you need filled. Use the thicker end on the side that will show. Using liquid cement for styrene (not ACC), cement from the back side and set aside to dry.


When dry, use a chisel blade (Xacto #17) to slowly and carefully slice the remaining sprue off. It's important that the glue is dry or the joint will be soft and the filler rod can distort and leave a bump or dent. Then, sand or file smooth. Not a lot will be needed.


After priming and painting, these filled holes will be invisible.
Doug Heitkamp
Centennial, CO
Reply | Threaded
Open this post in threaded view
|

Re: Building a backdated C&S Refrigerator Car in Sn3

Doug Heitkamp
Here are a couple of shots of one side that has been filled and re-drilled for early style grab irons.


Doug Heitkamp
Centennial, CO
Reply | Threaded
Open this post in threaded view
|

Re: Building a backdated C&S Refrigerator Car in Sn3

Lee Gustafson
Doug,

Glad to see your build resume. Your work is always instructional and inspirational. Look forward to any word on Design Tech. Again, thanks.

Lee Gustafson
Reply | Threaded
Open this post in threaded view
|

Re: Building a backdated C&S Refrigerator Car in Sn3

lakeray
Glad to see your back Doug.  How useful is the stereo microscope in your modeling work?

Thanks,
Ray
Reply | Threaded
Open this post in threaded view
|

Re: Building a backdated C&S Refrigerator Car in Sn3

Doug Heitkamp
Lee & Ray,

Thanks for the kind words!

The microscope - I find that I'm using it more than I thought I would, especially when I'm working on, or looking at, details that are just a bit too small to see with my glasses. Re-scribing board lines, marking hole centers, making very small precise measurements are pretty easy to do under the scope. Remember that this is a relatively low power scope. I usually use it at 10X power. The scope has a range of 10X - 20X power. Most of the time I use it just to look at my work, looking for gaps or flaws. This is important when pattern making because any goof-up in the pattern will be replicated in the final part.

Thanks for asking!
Doug Heitkamp
Centennial, CO
Reply | Threaded
Open this post in threaded view
|

Re: Building a backdated C&S Refrigerator Car in Sn3

Keith Hayes
Doug, thanks for picking this project up again. We all look forward to seeing the finished product.

Care to take on modifications to a Phase II stock car to make it the right height/ width? I have a couple models I am willing to donate to the cause!
Keith Hayes
Leadville in Sn3
12