Baggage and Mail #13
|
Administrator
|
I was looking back through previous posts, and discovered that I have apparently failed to post pictures of my Baggage and Mail #13 which I built in 2014 using parts and material from a Crossing Gate RPO kit, Evergreen styrene sheets and strips, a few PSC castings, and modified Grandtline trucks. I decided to use the Grandt doors that came with the kit, and modified Grandt window castings to at least closely approximate the correct size.
Many thanks to Ken Martin for drawings which were included in his excellent book, and for helping me out with a dimension or two, and a couple of questions along the way. Thanks too, to Randy Lee, for the large Brake Wheels he had made for his #20 kit. The decals were actually from Overland. How nice they included the ones for #13 on the On3 sheet! Back in the 80's, Todd Hackett and I drove up to Hill City, SD to measure and photograph #13, Coach #76, and #911, along with #9 for Overland Models. The quote from Overland's builder, M.S. Models in Korea was so high for #13 in On3, that Tom Marsh felt it just couldn't be done, and was not produced. Nor was #911, as it had already been done by Hallmark. But coaches #76 and #70 were built. Another of Tom's builders produced both coaches and #13 in Sn3 (?) and HOn3 (definitely). So this was an addition to the roster which absolutely had to be made when I returned to the On3 C&S fold in 2013. After all, how can you run a C&S passenger train without a Baggage and Mail?? With Ken's drawings and the small spiral (Quick Pic) book on #13, I went to work, building it as though it was a Crossing Gate kit, but with different dimensional aspects. The goal was to build a car that would look like it belonged in a train with the Overland Coaches, not so much as a contest model. Just a note of caution to those wanting to build some C&S passenger equipment, the C&S equipment sits higher off the ground by at least 6". The Grandt D&RGW trucks were modified by removing the frame extensions and not using the body stabilizers. Here are a few pictures, apologies to Robert and others who I had promised to post earlier. This car has appeared in several other posted photos, but if I couldn't find them this morning, it would be almost accidental for anyone else. 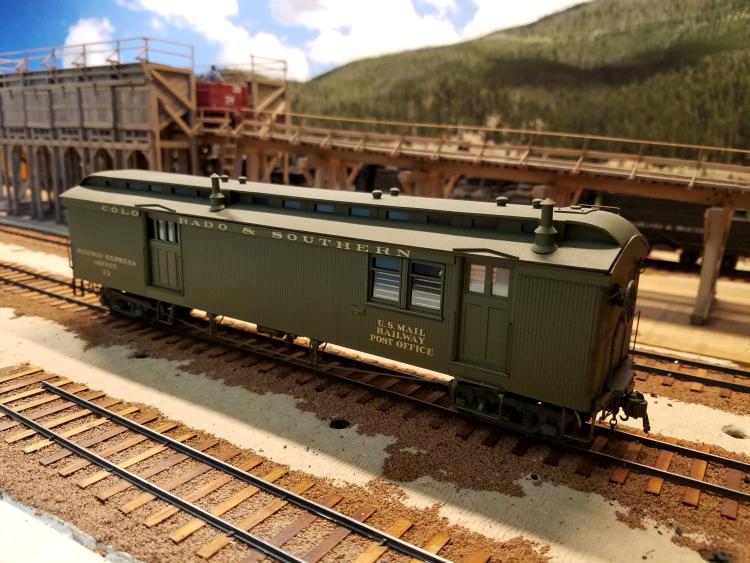 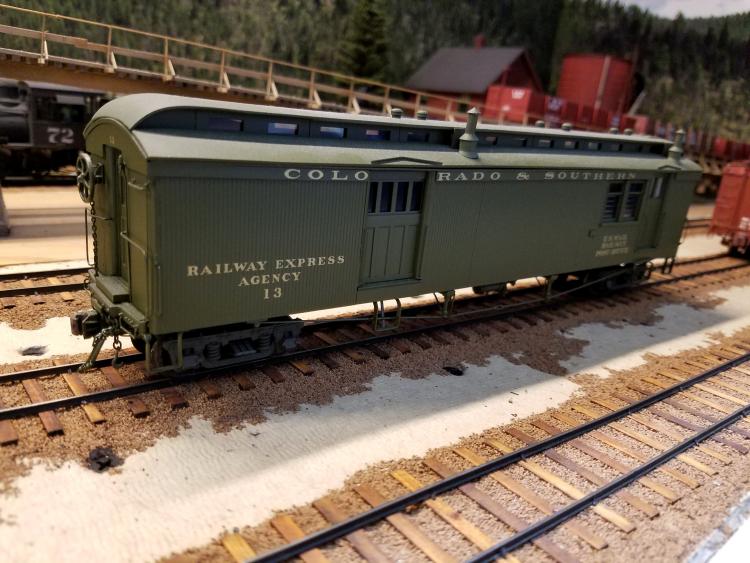 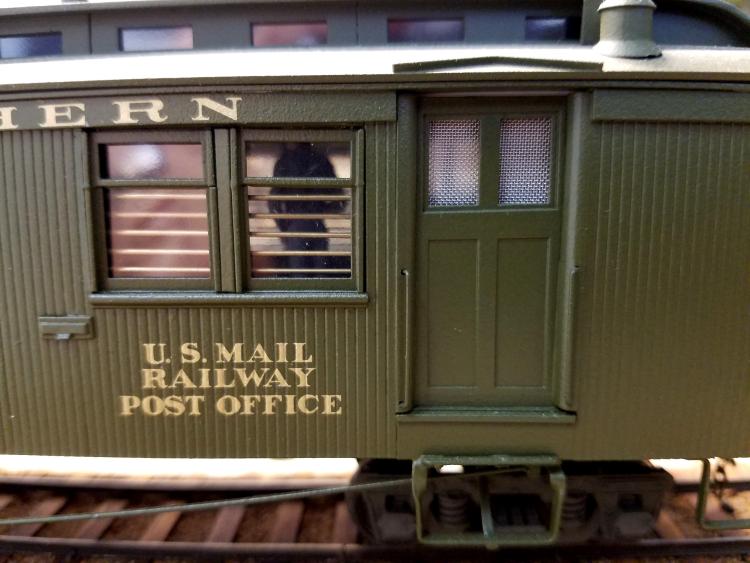 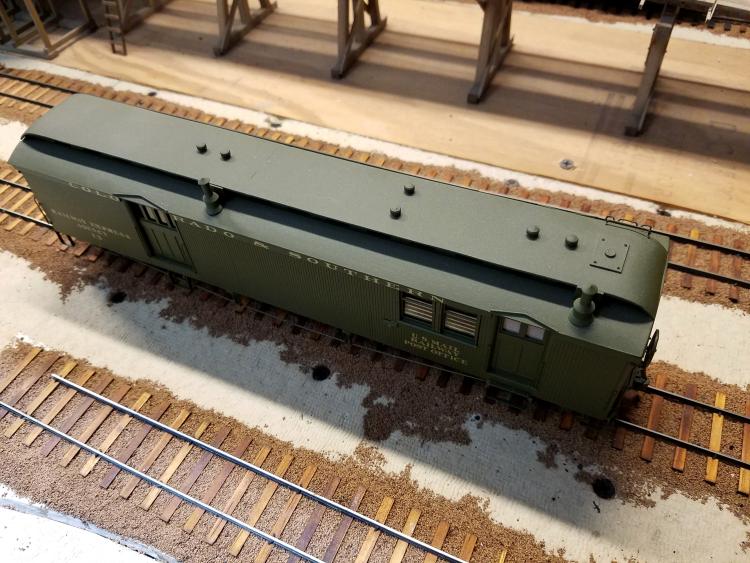
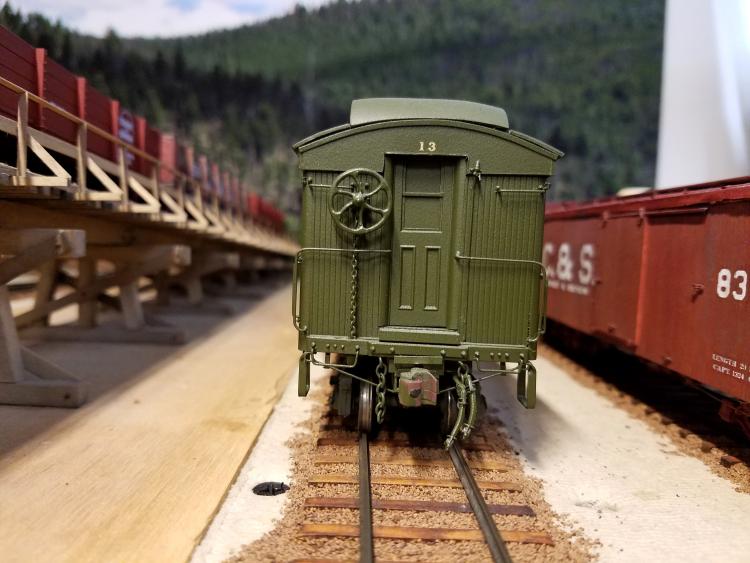 Just goes to show, where there's a will, you can find a way. I'm thinking seriously of building Baggage (Express) car #4, which would complete my train. I have three OMI coaches, #70, #74, and #76. And an old Hallmark #911. |
Re: Baggage and Mail #13 - Worm's Eye View
|
Administrator
|
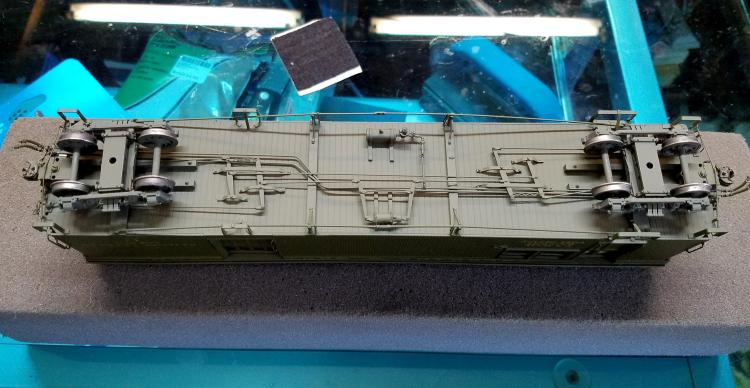
(In case anyone was wondering....)
|
Re: Baggage and Mail #13 - Worm's Eye View
|
Administrator
|
This post was updated on .
By the way, I don't believe the second hose was for steam, as is often the case on passenger equipment, I think on the C&S narrow gauge, it was for straight air.
|
|
In reply to this post by Mike Trent
Mike:
That #13 is really nice. The pics give me hope that my color is good. Just have to repaint one roof. Fred
Superintendent
C&S Kebler pass Subdivision The Kebler Pass Route |
Re: Baggage and Mail #13 - Worm's Eye View
|
In reply to this post by Mike Trent
Wow! Very impressive, Mike.
Cheers, Jeff. |
|
In reply to this post by Mike Trent
Mike,
Very nice clean build. How did you do the roof? Crossing Gate or scratch? Please contact me back channel I have some questions about Overland #9. Thanks. Lee Gustafson bagustaf at aol dot com |
|
Administrator
|
Hi Lee, the roof was actually the reason I used the kit, as the stamped roof helped a lot. The roof I actually used was from a coach kit, as saving the longer roof for some future use seemed like a good idea at the time. As a result, this roof needed to be lengthened, and you can see about an 8" splice at about the point where the baggage wall is about a foot toward center from the baggage end stove chimney. I decided this was a good place for the splice, as there must have been some major work done there to support a bad sag in about 1930, I'd guess.
|
|
In reply to this post by Mike Trent
Mike,
Nice job. Glad I could help. Ken Martin |
|
In reply to this post by Mike Trent
Very nice work Mike!!!
This is a cool car. Best, Todd Ferguson |
|
In reply to this post by Mike Trent
Mike:
Did you detail the interior as well? One icture looks as though There's a clerk near the window. Fred
Superintendent
C&S Kebler pass Subdivision The Kebler Pass Route |
|
In reply to this post by Mike Trent
Mike,
I am not really familiar with the Crossing Gate kits other than to see them in the old Gazettes and on eBay once in a while. Would it be possible to use the San Juan roof and underframe parts to create such a car along with a helping of castings and styrene? Perhaps some other San Juan passenger car parts could be used also... Best, Todd Ferguson |
|
Administrator
|
Todd, thats exactly what I did.
Crossing Gate kits are really little more than cut Evergreen Styrene strips of various length and size, and cut scribed styrene sheet material for siding and flooring. There are also several Grandt parts which are commonly available, including doors, windows, trucks, end beams and brake parts. The best part of them are the roof parts, the long sides, and the center celestory. These were formed from styrene strips in a heated vacuum device. There were two lengths of the roof parts. The shorter ones were used on the platform coaches, combine and baggage car. The longer roof parts were for the closed vestibule coaches, parlor car, and the long RPO. To build a car different from the kit, it is necessary to figure out the length and width of the floor frame, with sills, etc., along with the upper body parts. After you build a car or two, you will know how to do the roof and body. They are a little complicated, but its not bad, and the rewards are worth the risk. I am of the opinion that even to this day, probably at least half of the kits produced are still hidden or tucked away in boxes, as they were collected and hoarded for that "San Juan" that would never be built. Check ebay, they are available fairly often, sometimes from estate sales or downsizing. Or scale changes or a move into RC Helicopters. The instructions and drawings are quite good, and can help a lot on guiding you through the woods. |
«
Return to C&Sng Discussion Forum
|
1 view|%1 views
| Free forum by Nabble | Edit this page |

