Re: Leadville Designs Baggage/Express 1 in C&Sn3
Posted by Jim Courtney on
URL: http://c-sng-discussion-forum.254.s1.nabble.com/Leadville-Designs-Baggage-Express-1-in-C-Sn3-tp19129p19223.html
Well, it's been an couple of weeks since I posted progress on this project. Very busy taking my wife to doctor's appointments for her many health issues. And the contract with the little people from Denver expired, they flew home last week for Thanksgiving with their families. Nonetheless, an hour here and an hour there and there is some progress to report.
Roof: Milliputian Adventures:
I set out to fill all those seams in the roof with Milliput, as Geoff Hamway had suggested.
The manufacturer's info on the stuff is here: https://www.milliput.com/howto.html
The YouTube video on thinning the stuff and applying with a brush is here: https://www.youtube.com/watch?v=iWT9mnaUy0M&ab_channel=ScaleWarMachines
I followed the video exactly, mixed up a walnut sized piece of Milliput, squished it down on a jar lid and formed a tiny volcano. I then added a few drops of isopropyl alcohol to the mouth of the volcano and kept some nearby. I used a 00 brush to mix the alcohol and Milliput to various consistencies, from soft butter, to sour cream to skim milk (to use a dairy metaphor). I used the buttery stuff to brush it into the seams between the printed roof ends and the wood roof proper. I sat the roof aside--the manufacture says the stuff hardens in about 3 hours, fully cured in about 6 hours.
Being an impatient lad, I watched the clock and at 6 hours began sanding the seams smooth. I was dismayed that tiny flecks of Milliput was pulled up with my sanding sticks. Perhaps thinning the stuff delays the curing time? For all future applications of thinned Milliput, I let it cure overnight before trying to work it.
Before the 2nd application, I noticed that both end resin prints had a corner that wasn't really square, slightly rounded, a printing artifact. So I cut thin strips of 0.005" styrene and glued them onto the underside of the roof end, keeping the outside edge of the strips exactly in line with the outside edge of the wood roof portion. These would be forms to build up Milliput at the corners (they were later sanded off flush with the roof bottom). I also filled the four holes for the lamp vents on the top roof panel with un-thinned Milliput. Bill got these holes too close together, 6 scale inches on center. They should be 12 scale inches apart on center, per Ken Martin's plans.
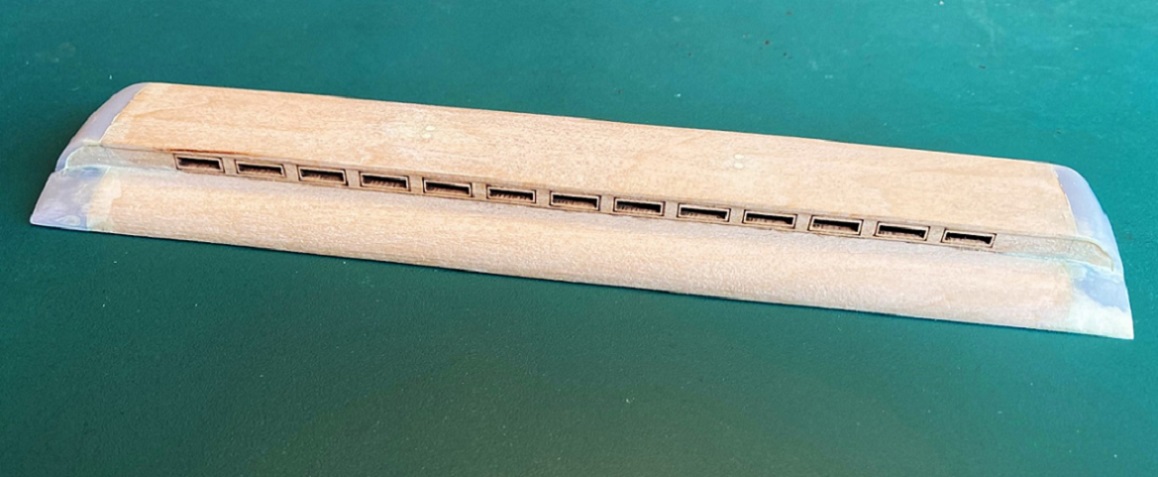
Anyways, this is how the roof looked after the 2nd Milliput application had dried and been sanded a bit:
I realized that the dried Milliput was about the same color as the raw basswood and I really couldn't see what I was doing. So I gave the entire roof a thin coat of Tamiya fine grey primer:
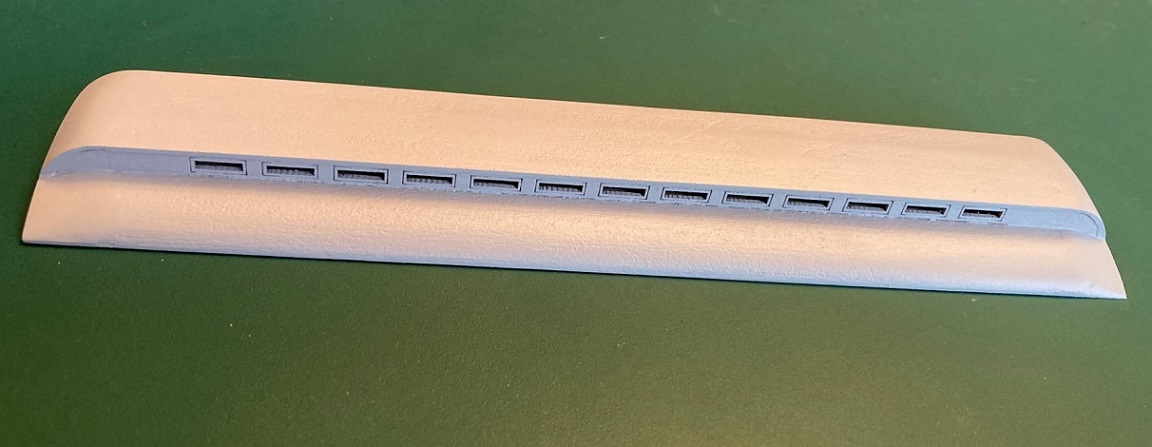
Wow, this hybrid roof design of Bill's might actually work! Note that there are very fine gaps in places where the clerestory side panels was joined to the lower roof panel. These would need to be filled with thinned Milliput. And the right corner needs further build up. The ends of the clerestory side wall, in the printed ends needs more filling and filing as well. And the entire roof needs much, much sanding to get rid of the roof grain.
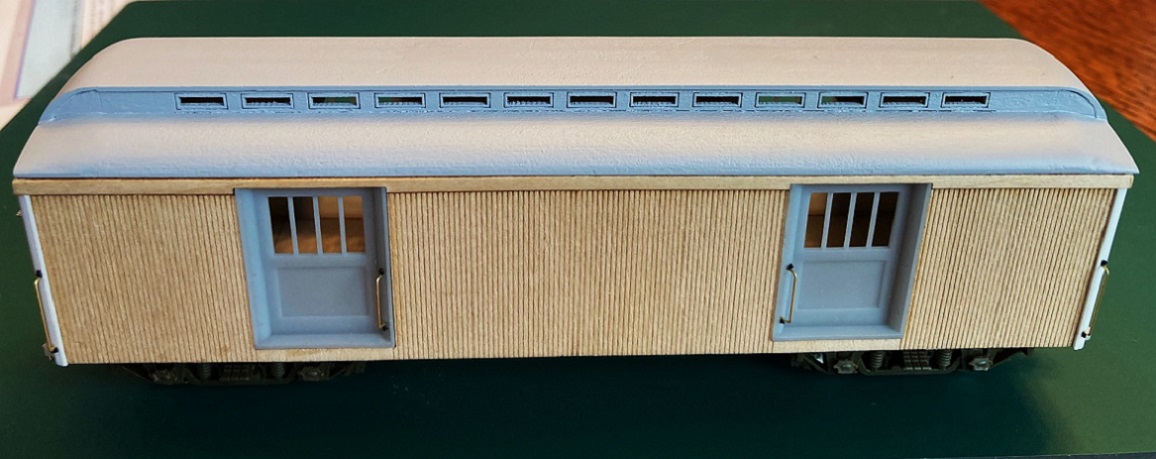
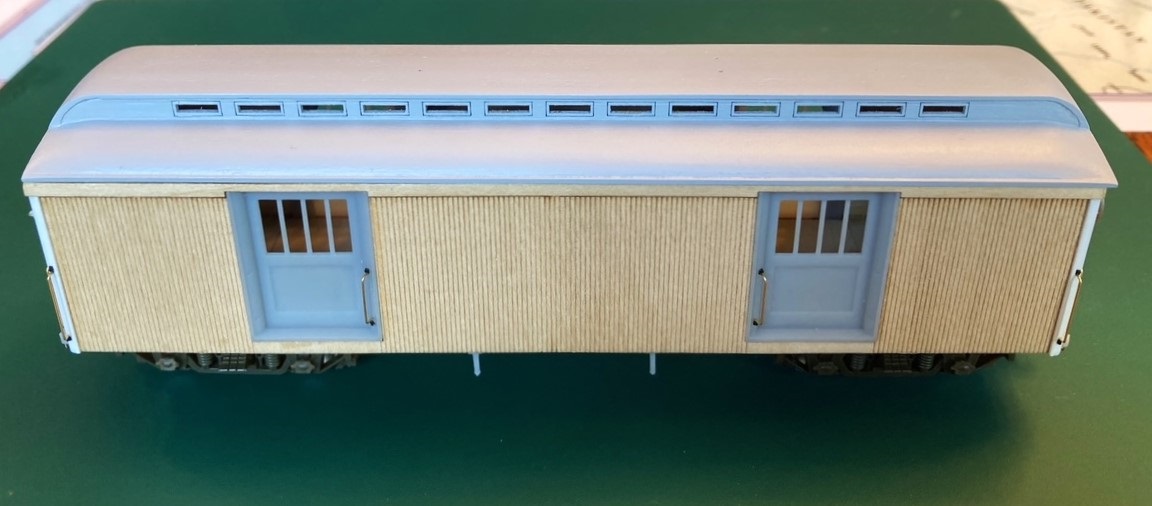
Here's how the roof looks at this point, sitting atop the body:
Before going on to the 3rd Milliput application, I decided to add the strips to the side of the entire length of the roof to correct the width problem. I had intended to use S scale 2" x 2" strip wood (0.030" x0.030") but ended up using HO scale Evergreen 2 x 3s (0.022" x 0.033") instead. The shallower roof overhang better matches my Overland brass coaches and Roy's printed RPO/coach 43. I placed the roof on a piece of window glass, weighted it, and applied the styrene strip to the edges with MEK. When dry, I reinforced the joint on the bottom with thin ACC.
I decided that I wanted the end of the lower roof panels to have the same exposed edges as on the side. And despite my "whiskey bottle" sanding, there was a bit of a gap where the roof joined the body, that needed to be covered. It's pretty near impossible to gently curve 0.010" x 0.030" styrene strip or stripwood on edge (yep, I tried). So I resorted to using Plastruct 0.010" x 0.010" square rod, real cat whisker stuff:

A strip was carefully tacked to the center or the arch of the roof with a little MEK, then reinforced with a tiny bit of ACC on the bottom. When dry, the two ends of the strip were gently curved down and attached to the side strips, keeping the lower edge of the end strip flush with the bottom of the side strip, and glued with MEK. The lower end strip joint was then reinforced with ACC. After allowing a couple of hours for things to dry, it was a simple matter to apply two more strips to each end arch, adding them atop the previous strip. When the MEK was dry, the protruding ends were cut flush with the outside edges of the side strip. and the curved end strip very lightly sanded. It ended up looking like this:
With the sides and the ends of the roof now framed, a 3rd application of Milliput was applied to the roof at the corners and at the edges of the clerestory sides. After more sanding and a second coat of primer, the roof now looks like this:

I still need a 4th Milliput application to finish building up the corners. Stay tuned . . .
The Car Body Details:
I successfully drilled all the grab iron holes, only broke one drill bit. Bill's resin doesn't mind being drilled as much. All the grab irons were formed of 0.015" wire:
Bill printed two drilling dimples for 20" vertical grabs on each of the quarter round frames on either side of each baggage door. But C&S baggage 1, by the 1920s, had only a single vertical grab per door, located on the side framing closest to the center of the car:

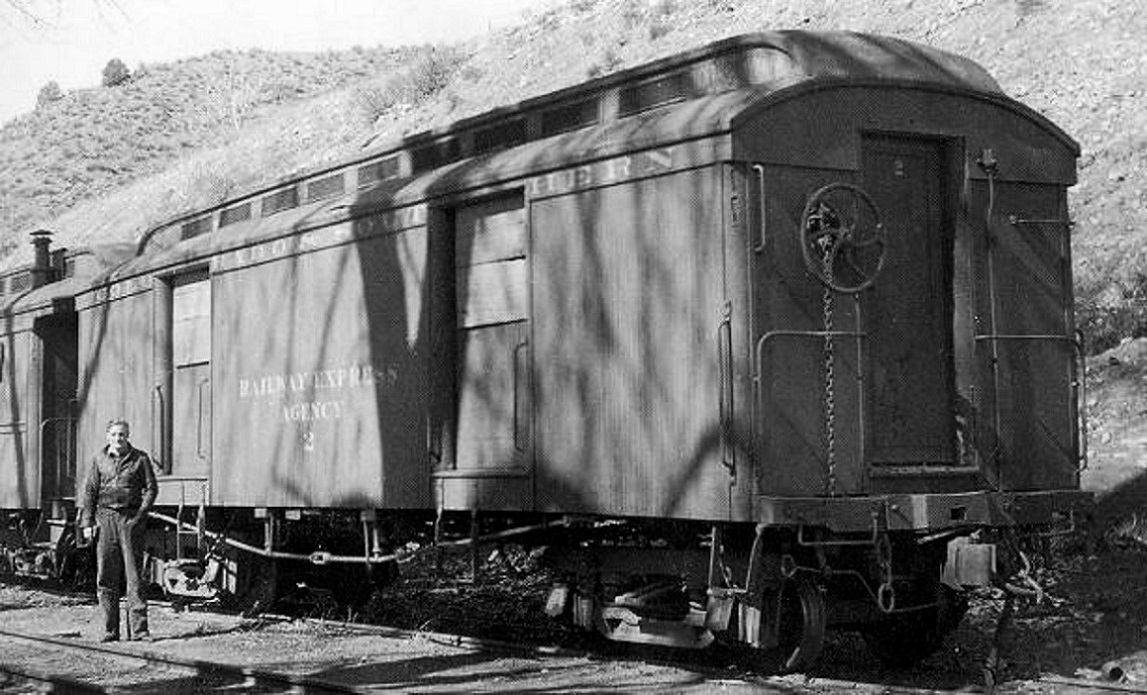
Sister car, C&S Baggage 2, kept paired vertical grabs at each baggage door, all the way to abandonment:
Estimating measurements from the photos, the end corner vertical grabs are about 30" tall. I used some old Simpson grab iron ends for the attachments instead of NBWs, as they more resembled the cast on tabs ion the photos.
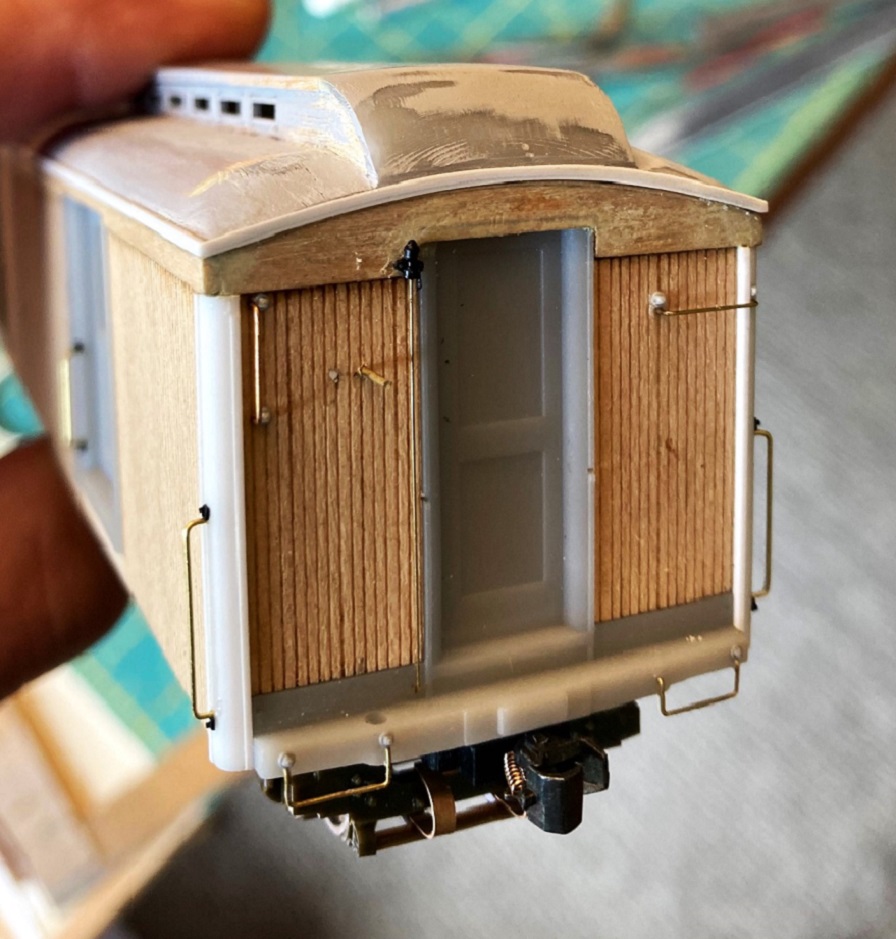
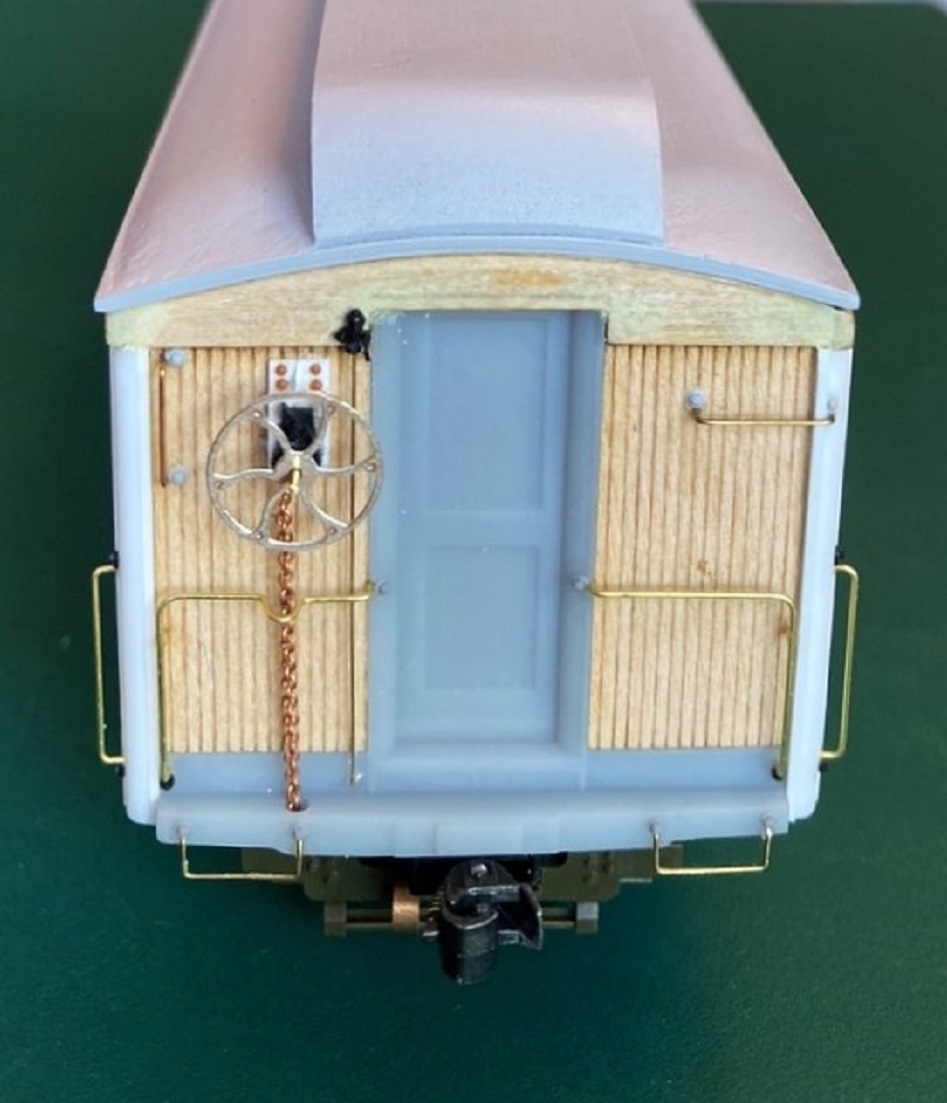
The ends were more challenging:
The straight grabs have NBWs (Grandt #101). The vertical grab at top left is 18", the horizontal grab at top right is 20". The inverted L-shaped end railings were formed from measurements to fit Bill's printed holes on the door castings. As I have several more baggage cars and Roy Steven's combine 20 to build, I went to the trouble of building a bending jig, so they will all be identical. Note the grab railing to the left of the end door has a loop-out to clear the brake chain.
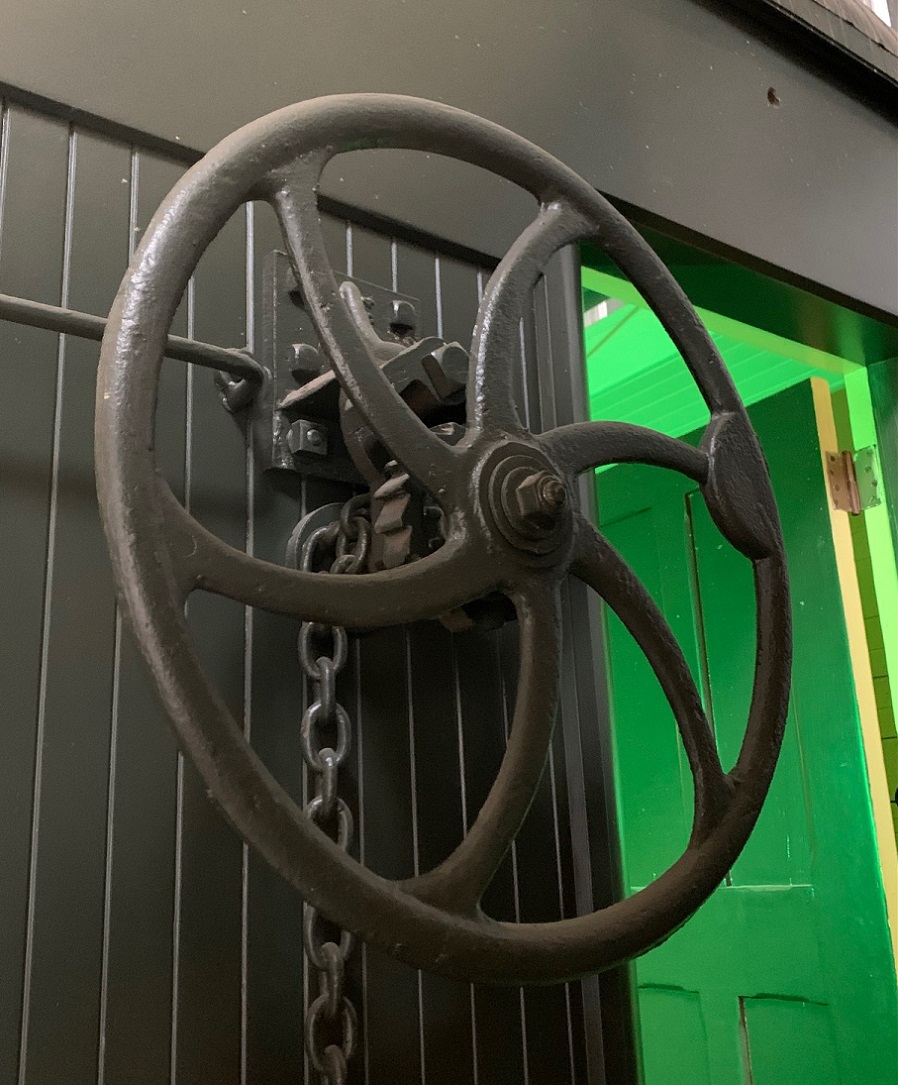
I attached the chain to the ends. Bill has printed a simple flat fixture to glue to the end wall for the big brake wheel mount. I chose to build up my own, trying to duplicate the ones on RPO 13, based on the photos that our departed friend, Doug Heitkamp, had posted on another thread, one of many gifts Doug gave us over the years:
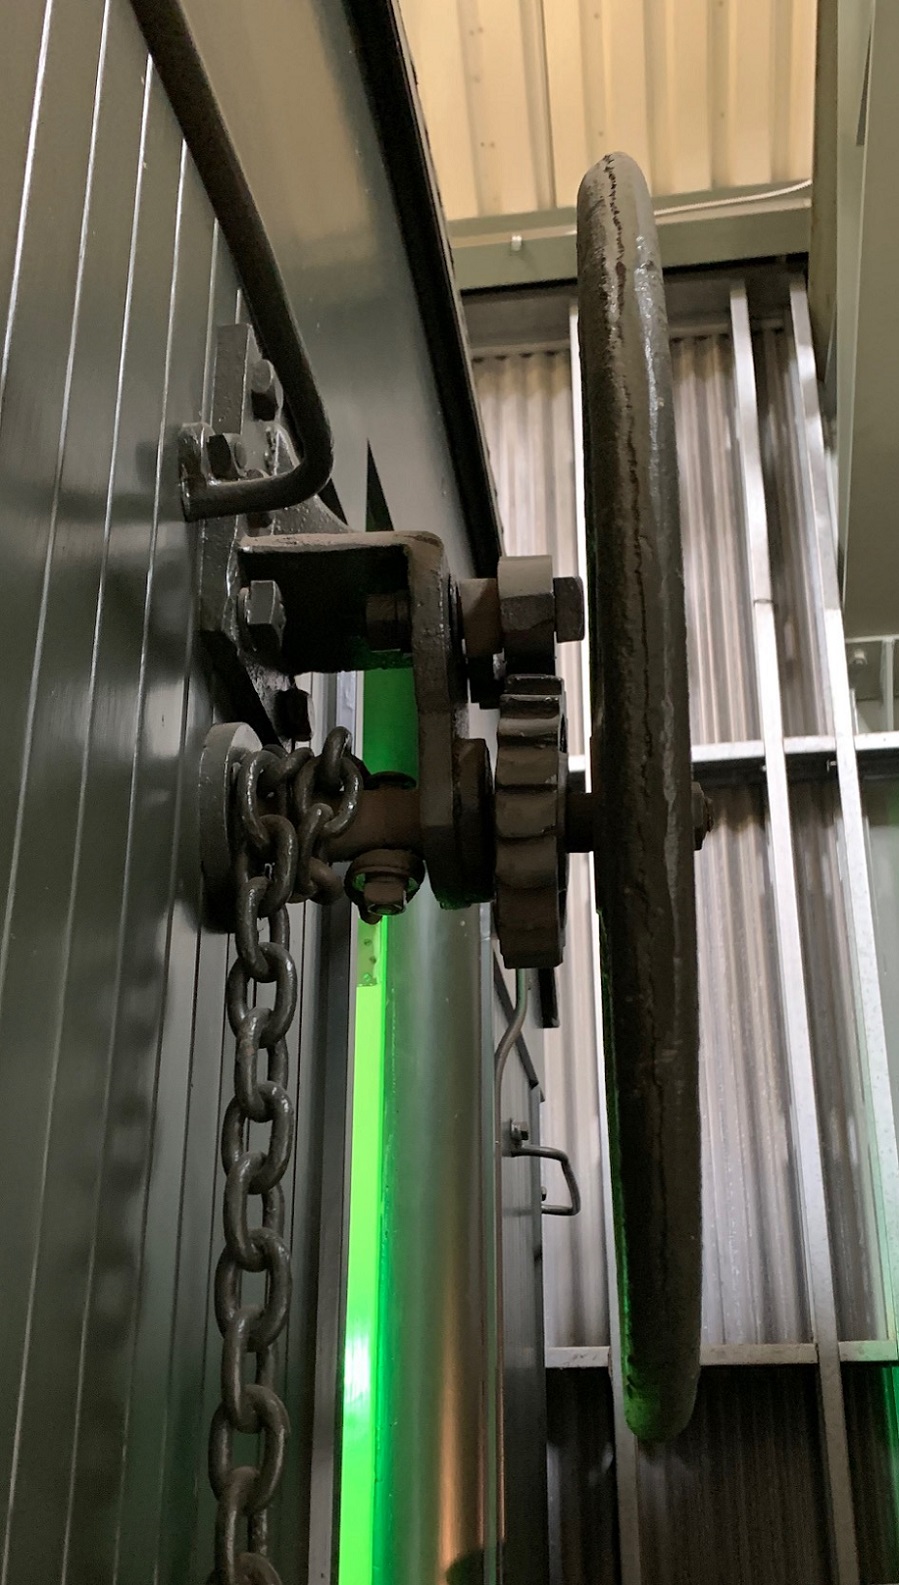
The big brake wheel etchings are temporarily placed for photos. They will be the last things glued on prior to painting.
Next up will be turning the body over and starting the underframe detailing. You may have noticed that the needle beams are already in place.
URL: http://c-sng-discussion-forum.254.s1.nabble.com/Leadville-Designs-Baggage-Express-1-in-C-Sn3-tp19129p19223.html
Well, it's been an couple of weeks since I posted progress on this project. Very busy taking my wife to doctor's appointments for her many health issues. And the contract with the little people from Denver expired, they flew home last week for Thanksgiving with their families. Nonetheless, an hour here and an hour there and there is some progress to report.
Roof: Milliputian Adventures:
I set out to fill all those seams in the roof with Milliput, as Geoff Hamway had suggested.
The manufacturer's info on the stuff is here: https://www.milliput.com/howto.html
The YouTube video on thinning the stuff and applying with a brush is here: https://www.youtube.com/watch?v=iWT9mnaUy0M&ab_channel=ScaleWarMachines
I followed the video exactly, mixed up a walnut sized piece of Milliput, squished it down on a jar lid and formed a tiny volcano. I then added a few drops of isopropyl alcohol to the mouth of the volcano and kept some nearby. I used a 00 brush to mix the alcohol and Milliput to various consistencies, from soft butter, to sour cream to skim milk (to use a dairy metaphor). I used the buttery stuff to brush it into the seams between the printed roof ends and the wood roof proper. I sat the roof aside--the manufacture says the stuff hardens in about 3 hours, fully cured in about 6 hours.
Being an impatient lad, I watched the clock and at 6 hours began sanding the seams smooth. I was dismayed that tiny flecks of Milliput was pulled up with my sanding sticks. Perhaps thinning the stuff delays the curing time? For all future applications of thinned Milliput, I let it cure overnight before trying to work it.
Before the 2nd application, I noticed that both end resin prints had a corner that wasn't really square, slightly rounded, a printing artifact. So I cut thin strips of 0.005" styrene and glued them onto the underside of the roof end, keeping the outside edge of the strips exactly in line with the outside edge of the wood roof portion. These would be forms to build up Milliput at the corners (they were later sanded off flush with the roof bottom). I also filled the four holes for the lamp vents on the top roof panel with un-thinned Milliput. Bill got these holes too close together, 6 scale inches on center. They should be 12 scale inches apart on center, per Ken Martin's plans.
Anyways, this is how the roof looked after the 2nd Milliput application had dried and been sanded a bit:
I realized that the dried Milliput was about the same color as the raw basswood and I really couldn't see what I was doing. So I gave the entire roof a thin coat of Tamiya fine grey primer:
Wow, this hybrid roof design of Bill's might actually work! Note that there are very fine gaps in places where the clerestory side panels was joined to the lower roof panel. These would need to be filled with thinned Milliput. And the right corner needs further build up. The ends of the clerestory side wall, in the printed ends needs more filling and filing as well. And the entire roof needs much, much sanding to get rid of the roof grain.
Here's how the roof looks at this point, sitting atop the body:
Before going on to the 3rd Milliput application, I decided to add the strips to the side of the entire length of the roof to correct the width problem. I had intended to use S scale 2" x 2" strip wood (0.030" x0.030") but ended up using HO scale Evergreen 2 x 3s (0.022" x 0.033") instead. The shallower roof overhang better matches my Overland brass coaches and Roy's printed RPO/coach 43. I placed the roof on a piece of window glass, weighted it, and applied the styrene strip to the edges with MEK. When dry, I reinforced the joint on the bottom with thin ACC.
I decided that I wanted the end of the lower roof panels to have the same exposed edges as on the side. And despite my "whiskey bottle" sanding, there was a bit of a gap where the roof joined the body, that needed to be covered. It's pretty near impossible to gently curve 0.010" x 0.030" styrene strip or stripwood on edge (yep, I tried). So I resorted to using Plastruct 0.010" x 0.010" square rod, real cat whisker stuff:
A strip was carefully tacked to the center or the arch of the roof with a little MEK, then reinforced with a tiny bit of ACC on the bottom. When dry, the two ends of the strip were gently curved down and attached to the side strips, keeping the lower edge of the end strip flush with the bottom of the side strip, and glued with MEK. The lower end strip joint was then reinforced with ACC. After allowing a couple of hours for things to dry, it was a simple matter to apply two more strips to each end arch, adding them atop the previous strip. When the MEK was dry, the protruding ends were cut flush with the outside edges of the side strip. and the curved end strip very lightly sanded. It ended up looking like this:
With the sides and the ends of the roof now framed, a 3rd application of Milliput was applied to the roof at the corners and at the edges of the clerestory sides. After more sanding and a second coat of primer, the roof now looks like this:
I still need a 4th Milliput application to finish building up the corners. Stay tuned . . .
The Car Body Details:
I successfully drilled all the grab iron holes, only broke one drill bit. Bill's resin doesn't mind being drilled as much. All the grab irons were formed of 0.015" wire:
Bill printed two drilling dimples for 20" vertical grabs on each of the quarter round frames on either side of each baggage door. But C&S baggage 1, by the 1920s, had only a single vertical grab per door, located on the side framing closest to the center of the car:
Sister car, C&S Baggage 2, kept paired vertical grabs at each baggage door, all the way to abandonment:
Estimating measurements from the photos, the end corner vertical grabs are about 30" tall. I used some old Simpson grab iron ends for the attachments instead of NBWs, as they more resembled the cast on tabs ion the photos.
The ends were more challenging:
The straight grabs have NBWs (Grandt #101). The vertical grab at top left is 18", the horizontal grab at top right is 20". The inverted L-shaped end railings were formed from measurements to fit Bill's printed holes on the door castings. As I have several more baggage cars and Roy Steven's combine 20 to build, I went to the trouble of building a bending jig, so they will all be identical. Note the grab railing to the left of the end door has a loop-out to clear the brake chain.
I attached the chain to the ends. Bill has printed a simple flat fixture to glue to the end wall for the big brake wheel mount. I chose to build up my own, trying to duplicate the ones on RPO 13, based on the photos that our departed friend, Doug Heitkamp, had posted on another thread, one of many gifts Doug gave us over the years:
The big brake wheel etchings are temporarily placed for photos. They will be the last things glued on prior to painting.
Next up will be turning the body over and starting the underframe detailing. You may have noticed that the needle beams are already in place.
Jim Courtney
Poulsbo, WA
Poulsbo, WA
| Free forum by Nabble | Edit this page |