Measure Twice, Cut Once.
Posted by Keith Hayes on
URL: http://c-sng-discussion-forum.254.s1.nabble.com/CONX-14-tp18668p19182.html
Withe the angle assembled, efforts turned to fabricating each stanchion. The angles were first cut to length. Then the pieces were filed and sanded again. Holes were created in the frame for a brass wire for support and strength and these were laid out at the bottom of each angle. Then the holes for the rail were laid out and drilled at the top of the angle. The machinenist's vise was invaluable for these steps.
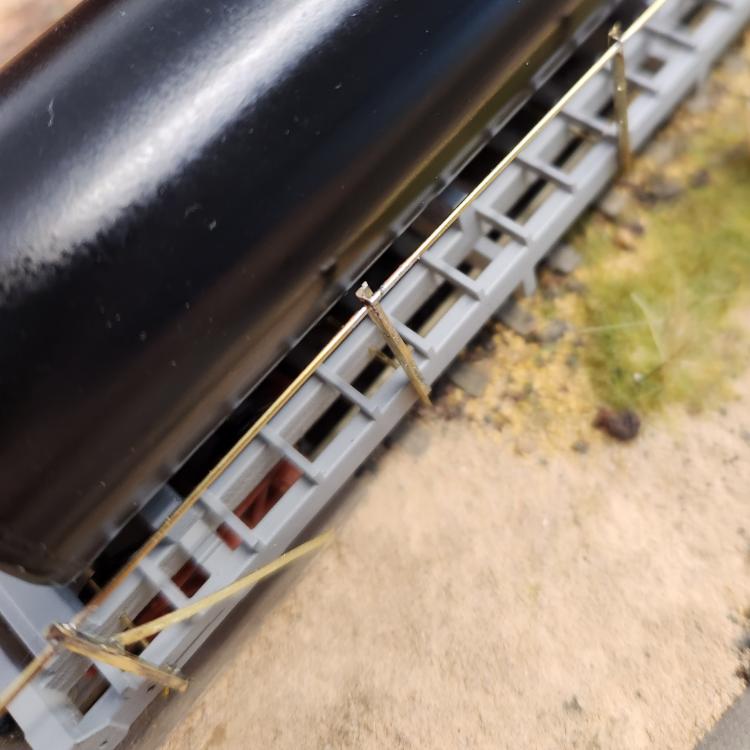
The photo of the silver tank above is CONX 19 in Morrison after a flood. The close up of the rail is great, but comparing 19 to 14, the angles are laid out differently. 14 appears to have the end stanchions with the back of the angle facing the center of the car. 19 is opposite. The photo indicates that the diagonal brace is bar stock and not an angle.
I cut some of the Simpson 2" stock into 5' lengths, which is oversize. The ends were tinned. An end angle was placed in the vise and I marked the position with a Sharpie. A 60 degree angle seemed about right. The tinned bar was placed on top and held with a weight.
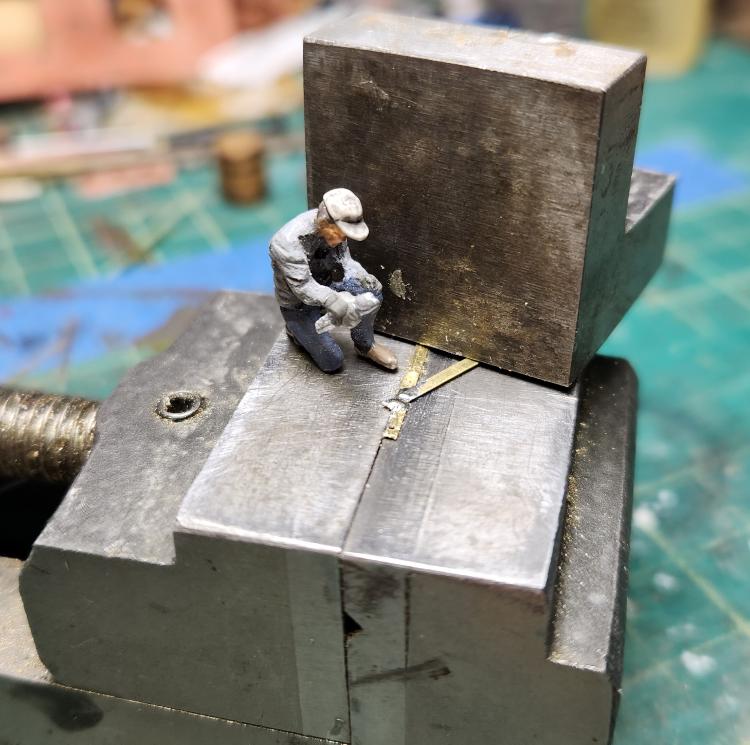
This worked well and in no time the four end pieces were completed. The bar was bent up using a razor blade and a weight. CONX 19 stanchions also have some additional holes in the, implying the use of recycled material. You can see this in the CONX 8 frame and D&RGW 6200 flat car frames. (I have not taken a drill to CONX 8...yet.). Anyhoo, here is the result!

Slow and steady wins the race. Flux helps, along with holding the parts so you have two free hands.
After a break, more progress. The brass rod was added to each stanchion to better stabilize the connection at the car. Then it was time to assemble the whole hand rail.
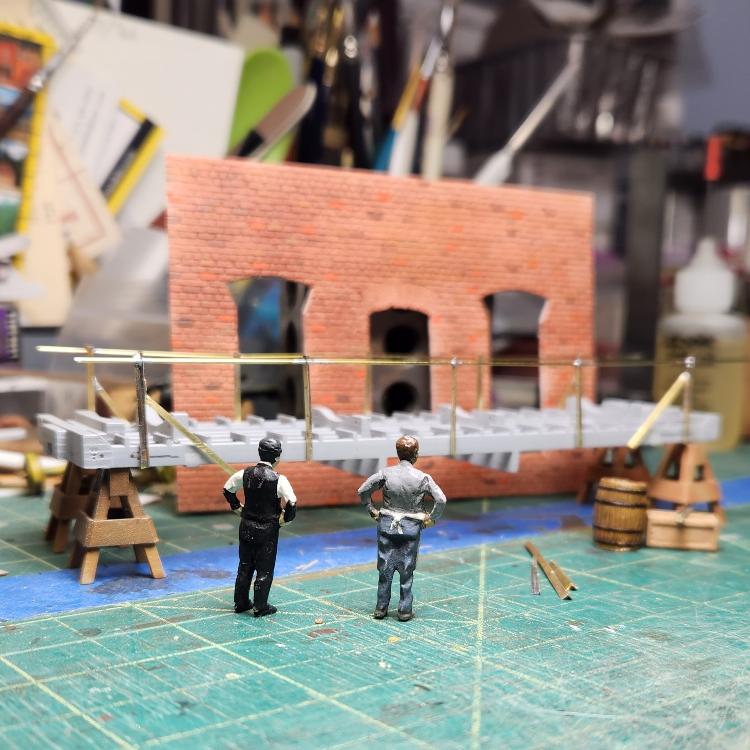
The stanchions were placed on the rail and the whole assembly was added to the frame print for soldering.

The rails will be trimmed later. Then the frame was flipped and the second rail assembled. The soldering was very quick, with a dab of Flux and barely any heat required!
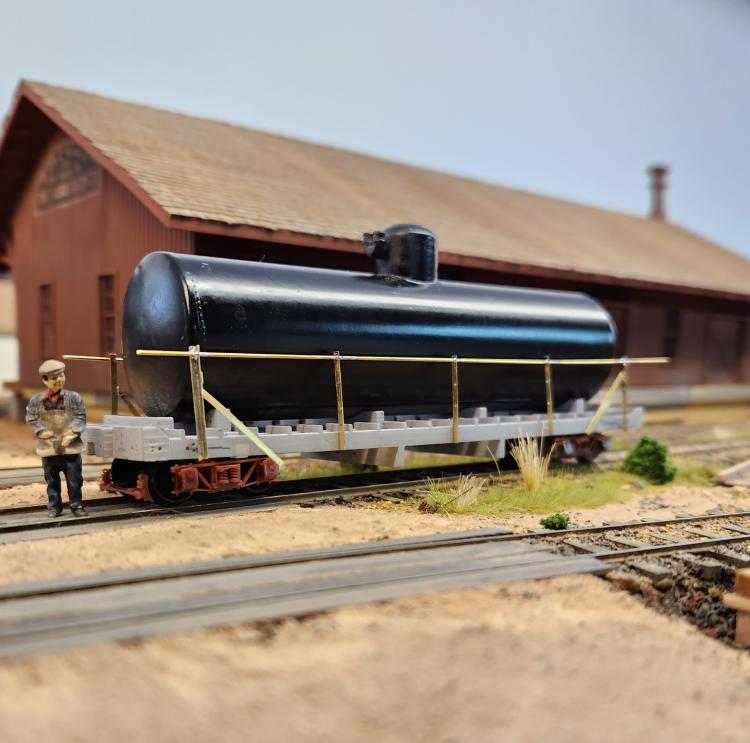
It is the funky rail that really attracts me to this car. It was fiddly to build, but a great challenge and I am happy thus far with the results. Now to carefully bend the angles outward.
I guess it is time to put the rest of the jewelry on the car frame. Then I can return to the tank.
URL: http://c-sng-discussion-forum.254.s1.nabble.com/CONX-14-tp18668p19182.html
Withe the angle assembled, efforts turned to fabricating each stanchion. The angles were first cut to length. Then the pieces were filed and sanded again. Holes were created in the frame for a brass wire for support and strength and these were laid out at the bottom of each angle. Then the holes for the rail were laid out and drilled at the top of the angle. The machinenist's vise was invaluable for these steps.
The photo of the silver tank above is CONX 19 in Morrison after a flood. The close up of the rail is great, but comparing 19 to 14, the angles are laid out differently. 14 appears to have the end stanchions with the back of the angle facing the center of the car. 19 is opposite. The photo indicates that the diagonal brace is bar stock and not an angle.
I cut some of the Simpson 2" stock into 5' lengths, which is oversize. The ends were tinned. An end angle was placed in the vise and I marked the position with a Sharpie. A 60 degree angle seemed about right. The tinned bar was placed on top and held with a weight.
This worked well and in no time the four end pieces were completed. The bar was bent up using a razor blade and a weight. CONX 19 stanchions also have some additional holes in the, implying the use of recycled material. You can see this in the CONX 8 frame and D&RGW 6200 flat car frames. (I have not taken a drill to CONX 8...yet.). Anyhoo, here is the result!
Slow and steady wins the race. Flux helps, along with holding the parts so you have two free hands.
After a break, more progress. The brass rod was added to each stanchion to better stabilize the connection at the car. Then it was time to assemble the whole hand rail.
The stanchions were placed on the rail and the whole assembly was added to the frame print for soldering.
The rails will be trimmed later. Then the frame was flipped and the second rail assembled. The soldering was very quick, with a dab of Flux and barely any heat required!
It is the funky rail that really attracts me to this car. It was fiddly to build, but a great challenge and I am happy thus far with the results. Now to carefully bend the angles outward.
I guess it is time to put the rest of the jewelry on the car frame. Then I can return to the tank.
Keith Hayes
Leadville in Sn3
Leadville in Sn3
| Free forum by Nabble | Edit this page |