Re: Leadville Designs Baggage/Express 1 in C&Sn3
Posted by Jim Courtney on Oct 23, 2023; 5:18am
URL: http://c-sng-discussion-forum.254.s1.nabble.com/Leadville-Designs-Baggage-Express-1-in-C-Sn3-tp19129p19174.html
OK, back to building the roof.
The first order of business was the resin printed clerestory end pieces, testing them to see how they fit --- they don't.
The bottom of each print is supposed to be flat. They are, but I lightly sanded off some printing imperfections.
The back side of each print (the gluing surface) is supposed to be flat. They are, but are not square relative to the floor. I fixed this with my True Sander, checking with a machinist's square. I also checked the ends of the wood build-up. They were square in the vertical, but my imperfect assembly produced a bit of skew from one side to the other. Again, I fixed this with the True Sander.
The critical issue is the curvature of the underside of the prints. The very end of each print has a curvature that matches the end wall curvature almost exactly, but for only about 1/64th inch depth. Then, moving toward the back of the print, the curvature narrows and the bottom becomes thicker and irregular. The end wall build-up is 0.080" thick and won't clear the bottom of the print, at that point, to let it sit on the car body end as it should.
Having pondered this, I decided that I needed a hard cylinder to wrap with sand paper and sand down the bottom of each print. I spent an hour or so interviewing every wine and liquor bottle in the house as to their radius of curvature. I finally found a bottle that seem to match (a craft whiskey, distilled on nearby Bainbridge Island). I wrapped it in 320 grit sand paper, taped tightly in the back.
Then, holding the print by the clerestory portion between thumb and forefinger, and keeping the roof axis in line with the axis of the bottle, I stroked the bottom of the print downward against the sandpaper:

I repeated this motion many, many, many times! In medical jargon TNTC (too numerous to count). I was careful to not let the bottom of the sides or the very end of the print touch the sand paper. The idea was to begin removing material from the center of the part bottom. With repetition, the shape of the bottle begins to create a new, uniform curvature to the bottom. And with more repetition, the new curved bottom eventually approaches the end and sides of the print. Left, just started, right, almost done:
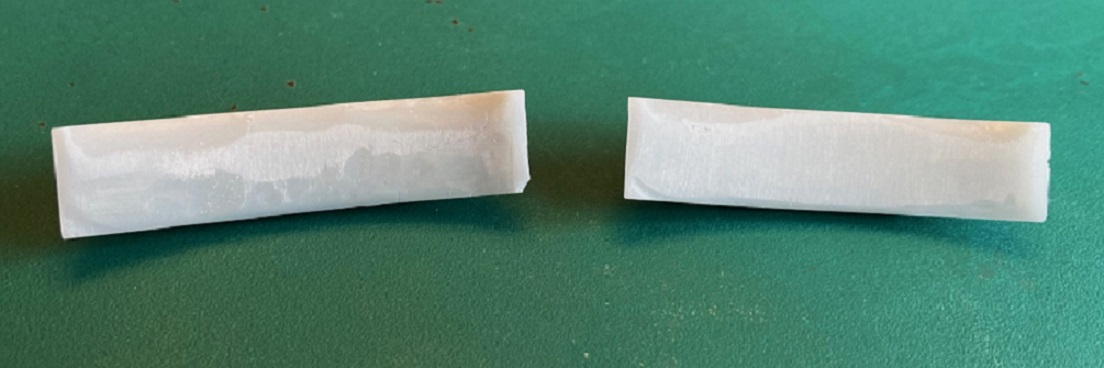
ProTip: Sipping some of the contents of the whisky bottle seemed to make the repetitive process go smoother, if not faster.
With periodic testing of fit, when I was satisfied that further sanding would not improve the fit, I moved on to finishing the wood portion of the roof. The clerestory sides have slightly down turning, pointy ends. The instructions say that you may need to slightly sand these ends so that they will fit into the recesses of the printed ends ---- you will. Rather than try this after the sides were attached to the wood clerestory, I assigned A and B ends to the roof build-up, the printed ends and the clerestory side pieces. I sanded the ends of the clerestory sides until I could insert them into the printed ends with the engraved vertical line even with the back of the print. Then the clerestory sides were glued to the side of the roof framing, again using the engraved lines to position them:
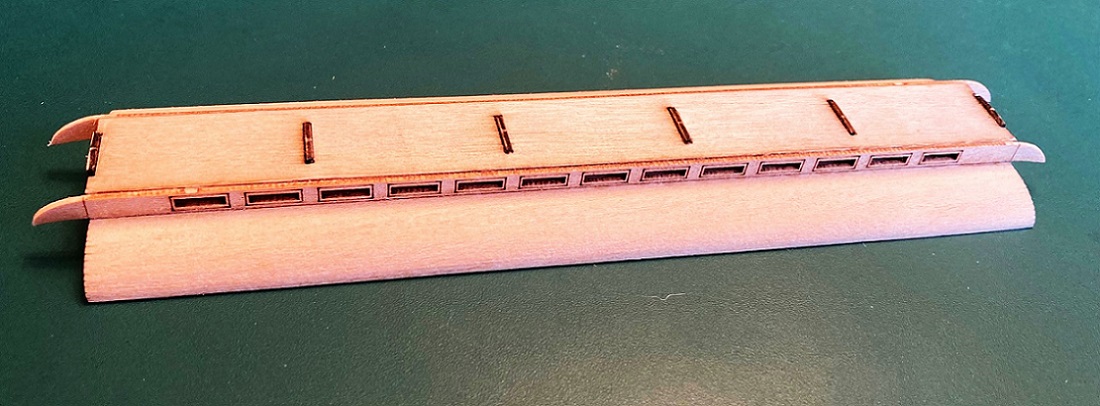
When the sides were dry, the joints were reinforced with thin ACC, applied with a piece of wire. Then on to the top roof panel. Liberal amounts of white glue was applied to the protruding tabs on the top of the roof framing, and a bead run down the top edge of the clerestory sides. While the glue was still wet, I visually centered the ends of the top panel insuring that roof overhang was equal, and tacked them in place with ACC. The top roof panel needs to curve slightly from the center down toward the edges. There is no way to clamp the panel, you must hold the edges down with your fingers for what seems an eternity. The holes are for the lamp vents.

Finally, now to attach the printed ends. The instructions say that it is important that the bottom of the printed ends is flush with the bottom of the wooden roof. But . . . the clerestory side ends, will only fit in their printed recesses if the bottom of the print is about 0.020" higher. Figuring that I could add styrene strip filler to the bottom of the print later, and sand everything flush, I chose a nice tight fitting joint. I put little dabs of Gorilla ACC gel on various places on the back side of the first print, lined things up in all dimensions and firmly pressed the print against the wood assembly until the gel hardened. I reinforced the joint by applying thin ACC along all visible seams, top and bottom. When everything was dry, I repeated the process for the other end.
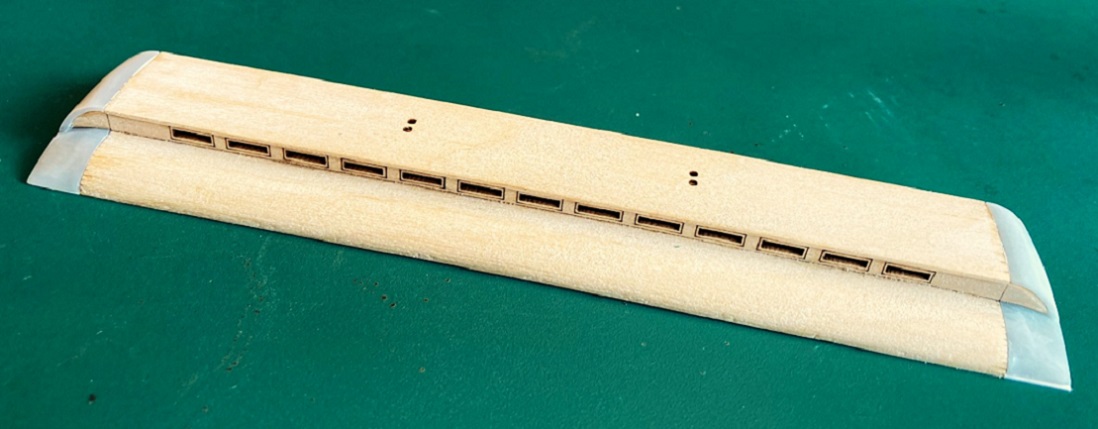
Some final clean up was required: I added 0.020x0.030" styrene to the bottom of the extreme edge of each roof end with ACC. When dry the entire roof assembly was sanded flush. Turns out that the wooden top roof panel is wider than the printed top roof panel on the ends. I used a sanding block to sand the sides of the top roof panel, until everything matched. The printed top roof panel is also a bit taller than the wooden roof panel, so that too was sanded down. Here's the roof at this stage:
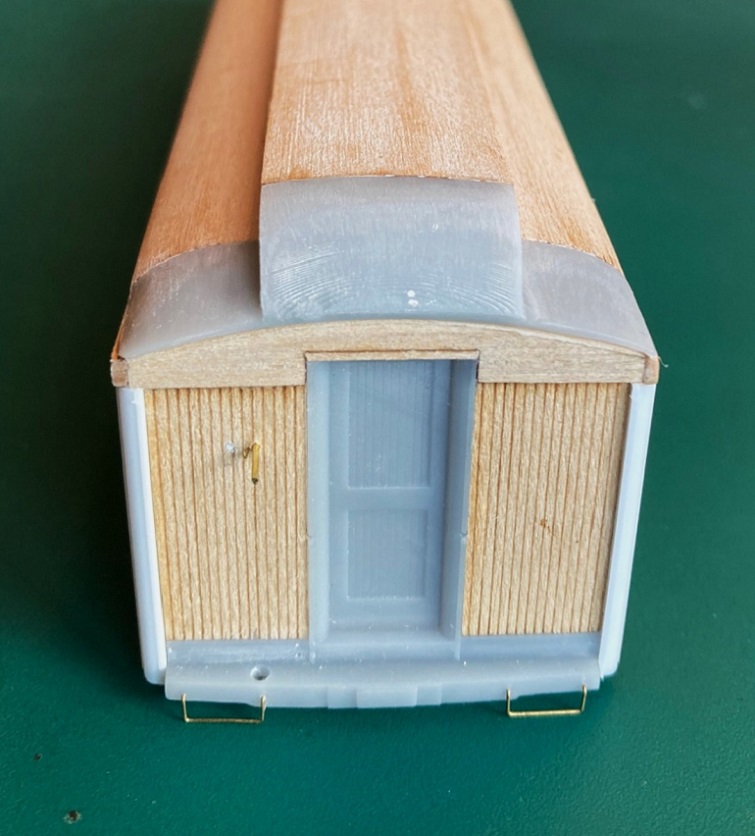
I still need to add the 2x2 strips to the sides to correct the width issue, but felt that I should wait until I have puttied all seams and sanded everything smooth. I may even prime the roof at that point, correct any divots that were overlooked, then re-prime before attaching the side strips. Anyways, here's how the roof looks atop the body:
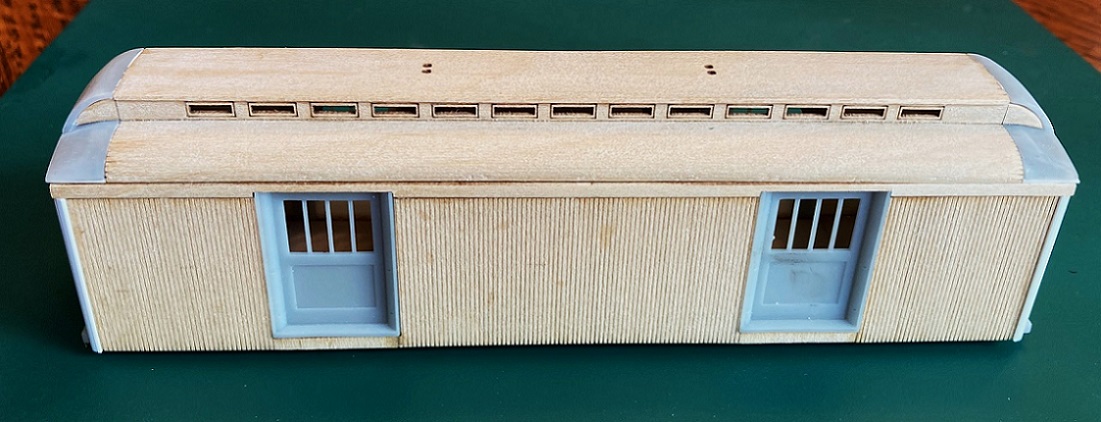
And my "whiskey bottle sanding" seems to have produced a joint with the end fascia that looks pretty good:
For mental health reasons, I'm going to put the roof aside for a while, and get back to the car body. Next up, bolsters, truck mounting and couplers . . .
URL: http://c-sng-discussion-forum.254.s1.nabble.com/Leadville-Designs-Baggage-Express-1-in-C-Sn3-tp19129p19174.html
OK, back to building the roof.
The first order of business was the resin printed clerestory end pieces, testing them to see how they fit --- they don't.
The bottom of each print is supposed to be flat. They are, but I lightly sanded off some printing imperfections.
The back side of each print (the gluing surface) is supposed to be flat. They are, but are not square relative to the floor. I fixed this with my True Sander, checking with a machinist's square. I also checked the ends of the wood build-up. They were square in the vertical, but my imperfect assembly produced a bit of skew from one side to the other. Again, I fixed this with the True Sander.
The critical issue is the curvature of the underside of the prints. The very end of each print has a curvature that matches the end wall curvature almost exactly, but for only about 1/64th inch depth. Then, moving toward the back of the print, the curvature narrows and the bottom becomes thicker and irregular. The end wall build-up is 0.080" thick and won't clear the bottom of the print, at that point, to let it sit on the car body end as it should.
Having pondered this, I decided that I needed a hard cylinder to wrap with sand paper and sand down the bottom of each print. I spent an hour or so interviewing every wine and liquor bottle in the house as to their radius of curvature. I finally found a bottle that seem to match (a craft whiskey, distilled on nearby Bainbridge Island). I wrapped it in 320 grit sand paper, taped tightly in the back.
Then, holding the print by the clerestory portion between thumb and forefinger, and keeping the roof axis in line with the axis of the bottle, I stroked the bottom of the print downward against the sandpaper:
I repeated this motion many, many, many times! In medical jargon TNTC (too numerous to count). I was careful to not let the bottom of the sides or the very end of the print touch the sand paper. The idea was to begin removing material from the center of the part bottom. With repetition, the shape of the bottle begins to create a new, uniform curvature to the bottom. And with more repetition, the new curved bottom eventually approaches the end and sides of the print. Left, just started, right, almost done:
ProTip: Sipping some of the contents of the whisky bottle seemed to make the repetitive process go smoother, if not faster.
With periodic testing of fit, when I was satisfied that further sanding would not improve the fit, I moved on to finishing the wood portion of the roof. The clerestory sides have slightly down turning, pointy ends. The instructions say that you may need to slightly sand these ends so that they will fit into the recesses of the printed ends ---- you will. Rather than try this after the sides were attached to the wood clerestory, I assigned A and B ends to the roof build-up, the printed ends and the clerestory side pieces. I sanded the ends of the clerestory sides until I could insert them into the printed ends with the engraved vertical line even with the back of the print. Then the clerestory sides were glued to the side of the roof framing, again using the engraved lines to position them:
When the sides were dry, the joints were reinforced with thin ACC, applied with a piece of wire. Then on to the top roof panel. Liberal amounts of white glue was applied to the protruding tabs on the top of the roof framing, and a bead run down the top edge of the clerestory sides. While the glue was still wet, I visually centered the ends of the top panel insuring that roof overhang was equal, and tacked them in place with ACC. The top roof panel needs to curve slightly from the center down toward the edges. There is no way to clamp the panel, you must hold the edges down with your fingers for what seems an eternity. The holes are for the lamp vents.
Finally, now to attach the printed ends. The instructions say that it is important that the bottom of the printed ends is flush with the bottom of the wooden roof. But . . . the clerestory side ends, will only fit in their printed recesses if the bottom of the print is about 0.020" higher. Figuring that I could add styrene strip filler to the bottom of the print later, and sand everything flush, I chose a nice tight fitting joint. I put little dabs of Gorilla ACC gel on various places on the back side of the first print, lined things up in all dimensions and firmly pressed the print against the wood assembly until the gel hardened. I reinforced the joint by applying thin ACC along all visible seams, top and bottom. When everything was dry, I repeated the process for the other end.
Some final clean up was required: I added 0.020x0.030" styrene to the bottom of the extreme edge of each roof end with ACC. When dry the entire roof assembly was sanded flush. Turns out that the wooden top roof panel is wider than the printed top roof panel on the ends. I used a sanding block to sand the sides of the top roof panel, until everything matched. The printed top roof panel is also a bit taller than the wooden roof panel, so that too was sanded down. Here's the roof at this stage:
I still need to add the 2x2 strips to the sides to correct the width issue, but felt that I should wait until I have puttied all seams and sanded everything smooth. I may even prime the roof at that point, correct any divots that were overlooked, then re-prime before attaching the side strips. Anyways, here's how the roof looks atop the body:
And my "whiskey bottle sanding" seems to have produced a joint with the end fascia that looks pretty good:
For mental health reasons, I'm going to put the roof aside for a while, and get back to the car body. Next up, bolsters, truck mounting and couplers . . .
Jim Courtney
Poulsbo, WA
Poulsbo, WA
| Free forum by Nabble | Edit this page |