Re: Leadville Designs Baggage/Express 1 in C&Sn3
Posted by Jim Courtney on Oct 14, 2023; 11:21pm
URL: http://c-sng-discussion-forum.254.s1.nabble.com/Leadville-Designs-Baggage-Express-1-in-C-Sn3-tp19129p19163.html
Hey folks, I've a new plan to resolve the roof issues. Thanks for all the suggestions and moral support!
It was reading Keith's post that made it dawn on me that I've been struggling to build Bill Meredith's interpretation of the baggage car roof. What I should be doing is building the roof that I see in the photos of baggage car 1, using Bill's parts when possible, modifying or replacing them as necessary.
Keith is correct. Bill's design has the lower roof panels gently arching down toward the sides, but as the panel approaches the side of the car, there is a tight radius bend downward. The roof panel is vertical when it abuts the car body sides.
But consider the prototype:
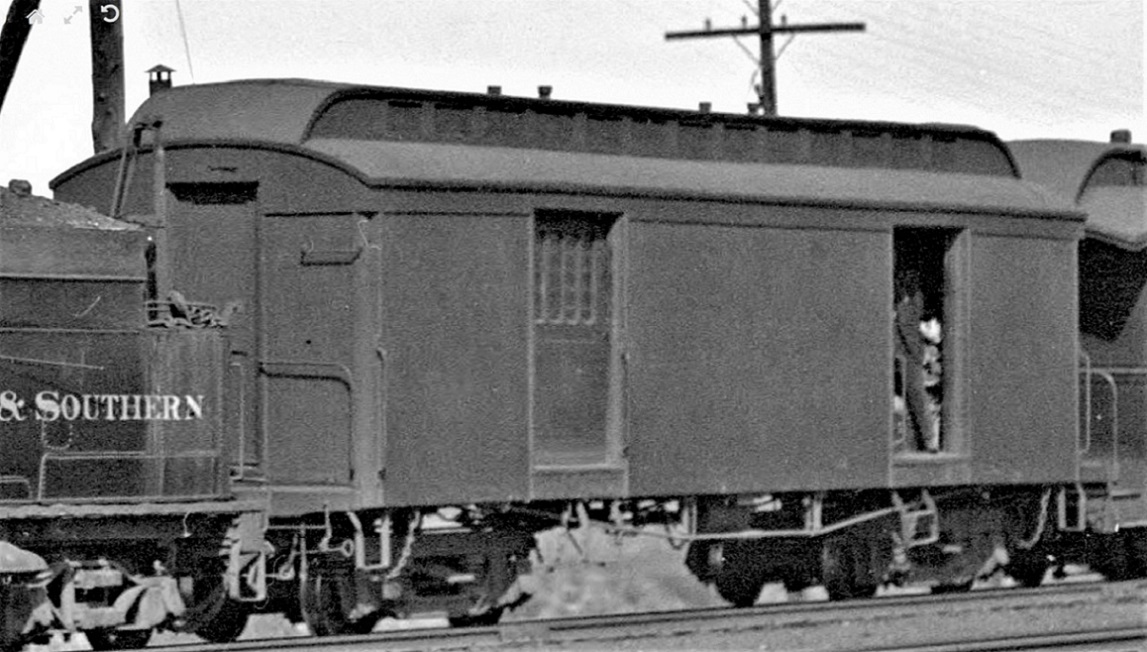
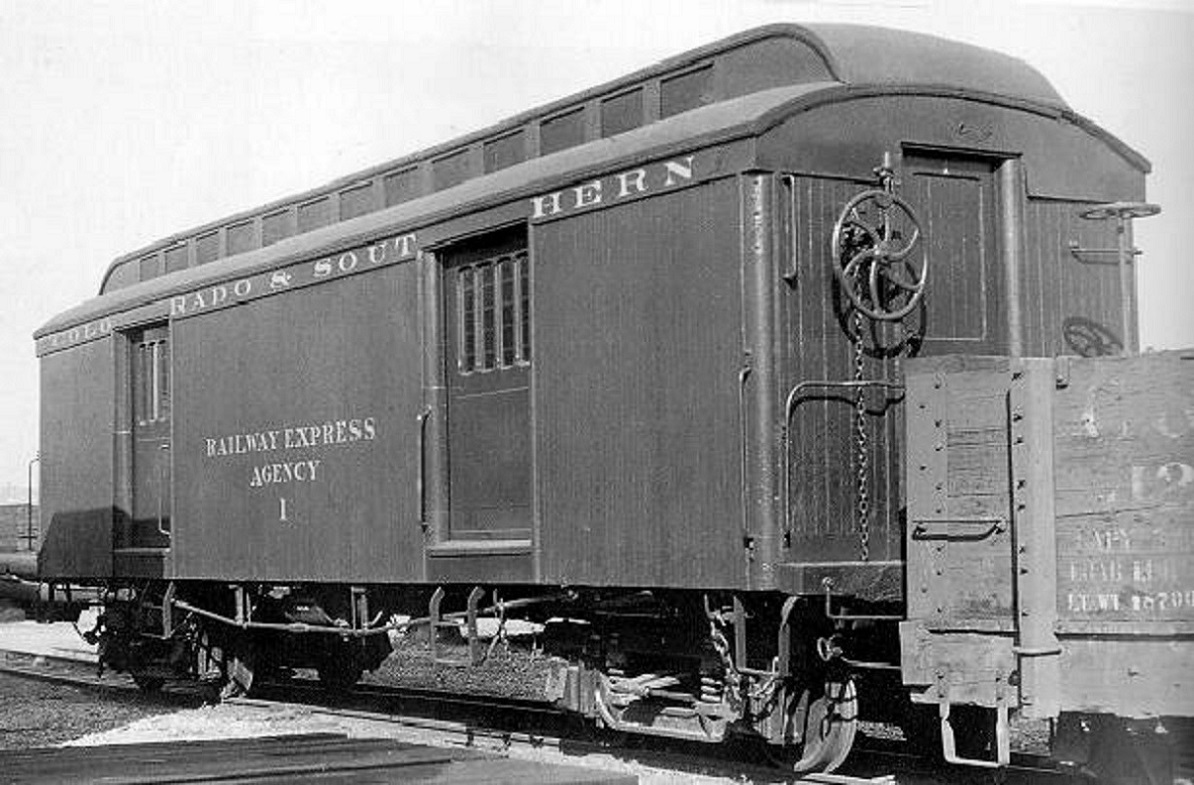
On the real deal, the lower roof panels arch downward on a constant curve, with the bottom of the roof panel sitting atop the car body wall. The edge of the multiple layers of the roof panel build up are exposed and trimmed to be smooth. The exposed edge of the roof panel overlaps the letter board by about an inch. Mr. Micrometer and I studied the photos in enlargement. We estimate that the thickness of the exposed edge of the roof panel to be about 2", given that the letter board is 6" wide.
So the solution to the roof issues is very simple (so simple, that it worries me that I'm overlooking something critical):
I'm going to finish building up Bill's roof as designed. When all the pieces are installed and the glue dried, I will again gently sand the bottom of the assembly to insure everything is flat and in one plane. As a last step, I will glue S scale 2x2 strip wood (0.030"x0.030") to the bottom edge of the roof, the length of the roof on each side. The bottom edge of the 2x2 will be flush with the bottom of the roof. I temporarily taped the roof to the body and taped the 2x2 in place:
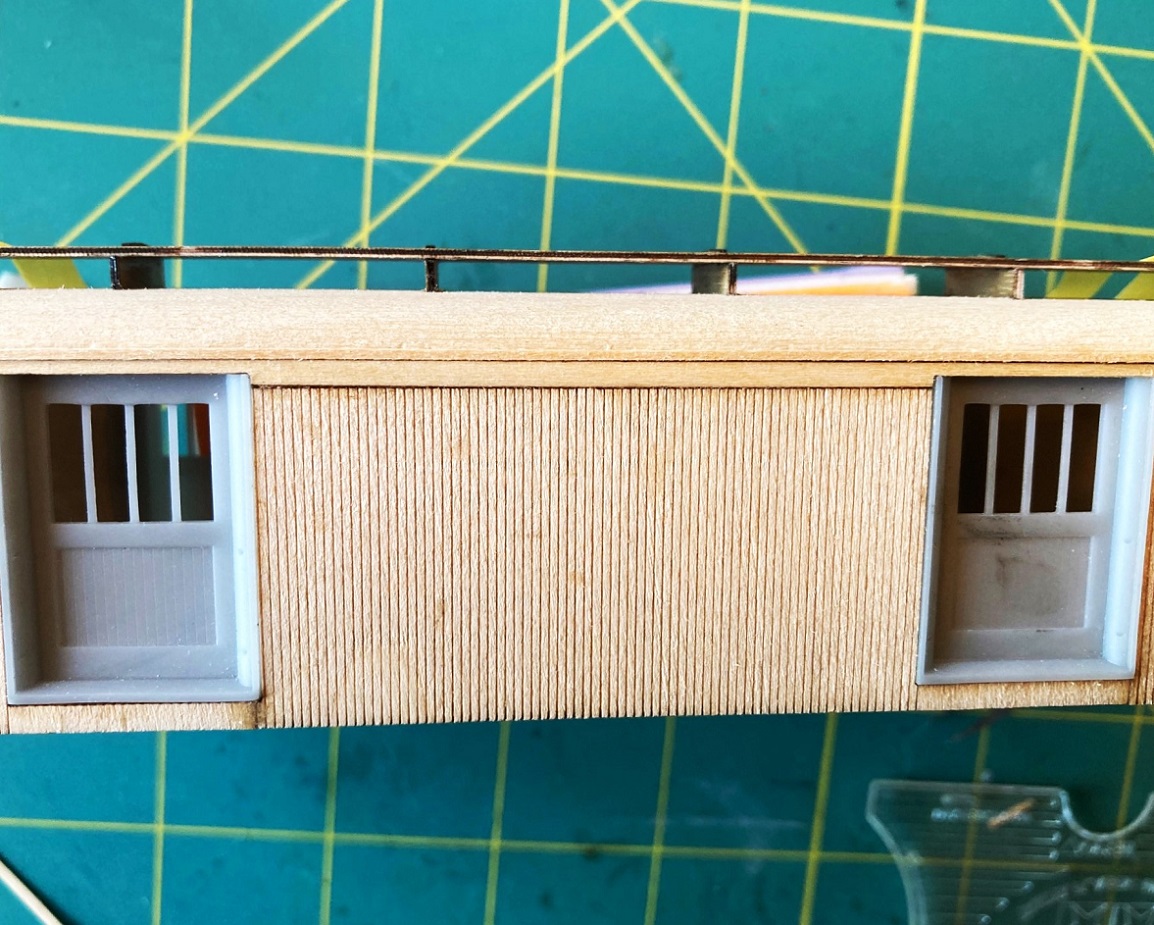
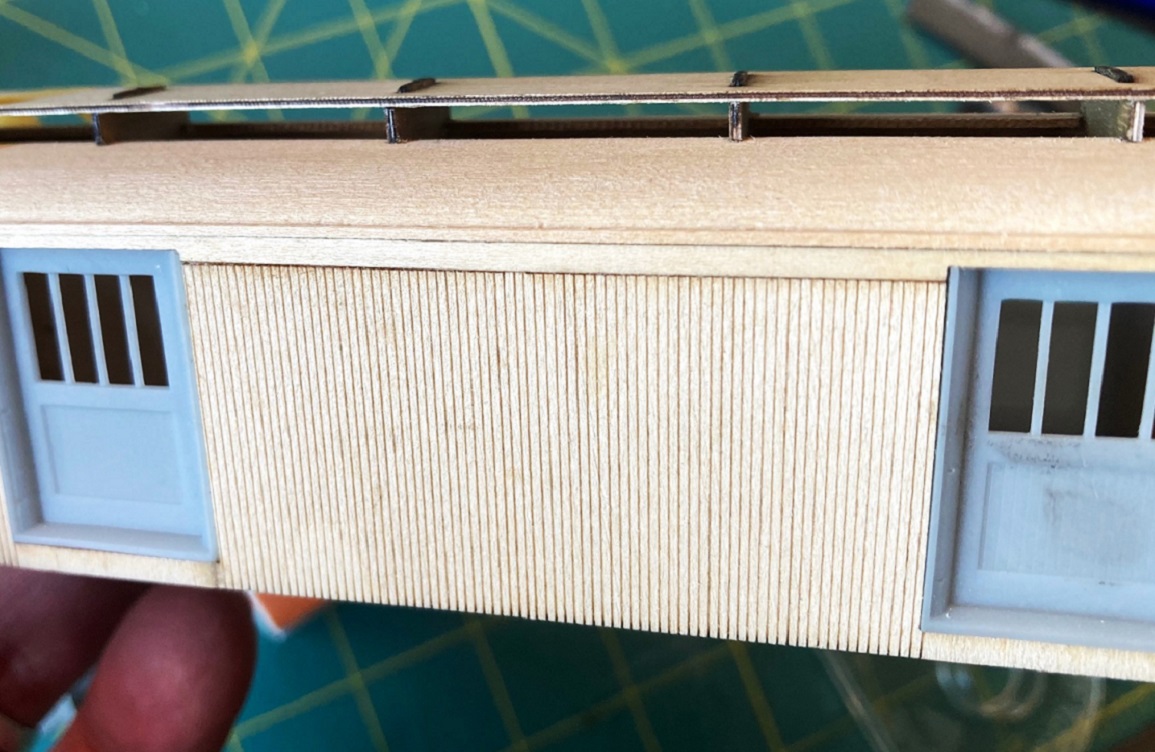
The 2x2 strip accomplishes two things:
1. It corrects the roof width problem--by adding 0.030" of strip to each side of the roof, the roof now overhangs the letterboard by 0.015", about an S scale inch.
2. It creates the illusion of the exposed roof panel edge.
I like Keith's idea of reshaping the lower roof contour, sanding down the tight radius curve near the edge of the roof to a more constant contour. But I don't think it possible with Bill's design. The lower roof panels are only 1/32" or 0.030" thick. The bottom of the roof panels have many parallel, laser engraved "bend" lines to allow the roof to bend over the profile ribs for gluing and clamping. These laser cut lines are deeper than they look. The intact portion of smooth wood on the top side of the roof panel is likely about as thick as a piece of printer paper. I'm afraid to try to sand down that rounded ridge, lest I quickly end up in the laser bend lines and cause the roof panel to begin to split. (I now understand why the masking tape was applied before gluing and shaping the lower roof panels, as above).
Anyways, that the new plan. If I've overlooked something obvious, and screw up the roof, I can always follow Chris Walker's suggestion: . . . just smash it and start again.
URL: http://c-sng-discussion-forum.254.s1.nabble.com/Leadville-Designs-Baggage-Express-1-in-C-Sn3-tp19129p19163.html
Hey folks, I've a new plan to resolve the roof issues. Thanks for all the suggestions and moral support!
It was reading Keith's post that made it dawn on me that I've been struggling to build Bill Meredith's interpretation of the baggage car roof. What I should be doing is building the roof that I see in the photos of baggage car 1, using Bill's parts when possible, modifying or replacing them as necessary.
Keith is correct. Bill's design has the lower roof panels gently arching down toward the sides, but as the panel approaches the side of the car, there is a tight radius bend downward. The roof panel is vertical when it abuts the car body sides.
But consider the prototype:
On the real deal, the lower roof panels arch downward on a constant curve, with the bottom of the roof panel sitting atop the car body wall. The edge of the multiple layers of the roof panel build up are exposed and trimmed to be smooth. The exposed edge of the roof panel overlaps the letter board by about an inch. Mr. Micrometer and I studied the photos in enlargement. We estimate that the thickness of the exposed edge of the roof panel to be about 2", given that the letter board is 6" wide.
So the solution to the roof issues is very simple (so simple, that it worries me that I'm overlooking something critical):
I'm going to finish building up Bill's roof as designed. When all the pieces are installed and the glue dried, I will again gently sand the bottom of the assembly to insure everything is flat and in one plane. As a last step, I will glue S scale 2x2 strip wood (0.030"x0.030") to the bottom edge of the roof, the length of the roof on each side. The bottom edge of the 2x2 will be flush with the bottom of the roof. I temporarily taped the roof to the body and taped the 2x2 in place:
The 2x2 strip accomplishes two things:
1. It corrects the roof width problem--by adding 0.030" of strip to each side of the roof, the roof now overhangs the letterboard by 0.015", about an S scale inch.
2. It creates the illusion of the exposed roof panel edge.
I like Keith's idea of reshaping the lower roof contour, sanding down the tight radius curve near the edge of the roof to a more constant contour. But I don't think it possible with Bill's design. The lower roof panels are only 1/32" or 0.030" thick. The bottom of the roof panels have many parallel, laser engraved "bend" lines to allow the roof to bend over the profile ribs for gluing and clamping. These laser cut lines are deeper than they look. The intact portion of smooth wood on the top side of the roof panel is likely about as thick as a piece of printer paper. I'm afraid to try to sand down that rounded ridge, lest I quickly end up in the laser bend lines and cause the roof panel to begin to split. (I now understand why the masking tape was applied before gluing and shaping the lower roof panels, as above).
Anyways, that the new plan. If I've overlooked something obvious, and screw up the roof, I can always follow Chris Walker's suggestion: . . . just smash it and start again.
Jim Courtney
Poulsbo, WA
Poulsbo, WA
| Free forum by Nabble | Edit this page |