Re: Leadville Designs Baggage/Express 1 in C&Sn3
Posted by Jim Courtney on Oct 03, 2023; 10:53pm
URL: http://c-sng-discussion-forum.254.s1.nabble.com/Leadville-Designs-Baggage-Express-1-in-C-Sn3-tp19129p19135.html
A bit of progress on Baggage 1:
Building up the ends was to have been straight forward, save a design flaw:
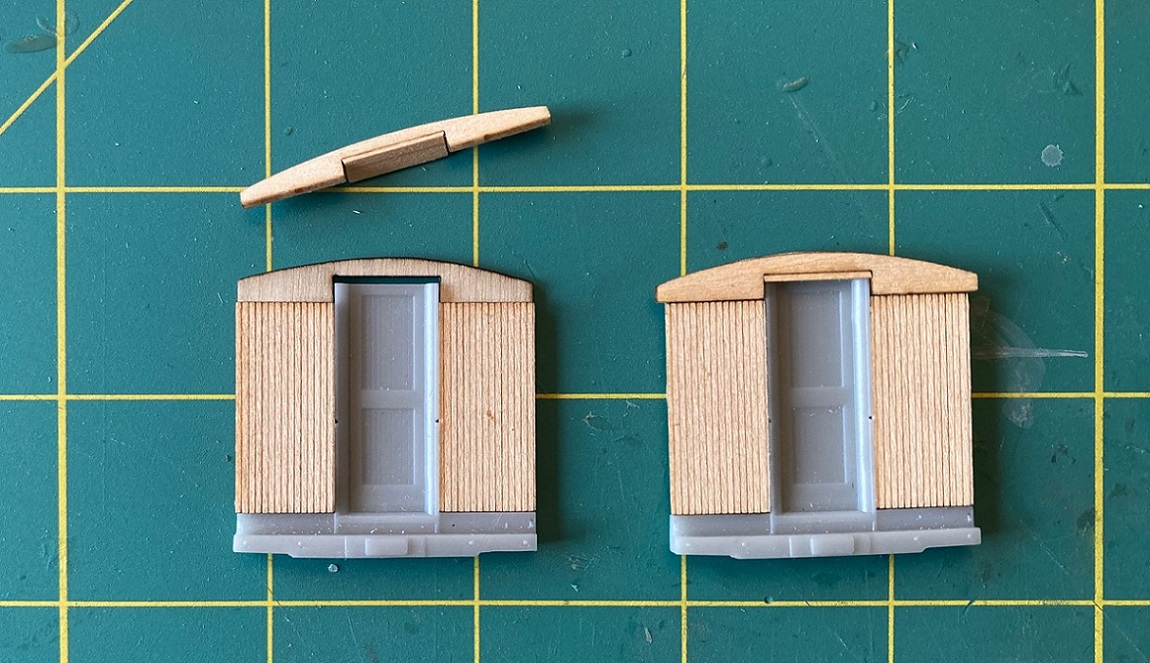
The door cut out on both the inner wall and the fascia board were cut too tall, leaving about a 2 scale inch gap at the top. I cut scale 2x6 to the width of the cutout in the fascia board and filled the gap. I'll probably use putty or plastic wood to fill the seam.
Attaching the sides to the floor ought to be simple, but it gave me fits. The floor isn't rigid, cut from basswood with the grain running the width of the floor--it tends to bow in the middle or lift up at the ends. The two gluing surfaces are about 1/8" of very fragile outside sheathing that glues to the outside of the floor and about 1/16" of the lower edge of the inner wall, that glues to the top of the floor. The side have to be aligned with the floor so the ends of each are flush. This required downward and inward pressure on the lower floor until the glue sets up. I couldn't figure a way to clamp the sides to the floor. I ended up using all my FastTrack point form tools, and machinist squares to hold things together:
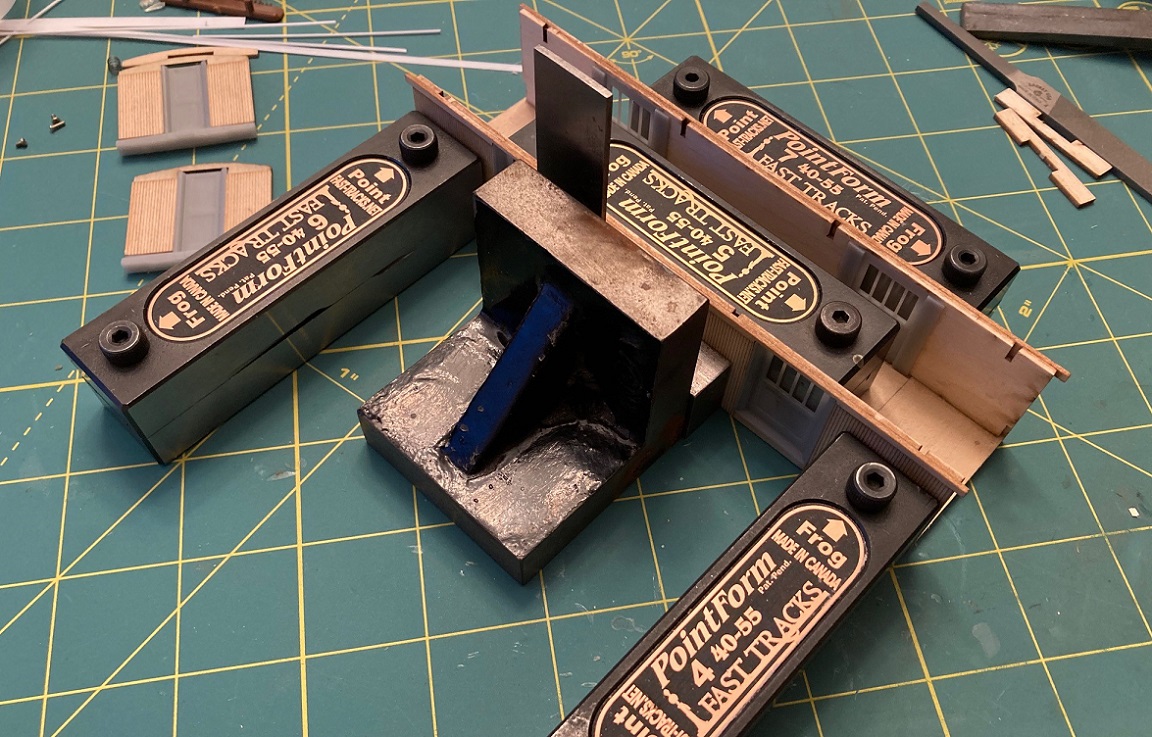
Anyways, (as Keith would say) with much heavy breathing, I got both sides glued to the floor, pretty much at a right angle to the floor with the lower sheathing edge flush with the floor bottom. There must be a better way to do this, bar-clamps perhaps--or those magnetic plates with magnets to hold things together when assembling structures.
Since the baggage cars will have no visible interior, when I build the second kit, I'll likely glue strips of 1/8" square wood to the inside of the interior wall, flush with the lower edge of the interior wall, for a larger gluing area that can be weighted. Since my Leadville Designs coach 62 has the same assembly sequence, not sure what I'll do there and have a full interior. Anyone have a better idea?
When the glue was dry and everything looked OK, I added the top joists to strengthen the basic car body structure:
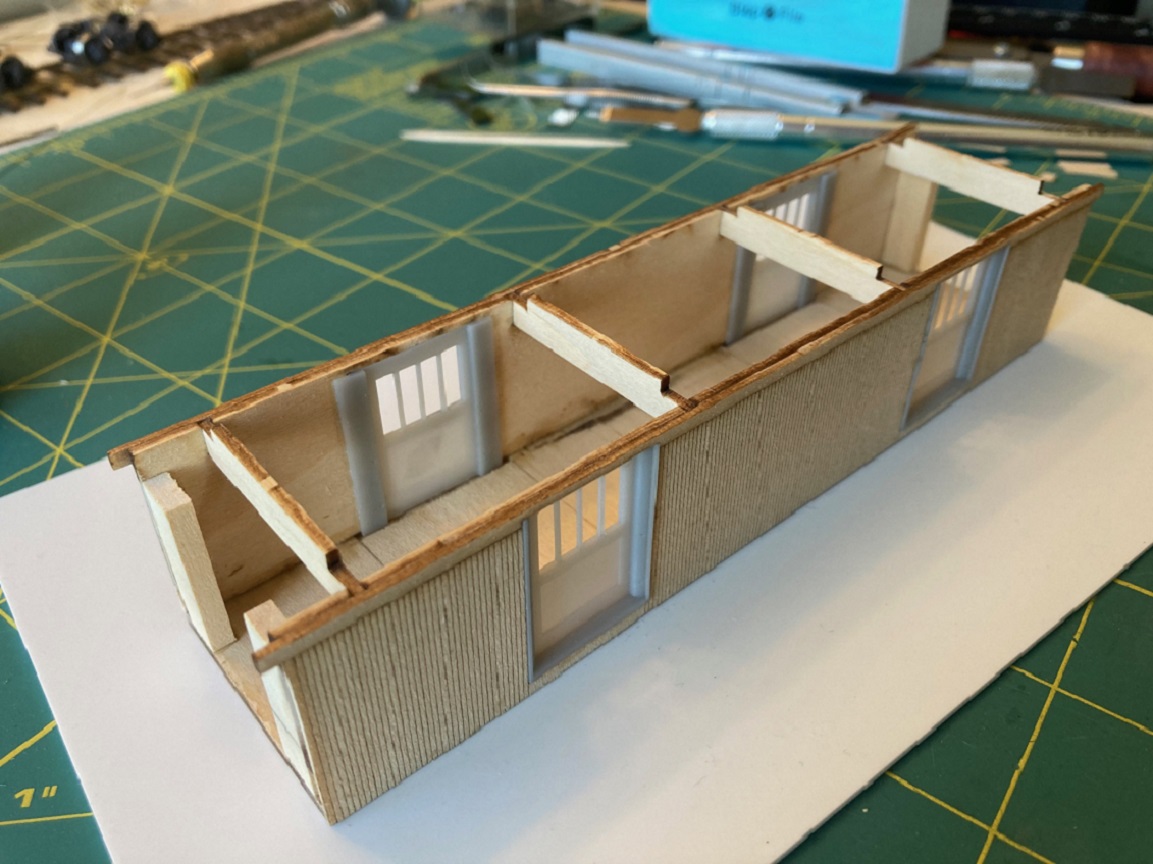
The raised tabs on the joists evidently interlock with the clerestory roof (that I haven't yet built). The pieces as cut don't fit in the slots without spreading the sides apart at the top--they're not too long but too thick (or the slots are too narrow). I sanded the width down until they seated squarely in the slots and made sure the distance between the inner walls was the same from bottom to top. Forget about the two pieces that fit at the lower ends of the side--the notch in them is too narrow to clear the back of the printed end doors. Instead I cut 1" lengths of 1/8"x5/8" strip wood and glued them to the floor and the inside of the interior wall, flush with the ends of the sides/floor. This will provide a gluing surface when the ends are attached. I test fitted one end and found that they line up vertically just right:
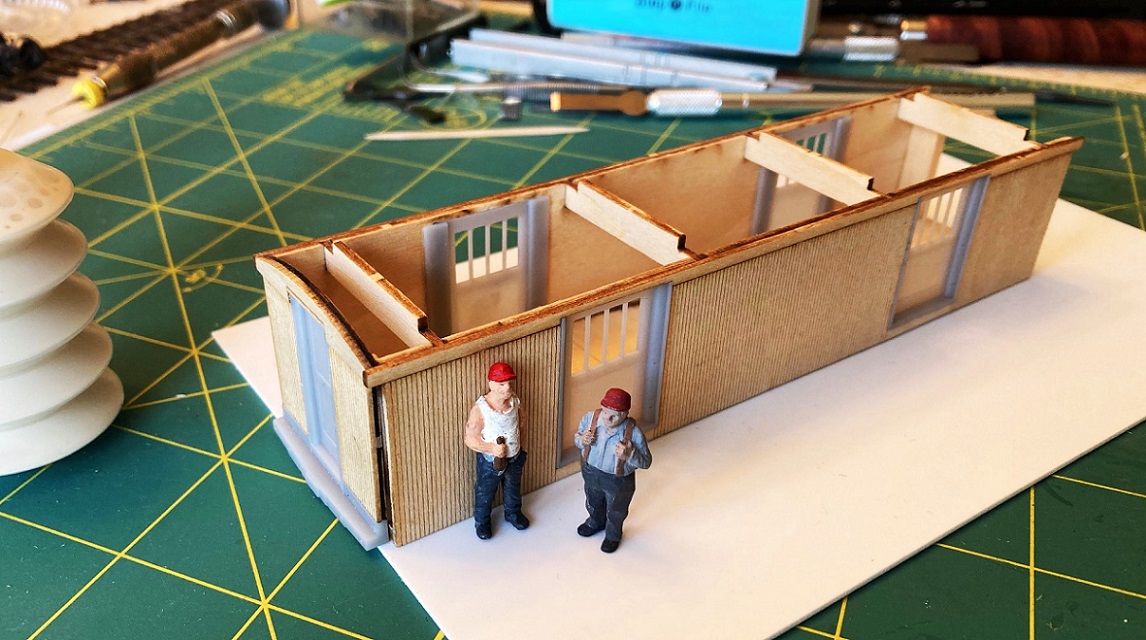
The printed quarter round needs to be installed before the ends can be permanently attached. While I've got the two end on the flat, I think I will drill some holes and add some details first . . .
URL: http://c-sng-discussion-forum.254.s1.nabble.com/Leadville-Designs-Baggage-Express-1-in-C-Sn3-tp19129p19135.html
A bit of progress on Baggage 1:
Building up the ends was to have been straight forward, save a design flaw:
The door cut out on both the inner wall and the fascia board were cut too tall, leaving about a 2 scale inch gap at the top. I cut scale 2x6 to the width of the cutout in the fascia board and filled the gap. I'll probably use putty or plastic wood to fill the seam.
Attaching the sides to the floor ought to be simple, but it gave me fits. The floor isn't rigid, cut from basswood with the grain running the width of the floor--it tends to bow in the middle or lift up at the ends. The two gluing surfaces are about 1/8" of very fragile outside sheathing that glues to the outside of the floor and about 1/16" of the lower edge of the inner wall, that glues to the top of the floor. The side have to be aligned with the floor so the ends of each are flush. This required downward and inward pressure on the lower floor until the glue sets up. I couldn't figure a way to clamp the sides to the floor. I ended up using all my FastTrack point form tools, and machinist squares to hold things together:
Anyways, (as Keith would say) with much heavy breathing, I got both sides glued to the floor, pretty much at a right angle to the floor with the lower sheathing edge flush with the floor bottom. There must be a better way to do this, bar-clamps perhaps--or those magnetic plates with magnets to hold things together when assembling structures.
Since the baggage cars will have no visible interior, when I build the second kit, I'll likely glue strips of 1/8" square wood to the inside of the interior wall, flush with the lower edge of the interior wall, for a larger gluing area that can be weighted. Since my Leadville Designs coach 62 has the same assembly sequence, not sure what I'll do there and have a full interior. Anyone have a better idea?
When the glue was dry and everything looked OK, I added the top joists to strengthen the basic car body structure:
The raised tabs on the joists evidently interlock with the clerestory roof (that I haven't yet built). The pieces as cut don't fit in the slots without spreading the sides apart at the top--they're not too long but too thick (or the slots are too narrow). I sanded the width down until they seated squarely in the slots and made sure the distance between the inner walls was the same from bottom to top. Forget about the two pieces that fit at the lower ends of the side--the notch in them is too narrow to clear the back of the printed end doors. Instead I cut 1" lengths of 1/8"x5/8" strip wood and glued them to the floor and the inside of the interior wall, flush with the ends of the sides/floor. This will provide a gluing surface when the ends are attached. I test fitted one end and found that they line up vertically just right:
The printed quarter round needs to be installed before the ends can be permanently attached. While I've got the two end on the flat, I think I will drill some holes and add some details first . . .
Jim Courtney
Poulsbo, WA
Poulsbo, WA
| Free forum by Nabble | Edit this page |