Leadville Designs C&S 5'-6" Passenger Trucks
Posted by Keith Hayes on Sep 17, 2023; 7:42pm
URL: http://c-sng-discussion-forum.254.s1.nabble.com/Leadville-Designs-C-S-5-6-Passenger-Trucks-tp19106.html
Hey Everyone!
For those of you who visited the layout during the recent Narrow Gauge Convention, thank you. It was terrific to see everyone qmand put faces with names. Sorry I couldn't talk with you longer. And for those of you who posted or shared photos of the layout, thank you. It is really neat to see the layout through others eyes. In one case there was a photo I didn't recognize and I thought, "gees, that is an awesome layout !" and I realized it was mine.
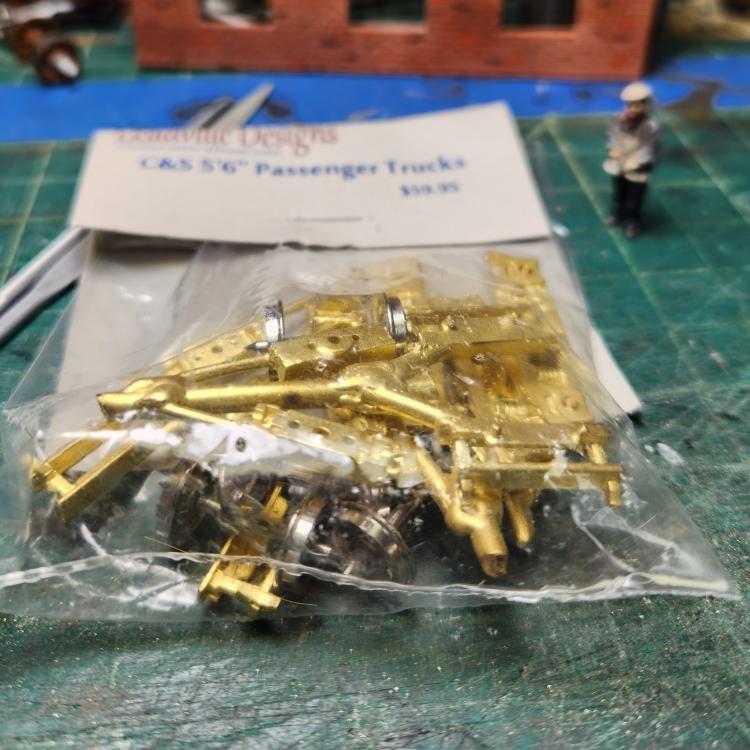
Anyway, Bill Meredith visited Denver and brought a bunch of kits with him. I brought home my Baggage Car 1/2 and several sets of the 5'-6" trucks. Though I promised Rich Gibson I would work on the track so we can improve operations, the trucks have been calling me!
First off these are based on a Master Car Builder design that was published and widely used in many late 19th century passenger cars and even caboosees--I am looking at the CB&Q crowd here. The design is a bunch of wood parts with some key metal castings. RPOs and head end cars evolved the design using all cast steel parts. Early cars had outside-hung brakes: the brakes are outboard of the truck ends. These trucks have the brakes inboard next to the bolster.
The truck kits feature 4 wheel sets, 4 tiny screws and 2 brass trees with the 6 truck parts. These include the top and bottom bolster; the two side frames and the two brake beams.
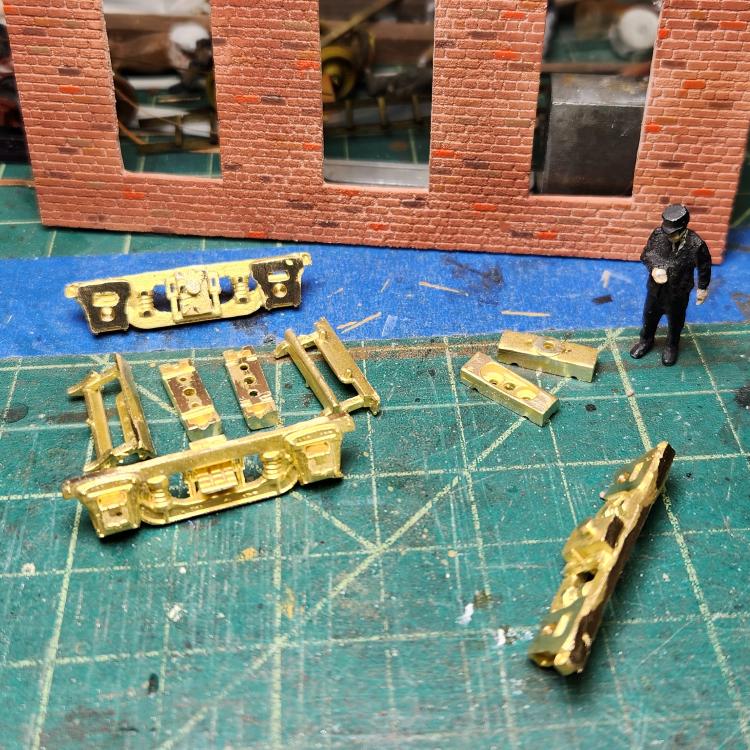
The bolster parts are nicely attached to the sprue and are easy to cut off and clean up. The other 4 parts are attached for easy casting but require careful despruing and a lot of filing to clean up. I enjoy watching Quinn on Blondy Hacks, and these trucks really make me want to get a mill to clean up rhe faces and make sure everything is parallel and square.
Here are the truck parts cleaned up. The side frames have a button that nests into the two bolster halves allowing the side frames to equalize. There are also two studs in each brake beam that fit into holes on the long side if the bolsters.
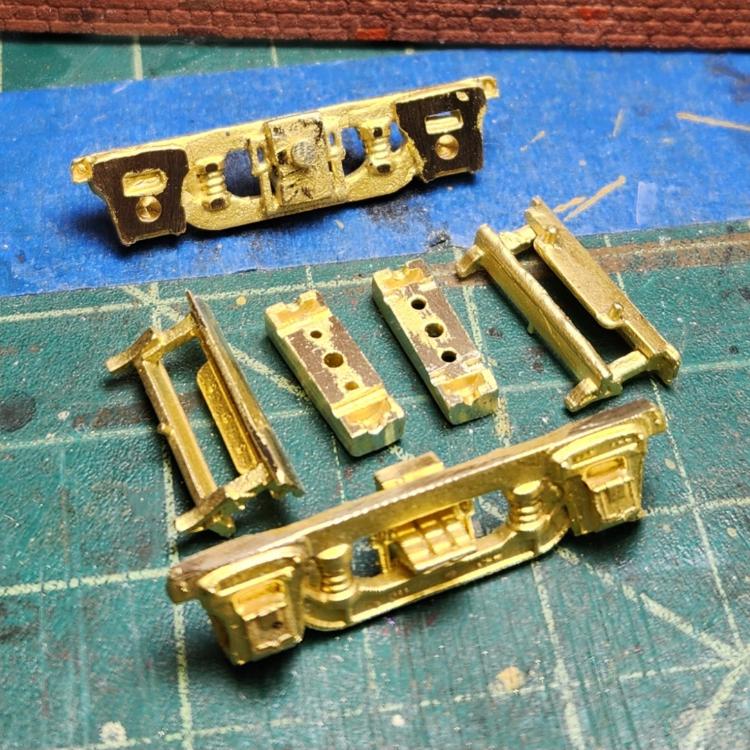
I got the parts desprued and cleaned up. The side frames are detailed nicely and should look really good when painted. The button studs are Fiddly and 3 of the 4 were not straight, so would not fit in the bolster. A gentle tap seems to have fixed that. I worry that they are more fragile than they appear.
The screws are intended to screw the bolster halves together, allowing the truck to be disassembled. I am wondering how to assemble it without another set of hands, and I am seriously thinking of soldering the brake beams to one of the bolster parts. The studs on the brake beams require some careful filing to fit in the corresponding holes in the bolsters. I wonder if holes and some wire would not have been a better strategy?
Test fits indicate that one pair of side frames has a deeper axle hole than the others. This means that the face of the wheel is perilously close to the inside face of the side frame. As my trucks will need to act as pick up for my Soundcar, I will need to pay attention to avoid any shorting. I can tell that filing the parts square and to the proper length is going to be key to smooth operation.
More to come....
URL: http://c-sng-discussion-forum.254.s1.nabble.com/Leadville-Designs-C-S-5-6-Passenger-Trucks-tp19106.html
Hey Everyone!
For those of you who visited the layout during the recent Narrow Gauge Convention, thank you. It was terrific to see everyone qmand put faces with names. Sorry I couldn't talk with you longer. And for those of you who posted or shared photos of the layout, thank you. It is really neat to see the layout through others eyes. In one case there was a photo I didn't recognize and I thought, "gees, that is an awesome layout !" and I realized it was mine.
Anyway, Bill Meredith visited Denver and brought a bunch of kits with him. I brought home my Baggage Car 1/2 and several sets of the 5'-6" trucks. Though I promised Rich Gibson I would work on the track so we can improve operations, the trucks have been calling me!
First off these are based on a Master Car Builder design that was published and widely used in many late 19th century passenger cars and even caboosees--I am looking at the CB&Q crowd here. The design is a bunch of wood parts with some key metal castings. RPOs and head end cars evolved the design using all cast steel parts. Early cars had outside-hung brakes: the brakes are outboard of the truck ends. These trucks have the brakes inboard next to the bolster.
The truck kits feature 4 wheel sets, 4 tiny screws and 2 brass trees with the 6 truck parts. These include the top and bottom bolster; the two side frames and the two brake beams.
The bolster parts are nicely attached to the sprue and are easy to cut off and clean up. The other 4 parts are attached for easy casting but require careful despruing and a lot of filing to clean up. I enjoy watching Quinn on Blondy Hacks, and these trucks really make me want to get a mill to clean up rhe faces and make sure everything is parallel and square.
Here are the truck parts cleaned up. The side frames have a button that nests into the two bolster halves allowing the side frames to equalize. There are also two studs in each brake beam that fit into holes on the long side if the bolsters.
I got the parts desprued and cleaned up. The side frames are detailed nicely and should look really good when painted. The button studs are Fiddly and 3 of the 4 were not straight, so would not fit in the bolster. A gentle tap seems to have fixed that. I worry that they are more fragile than they appear.
The screws are intended to screw the bolster halves together, allowing the truck to be disassembled. I am wondering how to assemble it without another set of hands, and I am seriously thinking of soldering the brake beams to one of the bolster parts. The studs on the brake beams require some careful filing to fit in the corresponding holes in the bolsters. I wonder if holes and some wire would not have been a better strategy?
Test fits indicate that one pair of side frames has a deeper axle hole than the others. This means that the face of the wheel is perilously close to the inside face of the side frame. As my trucks will need to act as pick up for my Soundcar, I will need to pay attention to avoid any shorting. I can tell that filing the parts square and to the proper length is going to be key to smooth operation.
More to come....
Keith Hayes
Leadville in Sn3
Leadville in Sn3
| Free forum by Nabble | Edit this page |