Re: C&S RPO / Coach 43 in C&Sn3 -- An Adventure in Resin-Printed Rolling Stock
Posted by Jim Courtney on
URL: http://c-sng-discussion-forum.254.s1.nabble.com/C-S-RPO-Coach-43-in-C-Sn3-An-Adventure-in-Resin-Printed-Rolling-Stock-tp18723p18808.html
A bit of progress to report.
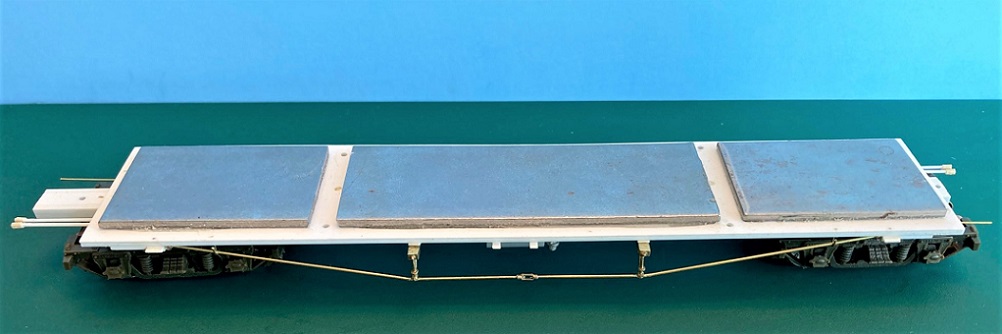
First, I didn't mention how I weighted the car in the first post. The resin car body, new styrene floor, PBL trucks and all the detail parts together weight about 2.3 oz. My Overland brass coaches (riding on PBL trucks) weigh about 6.5 oz. This disparity seemed a problem in the making. I have a stash of Accurail HO freight car weights that are narrow enough to fit between the recessed lips for the floor attachment and are thin enough not to interfere with the printed interior pieces, that set atop that printed lip. So I cut three pieces to length and epoxied them to the styrene floor (before starting the underbody detailing). The car will now weight in at about 4.6 oz:
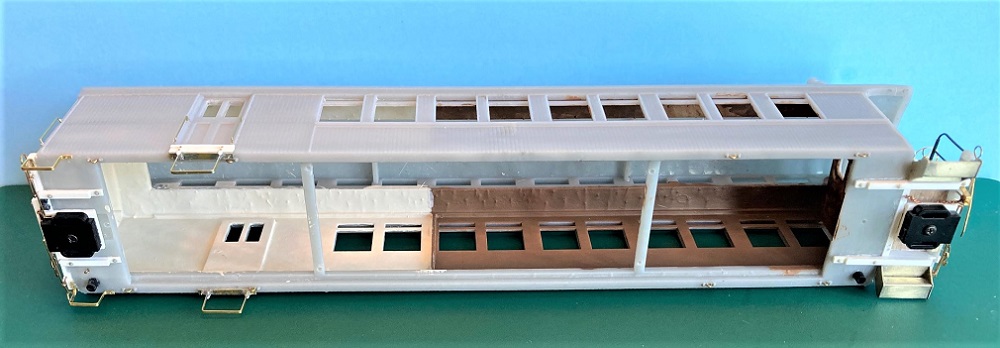
I got the interior painted. Roy says it is essential to prime the resin prior to using acrylic paints. I could find no way to spray my Tamiya primer inside the interior due to the recessed lips. So I broke out 25 year old bottles of Floquil lacquer paints from my stash and painted the RPO section "reefer white" (looks a bit off-white) and the coach section "D&RGW building brown":
I also noted some details that I overlooked: The toilet "dump pipes", that kept the weeds fertilized on the roadbed, are short lengths of those skinny straws that we sip coffee through. They're 3/32" OD and match my Overland coach details. I also installed the 8 little U-shaped fittings (to which the truck safety chains attached) to the underside of the side sills using half-loops of 0.015" wire and Grant NBW. Both are visible in the above photo if you look closely.
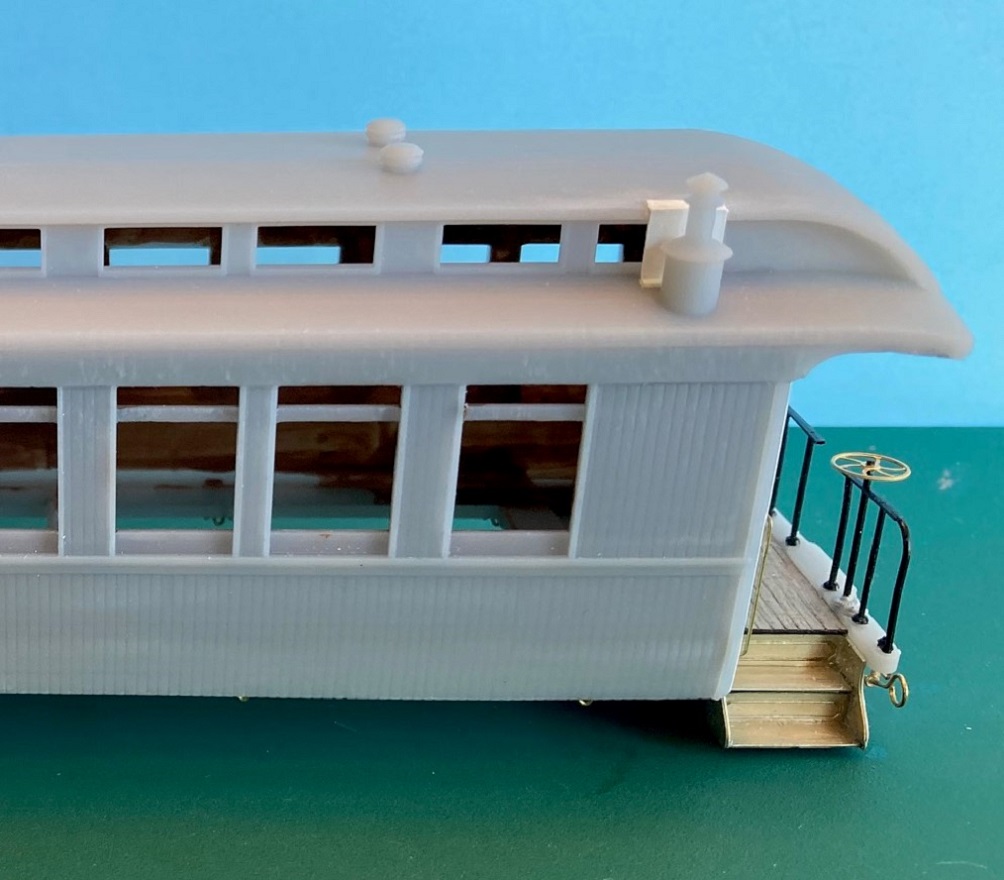
And I remembered Chris Walker's admonishment not to forget the flashing behind the stove smoke jack, less an S-scale fire start in the clerestory roof. I tried bending it from shim brass, couldn't get it right, so made it from 0.005" styrene:
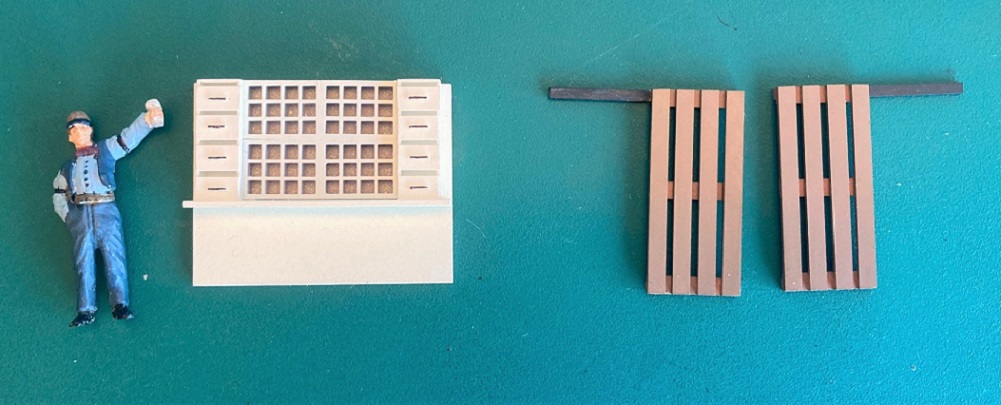
Before painting the interior I installed two 0.030 x 0.080 strips vertically as stops for the bulkhead between the RPO and coach sections and painted both sides. As part of the RPO bulkhead is visible through the RPO windows in the 1906 photo, I tried to duplicate this from the folio floor plan and drafted an S-scale figure as a postal clerk. I also constructed two wooden door guards for the RPO side doors, as things look pretty empty up there.:
I was tempted to go ahead and glue the partition bulkhead in place -- Don't Do This!! It will prevent installing the interior later, when all painting, lettering, sealing and glazing is complete.
If you're building the car, early on you should experiment with installing the printed interior pieces. The process is less complicated than building a ship in a bottle, but does require prior study and thought. Roy designed the pieces to be inserted on edge, via the middle longer opening on the bottom of the body. When clear of the recessed lip, the piece is then "flipped" 90-degrees, to rest on the top of the recessed lip for the floor attachment. The pieces are then scooted back into place (toilet/stove/seat piece first) and glued to the top of the lip. The second piece is installed the same way, scooted back and glued. Only then can the partition be glued into place.
I made two changes to Roy's interior prints.
1) The folio shows the first row of seats faced backwards, toward the coach door. They were likely fixed, bench seats. So I cut off the first row, through the base, so the piece can be reversed.
2) To have clearance for the "flip" maneuver, Roy had to print the stove much underscale, and the toilet partitions are not printed to full height. On the HOn3 prints, at normal viewing heights, this probably isn't an issue. But my never-starting layout is designed for track level to be only 6' below eye level, so the toilet looks, from the outside, more like an office cubicle. I thought my S scale ladies would appreciate a bit more privacy. So I cut the off the rear interior print flush with the front of the toilet partition and built new toilet and stove mounting pieces that can be individually installed into the two back corners of the coach section:
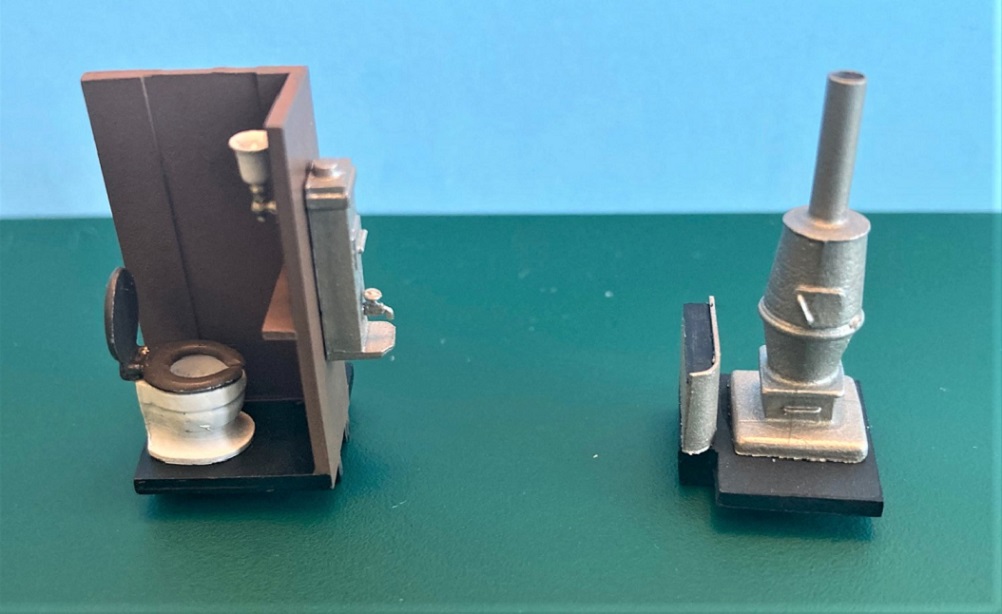
The C&S-style water cooler was built up from styrene based on dimensions of the cooler in the QuikPic book of coach 76.
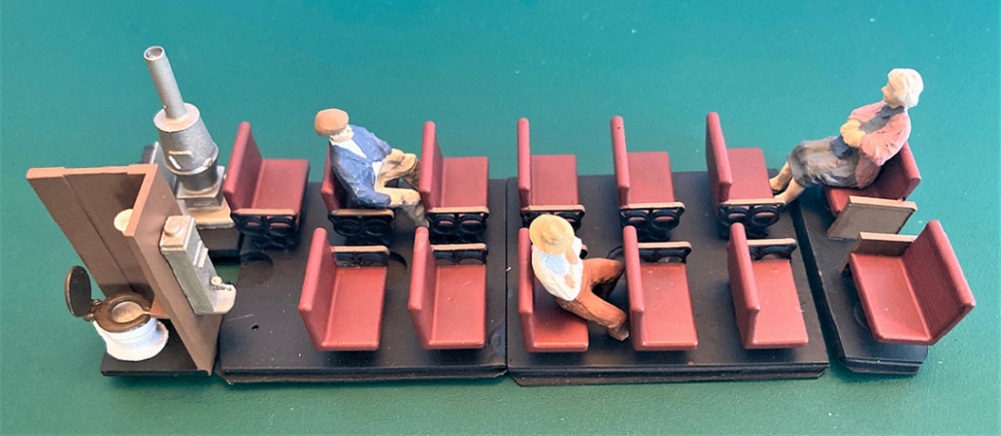
I primed all the printed parts, painted the now three pieces black and then brush painted the seats oxide red and highlighted the armrests with the brown interior color. This is how the rearranged interior pieces will look when installed. BTW, my S scale people have to have their feet amputated to sit in the seats . . .
I'm probably going way overboard with the interior, I have no idea how much will actually be visible through the glazed windows when complete. But I do know that if I can look inside and can see big empty spaces without some heads popping up in the seats, that it will really bug me and then it will be too late to remedy.
I got an email that my order of Tamiya Fine Primer (8 cans) will be delivered tomorrow. So now it's time to mask off the clerestory and main windows prior to priming the exterior.
URL: http://c-sng-discussion-forum.254.s1.nabble.com/C-S-RPO-Coach-43-in-C-Sn3-An-Adventure-in-Resin-Printed-Rolling-Stock-tp18723p18808.html
A bit of progress to report.
First, I didn't mention how I weighted the car in the first post. The resin car body, new styrene floor, PBL trucks and all the detail parts together weight about 2.3 oz. My Overland brass coaches (riding on PBL trucks) weigh about 6.5 oz. This disparity seemed a problem in the making. I have a stash of Accurail HO freight car weights that are narrow enough to fit between the recessed lips for the floor attachment and are thin enough not to interfere with the printed interior pieces, that set atop that printed lip. So I cut three pieces to length and epoxied them to the styrene floor (before starting the underbody detailing). The car will now weight in at about 4.6 oz:
I got the interior painted. Roy says it is essential to prime the resin prior to using acrylic paints. I could find no way to spray my Tamiya primer inside the interior due to the recessed lips. So I broke out 25 year old bottles of Floquil lacquer paints from my stash and painted the RPO section "reefer white" (looks a bit off-white) and the coach section "D&RGW building brown":
I also noted some details that I overlooked: The toilet "dump pipes", that kept the weeds fertilized on the roadbed, are short lengths of those skinny straws that we sip coffee through. They're 3/32" OD and match my Overland coach details. I also installed the 8 little U-shaped fittings (to which the truck safety chains attached) to the underside of the side sills using half-loops of 0.015" wire and Grant NBW. Both are visible in the above photo if you look closely.
And I remembered Chris Walker's admonishment not to forget the flashing behind the stove smoke jack, less an S-scale fire start in the clerestory roof. I tried bending it from shim brass, couldn't get it right, so made it from 0.005" styrene:
Before painting the interior I installed two 0.030 x 0.080 strips vertically as stops for the bulkhead between the RPO and coach sections and painted both sides. As part of the RPO bulkhead is visible through the RPO windows in the 1906 photo, I tried to duplicate this from the folio floor plan and drafted an S-scale figure as a postal clerk. I also constructed two wooden door guards for the RPO side doors, as things look pretty empty up there.:
I was tempted to go ahead and glue the partition bulkhead in place -- Don't Do This!! It will prevent installing the interior later, when all painting, lettering, sealing and glazing is complete.
If you're building the car, early on you should experiment with installing the printed interior pieces. The process is less complicated than building a ship in a bottle, but does require prior study and thought. Roy designed the pieces to be inserted on edge, via the middle longer opening on the bottom of the body. When clear of the recessed lip, the piece is then "flipped" 90-degrees, to rest on the top of the recessed lip for the floor attachment. The pieces are then scooted back into place (toilet/stove/seat piece first) and glued to the top of the lip. The second piece is installed the same way, scooted back and glued. Only then can the partition be glued into place.
I made two changes to Roy's interior prints.
1) The folio shows the first row of seats faced backwards, toward the coach door. They were likely fixed, bench seats. So I cut off the first row, through the base, so the piece can be reversed.
2) To have clearance for the "flip" maneuver, Roy had to print the stove much underscale, and the toilet partitions are not printed to full height. On the HOn3 prints, at normal viewing heights, this probably isn't an issue. But my never-starting layout is designed for track level to be only 6' below eye level, so the toilet looks, from the outside, more like an office cubicle. I thought my S scale ladies would appreciate a bit more privacy. So I cut the off the rear interior print flush with the front of the toilet partition and built new toilet and stove mounting pieces that can be individually installed into the two back corners of the coach section:
The C&S-style water cooler was built up from styrene based on dimensions of the cooler in the QuikPic book of coach 76.
I primed all the printed parts, painted the now three pieces black and then brush painted the seats oxide red and highlighted the armrests with the brown interior color. This is how the rearranged interior pieces will look when installed. BTW, my S scale people have to have their feet amputated to sit in the seats . . .
I'm probably going way overboard with the interior, I have no idea how much will actually be visible through the glazed windows when complete. But I do know that if I can look inside and can see big empty spaces without some heads popping up in the seats, that it will really bug me and then it will be too late to remedy.
I got an email that my order of Tamiya Fine Primer (8 cans) will be delivered tomorrow. So now it's time to mask off the clerestory and main windows prior to priming the exterior.
Jim Courtney
Poulsbo, WA
Poulsbo, WA
| Free forum by Nabble | Edit this page |